Something you may not {or may} know about me, is that I am obsessed with planners. I love them. I love creating them and using them to help manage all the daily madness. As educators a well organized planner is an essential, must-have for our line of work.
When it comes to choosing your planner for the year, you could use the standard teacher planner that gets passed out every year at school, but those are usually pretty darn boring if you ask me. So the solution for me has always been to create my own.
As a fun summer project, I worked on creating a planner for teachers and another planner for coaches to support your DIY Planner style. They have all the planner essentials you need, yet leave you with room to build out from there. You can find these different Teacher Planners in my shop.
Or if you’re interested in a weekly calendar that’s already set up and ready to go, definitely check out The Time & ToDo Planner.
Alright, now let’s take a look at how you might set yours up.
For my planner I chose to use a Discbound notebook, which seem to be all the rage these days and for good reason! They’re sleek and sophisticated, highly customizable, fold neatly in half, and lay flat when open. Love it! You can check out the Circa notebook system by Levenger
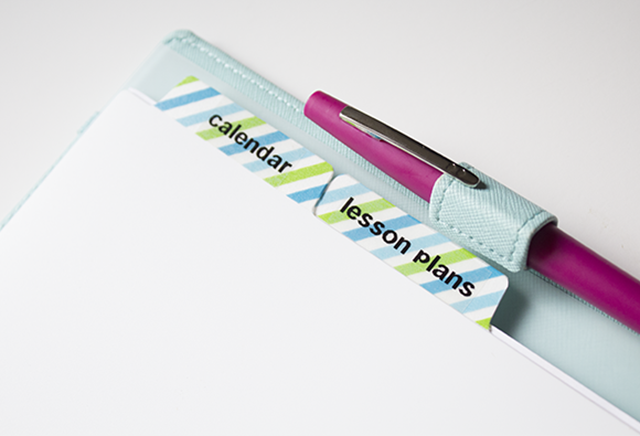
On the inside I added a pad of gotta-have sticky notes, some page tabs, and a few paper clips. I also had my cover laminated to spice it up a bit!
The Teaching Planning Kit has three different cover options for you to choose from.
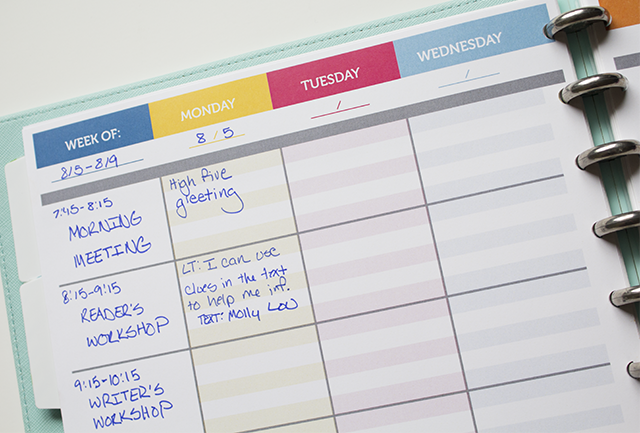
I used white tab dividers, some washi tape, and my label maker to create sections for “Calendar” and “Lesson Plans”. Two essential sections for every teacher!
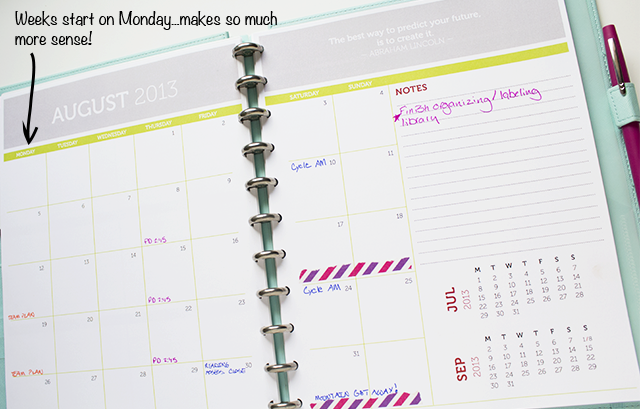
Begin your calendar section with a Year at a Glance spread. Use it to note important dates for the year, goals, and/or student birthdays.
Behind the Year at a Glance, let your two-page Monthly Calendar spreads for the year begin. These August 2016-July 20147 calendar pages will serve as your Comprehensive Calendar and it is going to be one of your most important tools in your Teacher Planner. A two-page spread is a must, since this is where you will record all of your hard deadlines, events, and meetings for both your school and home life. Yes, both! If you value getting a pizza and watching The Bachelor on Monday night, you’ve got to block that time off and work around it the best you can. Not that I watch The Bachelor or anything…
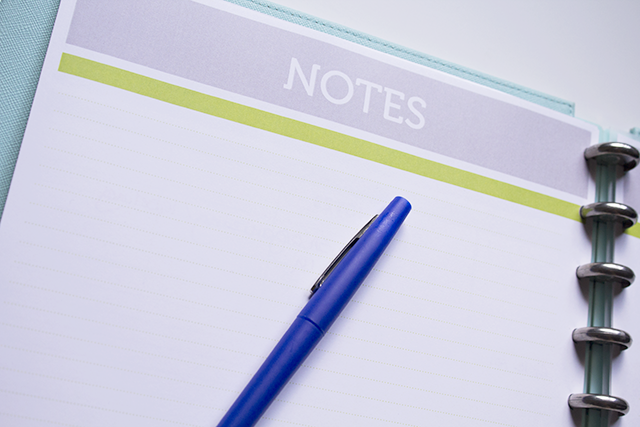
Behind each month are two lined pages for notes.
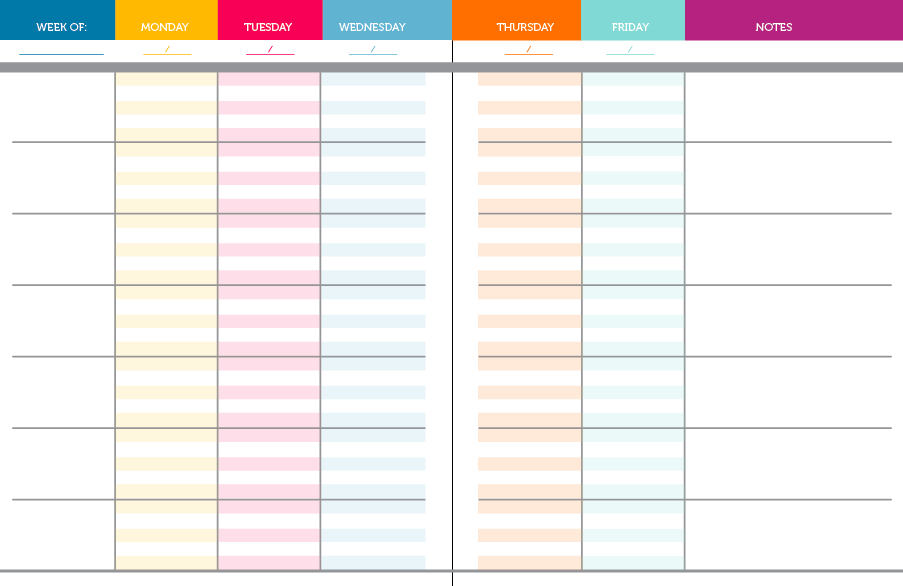
In the section for your lesson plans, I created a weekly lesson plan template you can use to get all your big ideas down. There are 5 planning spreads (print as many as you need!) in each Teacher Planner, designed to be printed front-back, so you can either print for the year, or a month at a time. It’s designed to be flexible!
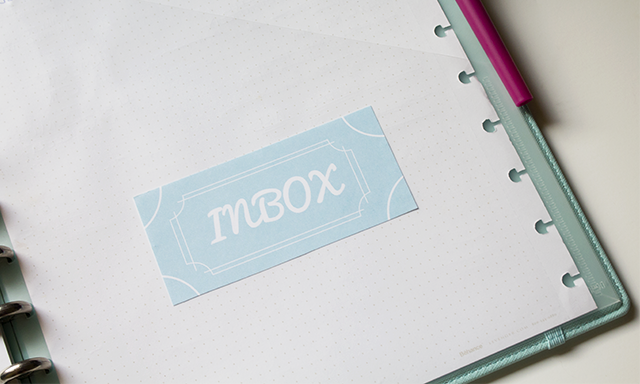
Lastly, I used some sticker paper to make a label for the folder in the back. This “Inbox” is where I’ll collect any loose odds and ends that come my way.
Now that you’ve got the essentials taken care of, the rest of the planner is up to you. You might add a section for grades, meetings, general reference, whatever you need!
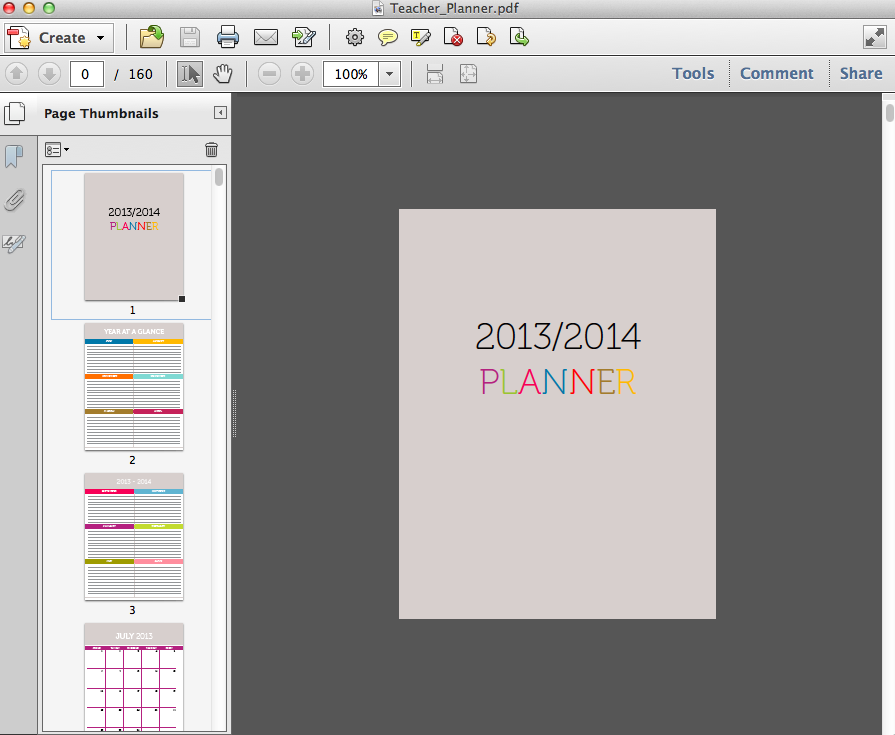
A few notes on printing the Weekly Lesson Plans in your Planning Kit or Teacher Planner. For easier viewing and printing, I recommend using Adobe Reader which you can download for free here. You can also use Preview if you have a Mac.
Once you open the Planner PDF in Adobe you should see a screen that looks similar to this:
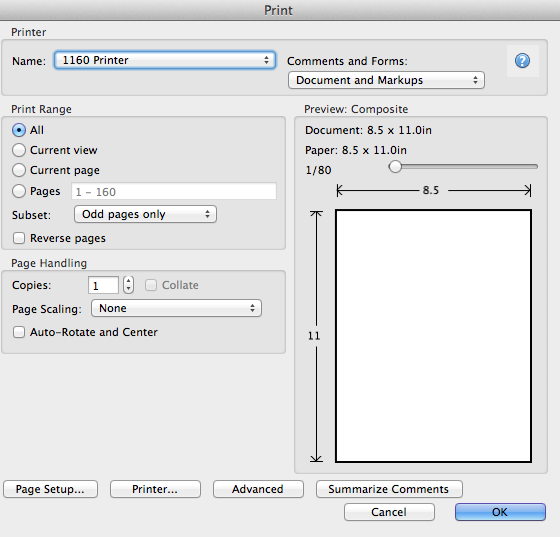
The weekly lesson plans are set-up for simple duplex/two sided printing. If you have a duplex printer, you’re good to go. If not, no worries. I don’t either, so on my printer I first printed the “odd pages” by adjusting the “Subset” selection in the print box. The paper I used for printing is standard letter size, 8 1/2″ x 11, 98 bright and 32 lb. from Staples.
After the odd pages were printed I flipped them over, inserted them back into the printer, and changed the “Subset” selection to “Even pages only.” Now, here’s what you need to make sure to do: print out a few test pages BEFORE printing out the entire document! Kind of like the old adage, “Measure twice, cut once.” Or you can take a shortcut and just head to Staples.
OR don’t forget about your Time & ToDo Planner option either. You’ll save on the cost of printing, and be ready to go.
Alrighty then, let’s get this Planner party started! Here’s to an organized and awesome school year.
Happy Planning!
Sign up for updates. It's FREE!
View Comments (33)
Hi! I want to buy this PDF to use for my student binder. I do have a question though.
1. If I would like to use this PDF, I would need to buy ruled paper from the Martha Stewart Refill Pages for the Discbound Notebook. Problem is, I don't want those nasty lines. If I print it on regular paper, how do I cut the paper to fit into my Discbound Notebook? Thanks!!!!
Hi Hadley! The Discbound notebook comes in two different sizes. The PDF pages I have created are standard letter, 8.5 x 11" and do not need to be cut to fit into the larger notebook (9-1/2" x 11-1/2").
Hope this helps!
Kristin
Is this completely compatible with Levenger's circa system (meaning, letter size works with letter size and so forth)....because I started out with Levenger, have the Levenger punch and rings, but they are SO expensive, I want to expand and get more books, but I just can't keep up. I mean, they want $28 just for 11 aluminum rings. Or $12 for two pieces of plastic. Give me a break! I'm glad that there's alternatives, just wondering if they are going to fit with what I have now or if I need to keep the two entirely separate.
Hi Lisa,
Yes, these pages are standard letter size, so they will work in a letter size Levenger. I know, Levenger is for sure pricey. Have you checked out Arc at Staples? They have a more affordable option.
Thanks :)
Kristin
Absolutely love this planner. Did you take it to Staples to have the pages hole punched to fit the discbound notebook? Thank you!
Hi Lydia! Thank you so much, I'm glad you like it :) Staples actually doesn't punch pages to fit the notebook. I purchased an Arc hole punch from Staples to do the punching: http://www.staples.com/M-by-Staples-Arc-System-Desktop-Punch-8-Sheet-Capacity/product_324688.
Thanks!
Kristin
I did not know Arc made a hole punch! Someone purchased an Arc binder for me and the ruled pages just didn't work for what I wanted. Now that you have shared with me the existence of the hole punch, I can actually use the colored paper I want in the binder. Thanks so much for your insight as well as your organizational tips. I really hope to keep on top of things this year and your tips are definitely a step in the right direction!
it looks so cute ! I'm crazy over planner too especially when new year is coming. I need to get a new one. Sadly there is no shipment to my country ( brunei ) by Staples. It will be great to have the punch
I use these notebooks too. I'm not a teacher, but have a friend who is. I shared this link with her. It's nice to see things tailored for teachers!
Hi hun! Thank you so much for this! I'm very interested in purchasing your pd as this looks like the perfect system for me, but i am not familir with Discbound notebooks. Could you please tell me exactly where you purchased your hardcover book?
Hi Carina! I purchased my Discbound at Staples. You can order them online and have it shipped to you!
Do you like the discbound system? It looks beautiful and I am very tempted but I am worried about the punched pages coming out or the punched edge getting folded and stuck and hard to turn. Do the pages move smoothly even if you want to turn to the end of the notebook?
Hi Amy!
I love the disc bound system. I don't know how I went so long without it. It's totally perfect for setting up our own planning system. The pages don't come out at all and turn very easily.
Kristin
I love your planner! Great Job! I want to make my own planner and customize it for my high school social studies courses....what software did you use? Do you use any commercial templates like those from scrapgirls.com? Any design tips for my diy? Any help in getting started would be great!
Thanks so much Maggie! I use the Adobe Creative Suite to create all my planner templates. The different programs take a bit of time to learn, but the learning is fun!
Kristin
Are the hole punches (staples, levenger, etc) interchangeable or do the holes differ by system?
Hi Ann,
As far as I know the hole punches are interchangeable :)
Kristin
I was wondering if you did something special to your printer to make the pages print so that the color completely covers the page. I don't see how I could print the pages without any white edges?
Hi! Some printers will print to "full bleed" or to the edge. You can also have them printed professionally like this. Otherwise you'll have the white edge.