
DIY Creative School Welcome Wall
Categories: Goals and Motivation, Instructional Coaching
The kids have arrived! And it’s been fun, fun to see how excited everyone is to be back at school. The school is looking pretty good, and teachers are getting back into the routine and flow of our school days. But last week was a different story! Everyone was hustling to get classrooms set-up, first week plans figured out, and the school overall ready to greet kids for the first day.
One of the hustle projects I worked on was DIY-ing a Creative School Welcome Wall. It’s a project I’ve done for the past few years, and each year I think about how to do it a little differently. This year I was inspired to create a cool watercolor theme, and was super psyched about the result.

A school welcome wall is a terrific way to add some positivity and beauty to a school environment.
In case you’re thinking you might like to work on a School Welcome Wall yourself, here are the steps I took to create ours.
1. Choose a Space
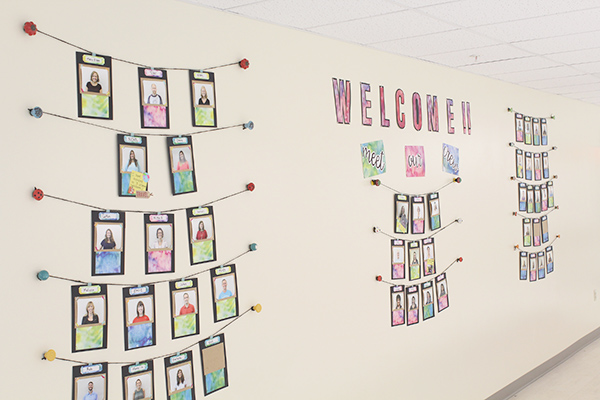
You can go big or small with the space you choose, but I’m always about bigger can be better when it comes to designing showcase boards/walls such as a Welcome Space. With this particular wall, I’m introducing our staff so I wanted to get as creative and artistic as I could in doing so. And for that, I needed a bigger space.
At first glance it was just a plain white wall, that I could have stuck a few photos to and called it good. But that just wouldn’t be my style.
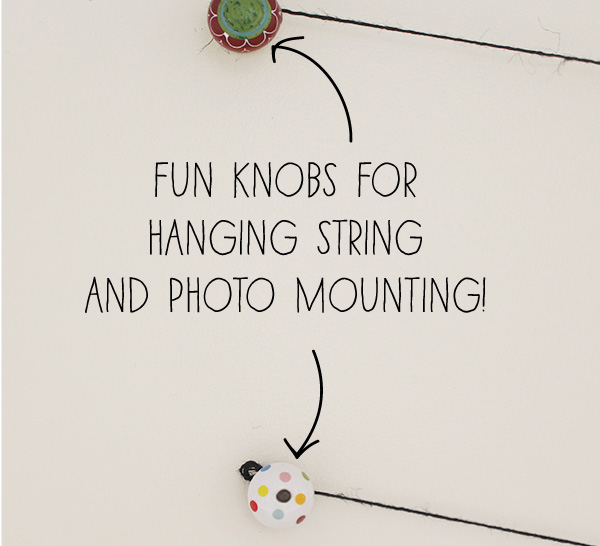
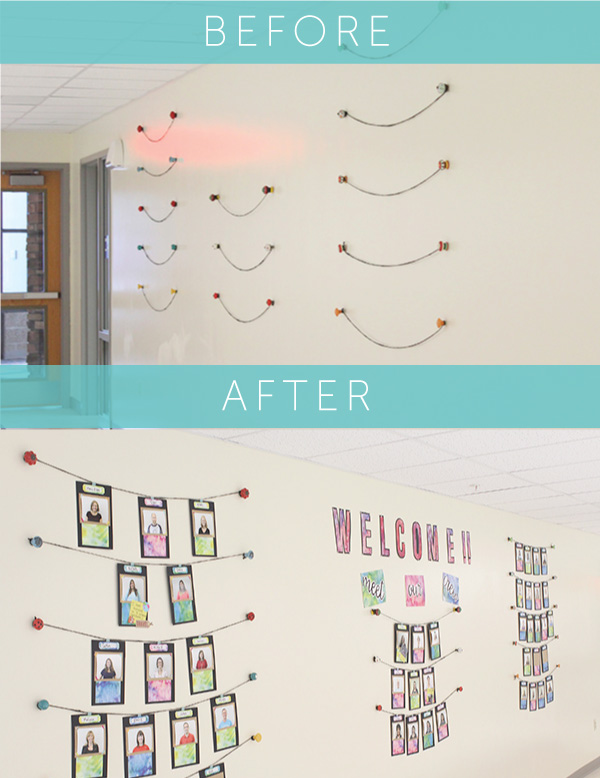
So I fancied it up with some cool cabinet knobs that I found at Hobby Lobby. I asked our custodian to help me drill them in, then I had the perfect photo hanging accessory. A little black string tied from knob to knob, and voila! I’ve just created the perfect space to work with.
![]()
2. Take Some Photos
Next step – photos. I grabbed my camera, chose a consistent neutral background, and snapped away during a staff meeting break. That way, I had all 35+ staff members in the same location, and didn’t have to spend a ton of time tracking everyone down.

3. Gather Your Materials
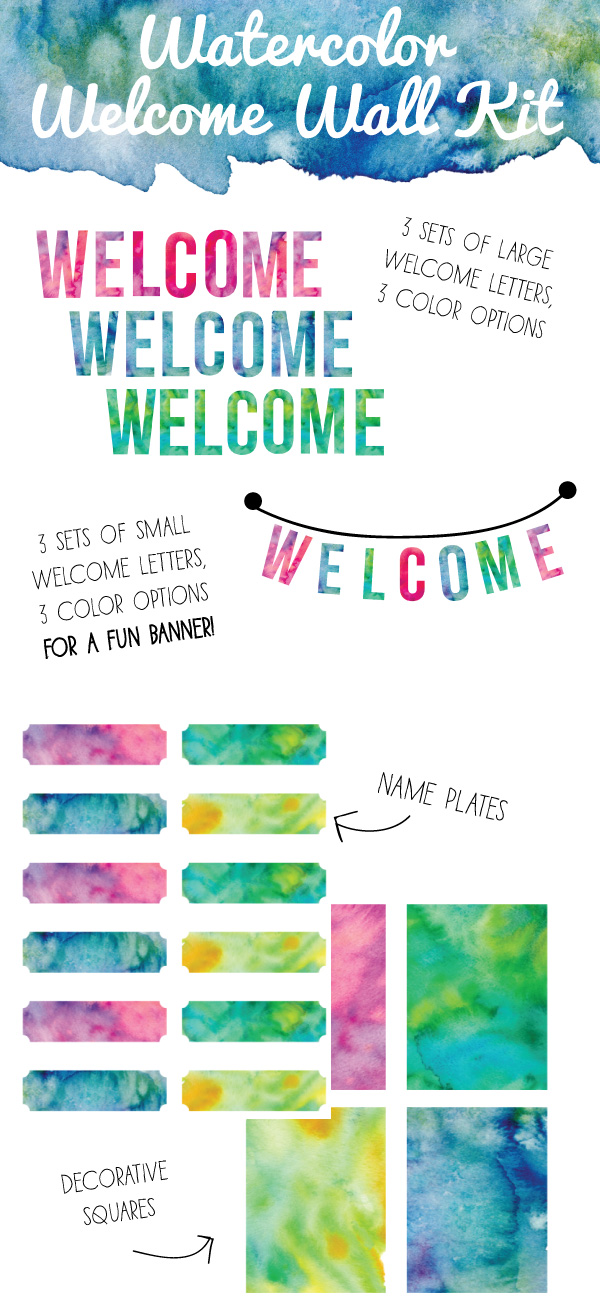
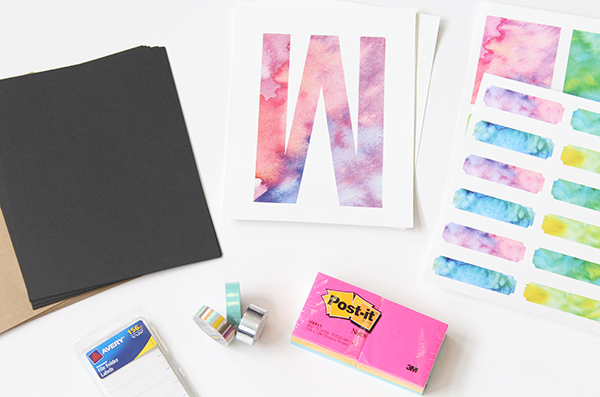
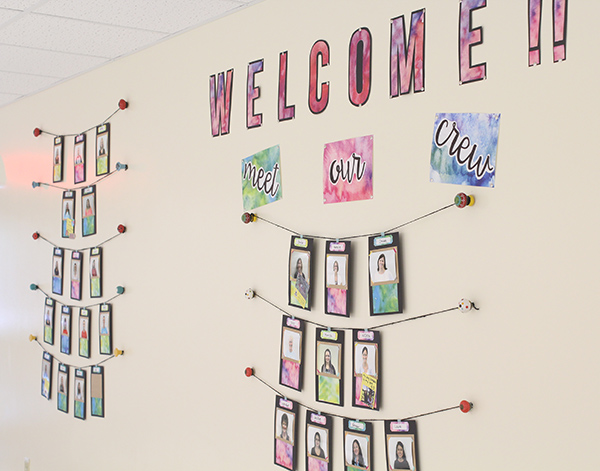
Ooo, this was the fun part. I started by designing the watercolor “theme” I was going to go with, which included a Welcome sign, name frames, and small squares to serve as a backing for each teacher’s “fun fact.” (note – I printed all these materials on thick white paper both for better color and sturdiness)
And guess what?! I put together all the materials I created for the Welcome Wall in a downloadable kit just for you. Woo Hoo!
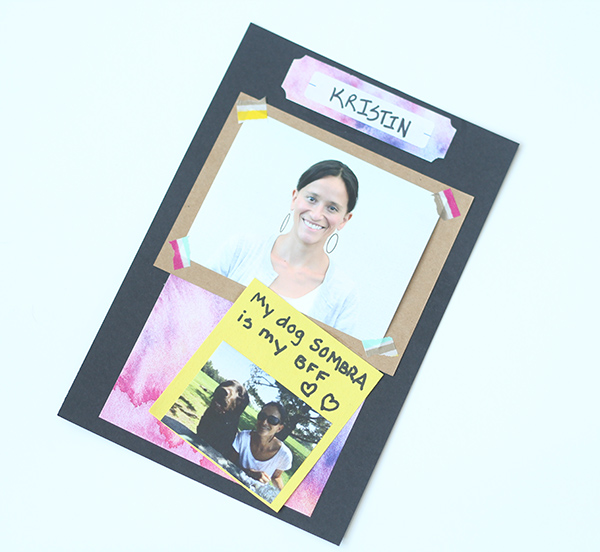
4. Start Assembling
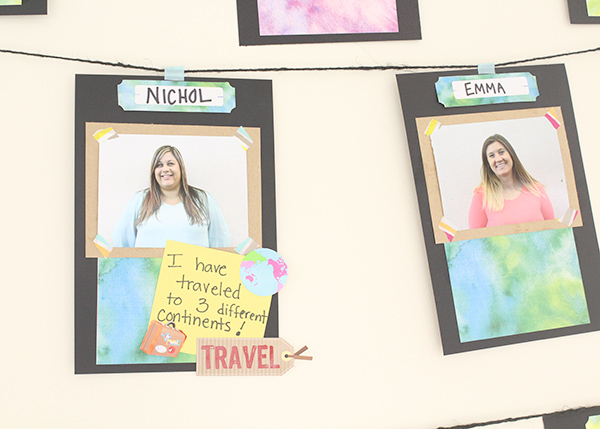
With the watercolor theme in mind, I chose black and kraft-colored card stock for the backing, and some fun washi tape for matting the photos.
I also asked teachers to write a “fun fact” about themselves on a post it note. These will be put on top of the watercolor squares.
5. Put It Up!
After each photo collage was assembled, I hung them up using more washi tape, and organized them by grade level/administration/specialist team. Teachers have been super busy with the first week of school, so I don’t have all the ‘fun facts’ up yet, but we’ll get there.
Once I had each photo hung, I stood back, admired my work, and gave myself a pat on the back for a job well done. It’s been fun to hear from teachers how excited they were to see the new staff Welcome Wall :)
And just for kicks, the glorious before and after of this fun and rewarding DIY project:
I hope you had some fun reading this post and thinking about what Welcome Space you may be able to create at your school for this year. If you do decide to DIY a Creative School Welcome Wall, send me a pic! I’d love to see it.
Happy School DIY-ing!
![]()
No comments yet.