Archive | Instructional Coaching RSS feed for this section

How to Engage in a Coaching Kick-Off Meeting

The kick-off meeting is a key piece in setting up a successful coaching cycle. Let’s talk through a few “key look-fors” for engaging in a successful kick-off meeting.

The primary purpose of a coaching kick-off meeting is to identify a focus for your upcoming coaching cycle with a teacher, familiarize your coachee with the logistics of the cycle and give them the opportunity to ask clarifying questions or express any concerns.

Engaging in a successful coaching kick-off meeting with a teacher lays the foundation for a successful coaching cycle.

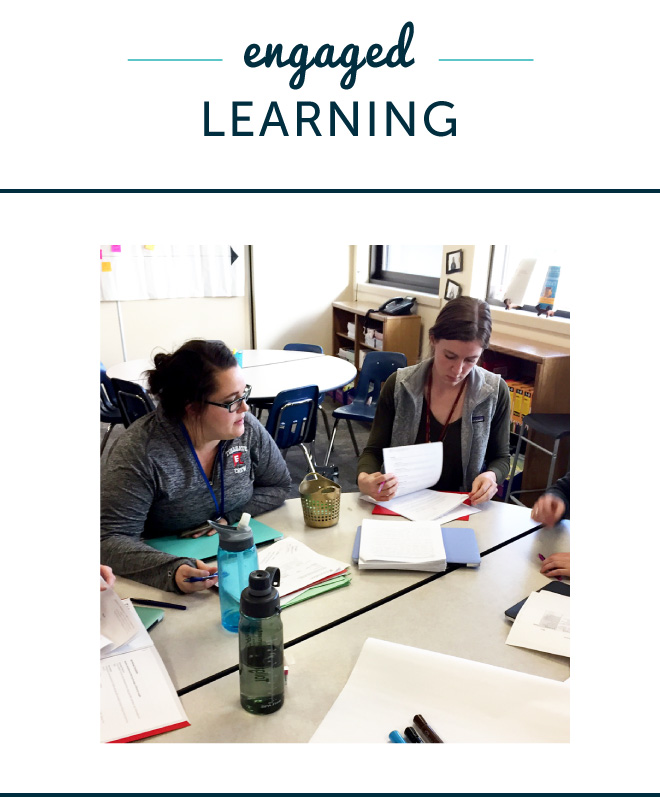
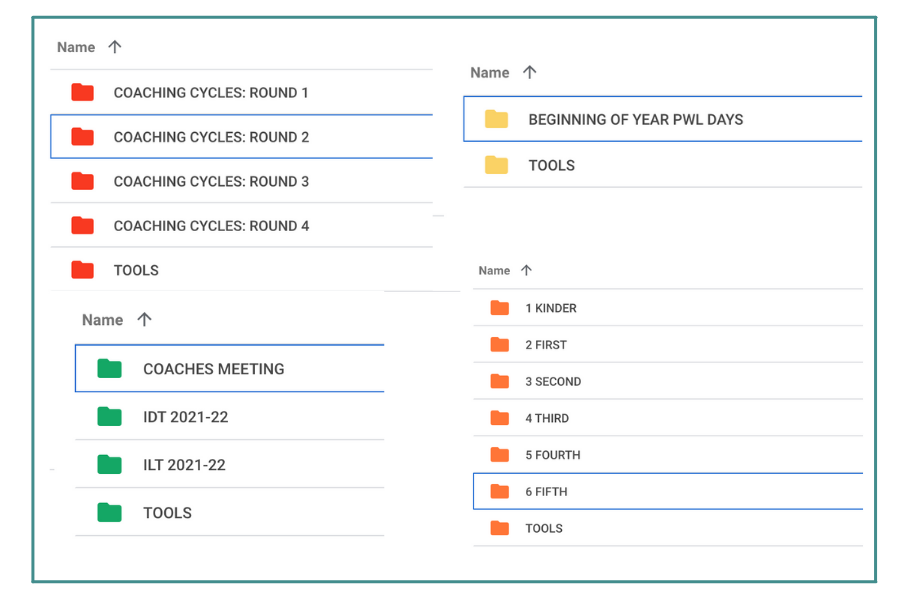
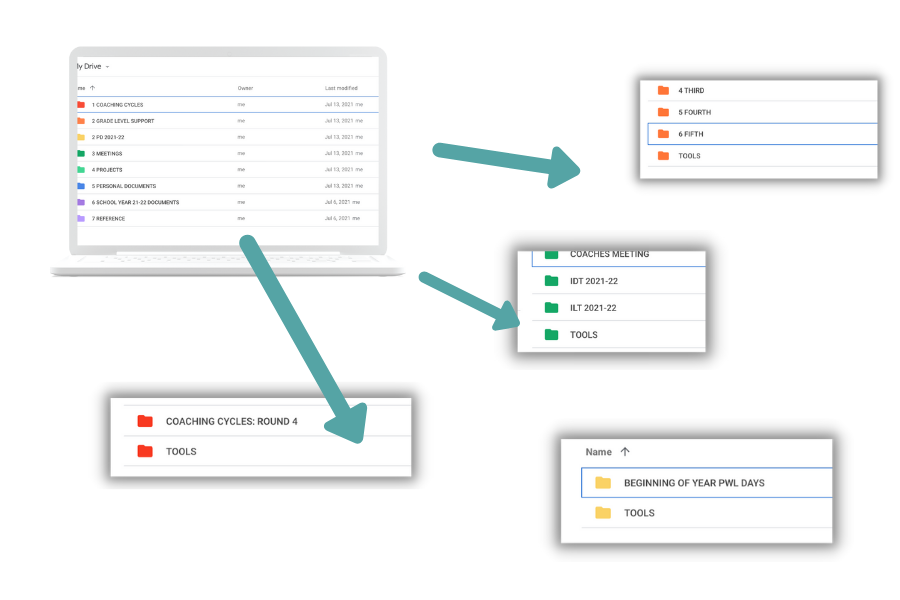
In this video, I give you a peek inside a coaching kick-off meeting I conducted with a Kindergarten teacher, Tyler, as well as the coaching tools I used.

How to Engage in a Coaching Kick-Off Meeting

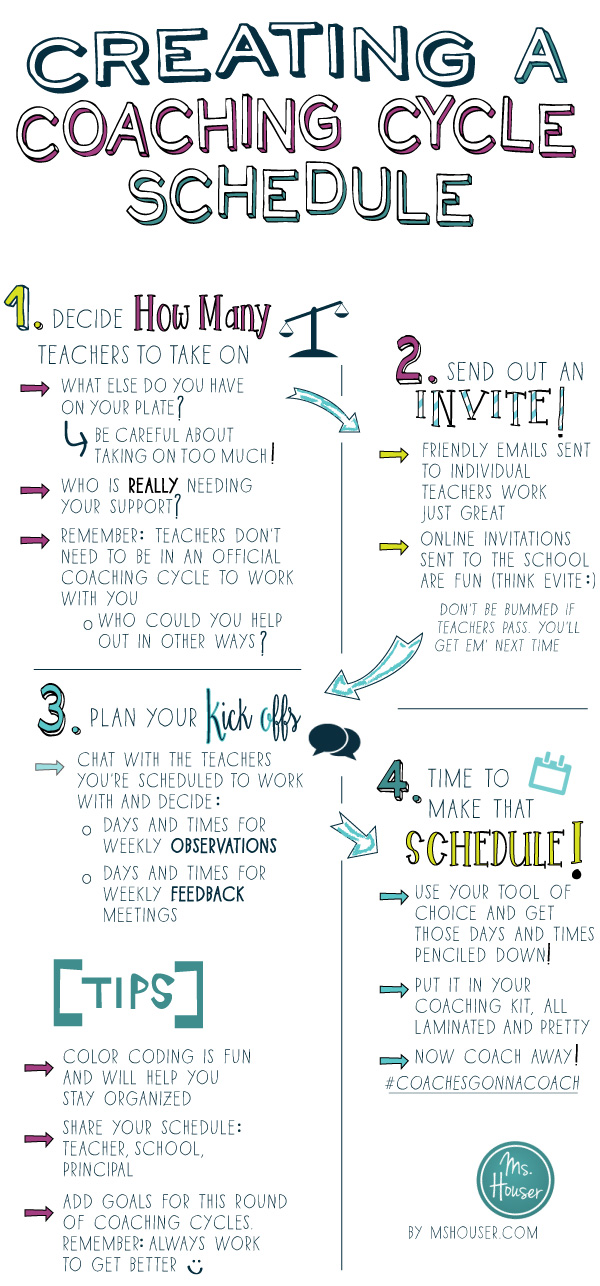
A coaching kick-off meeting is a little bit like a dance, and no two meetings are exactly the same. However, there are a few key coaching moves you can plan for.

1. Ask Clarifying Questions

Asking clarifying questions will help you guide the teacher in identifying a focus. It is helpful to plan questions you might ask in advance, especially if there is a more specific focus you would like to steer the teacher towards.

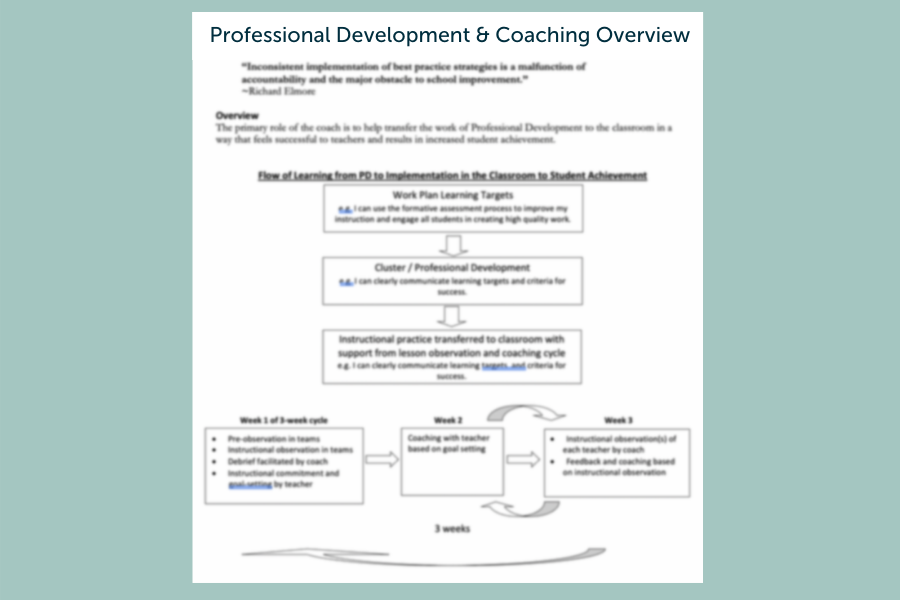
2. Identify a Target Standard

Identifying a standard and unit of instruction to anchor your coaching cycle to is very helpful. This will also help you in identifying what data or evidence you will use to monitor your progress towards the goal.

3. Identify and Create a Pre-Assessment

In this kick-off meeting video, you’ll notice Tyler and I discuss what pre-assessment data we could collect to help us understand where students currently are in relation to our target standard. We also discuss how we can work together to create this pre-assessment.

4. Discuss the Trajectory of Using Student Evidence Throughout the Cycle

Connected to identifying and creating a pre-assessment, I also helped Tyler understand the purpose of the pre-assessment and how we would continue to look at student work during and at the end of the coaching cycle to track and reflect on our progress.

5. Share Strategies for Coaching and Collaboration

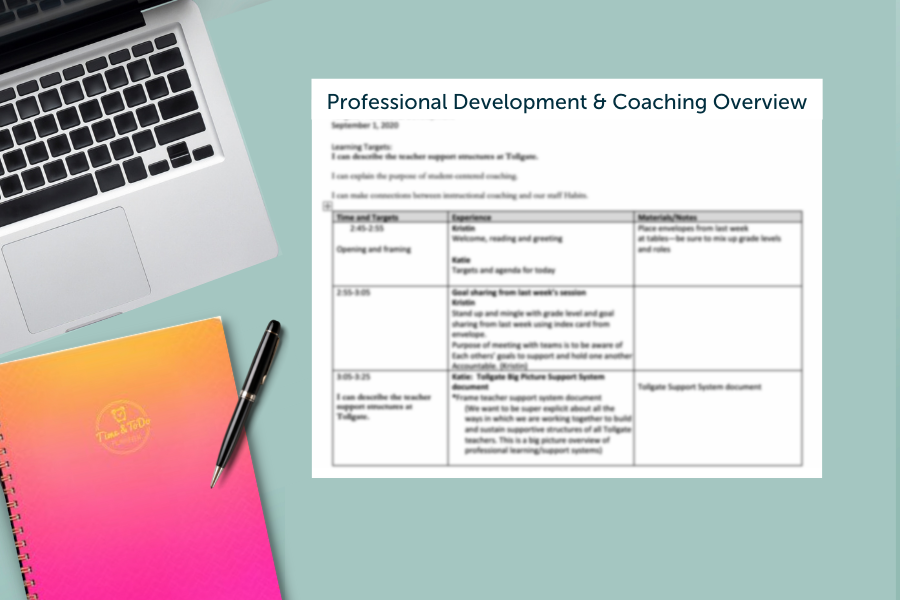
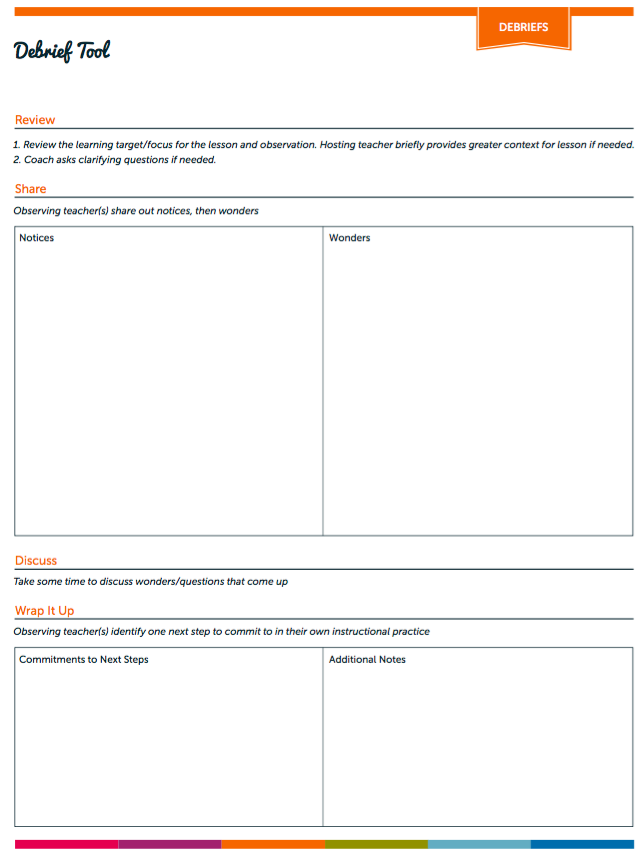
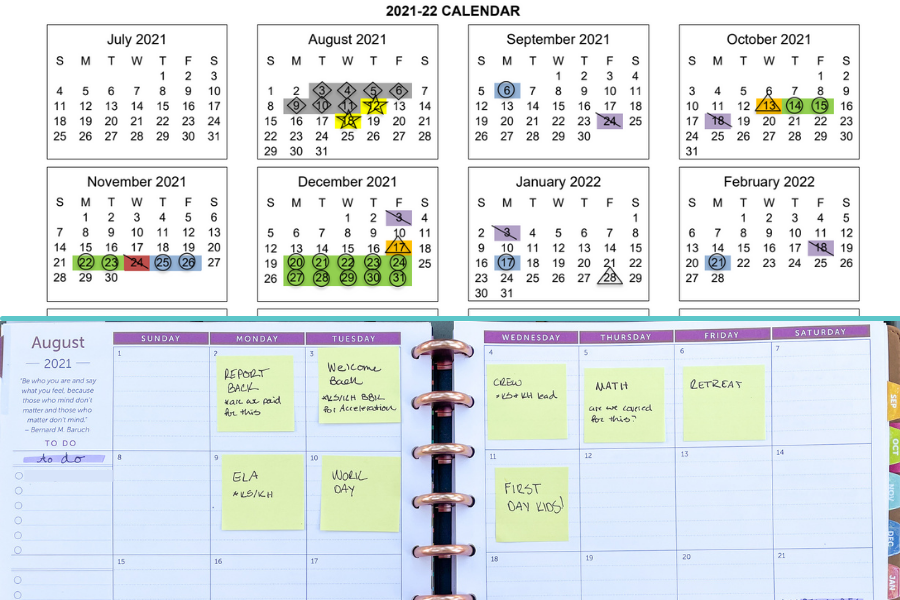
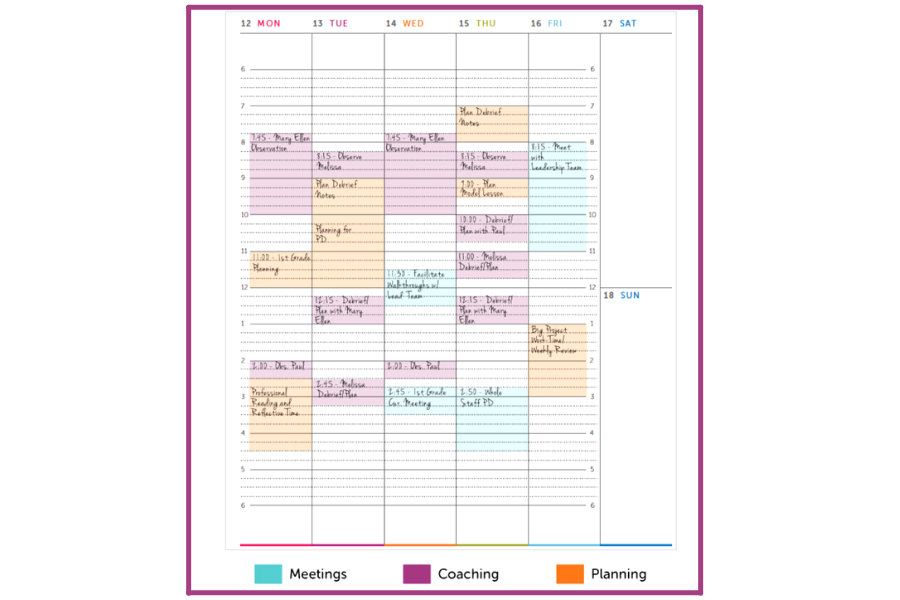
During the kick-off meeting, review logistics of the coaching cycle with your coachee such as coaching tools you’ll use together and scheduling. This is also your opportunity to ask teachers about any concerns they have, any questions on their mind, or anything else they would like you to know as their coach before moving forward.

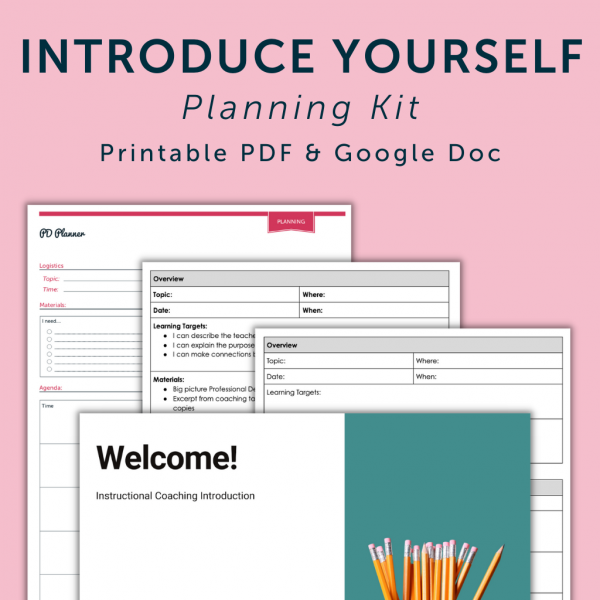
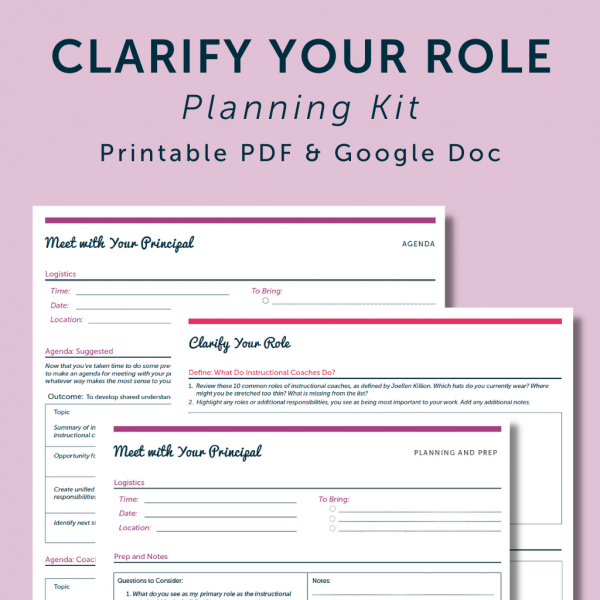
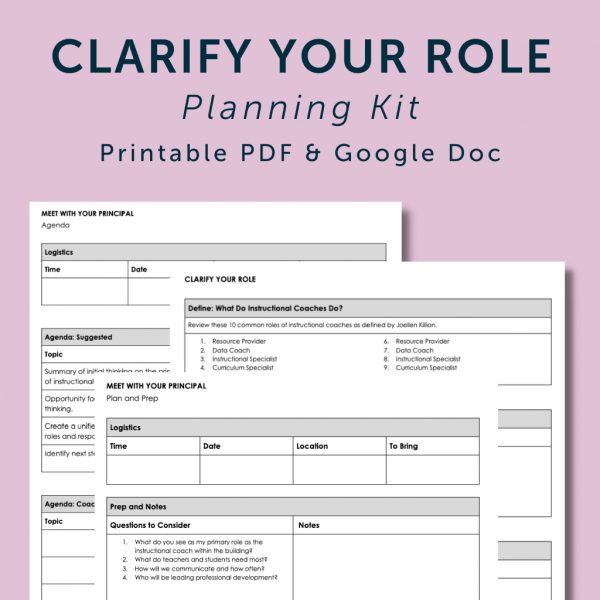
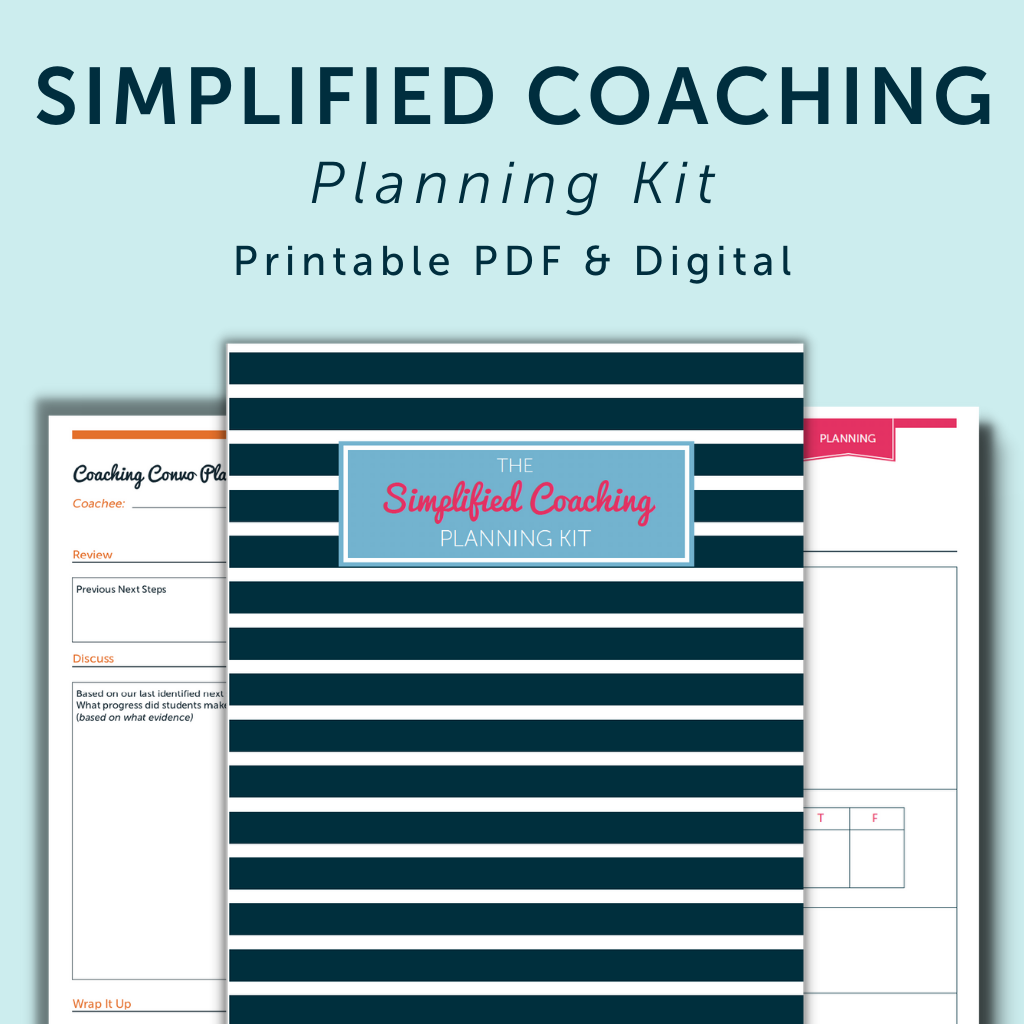
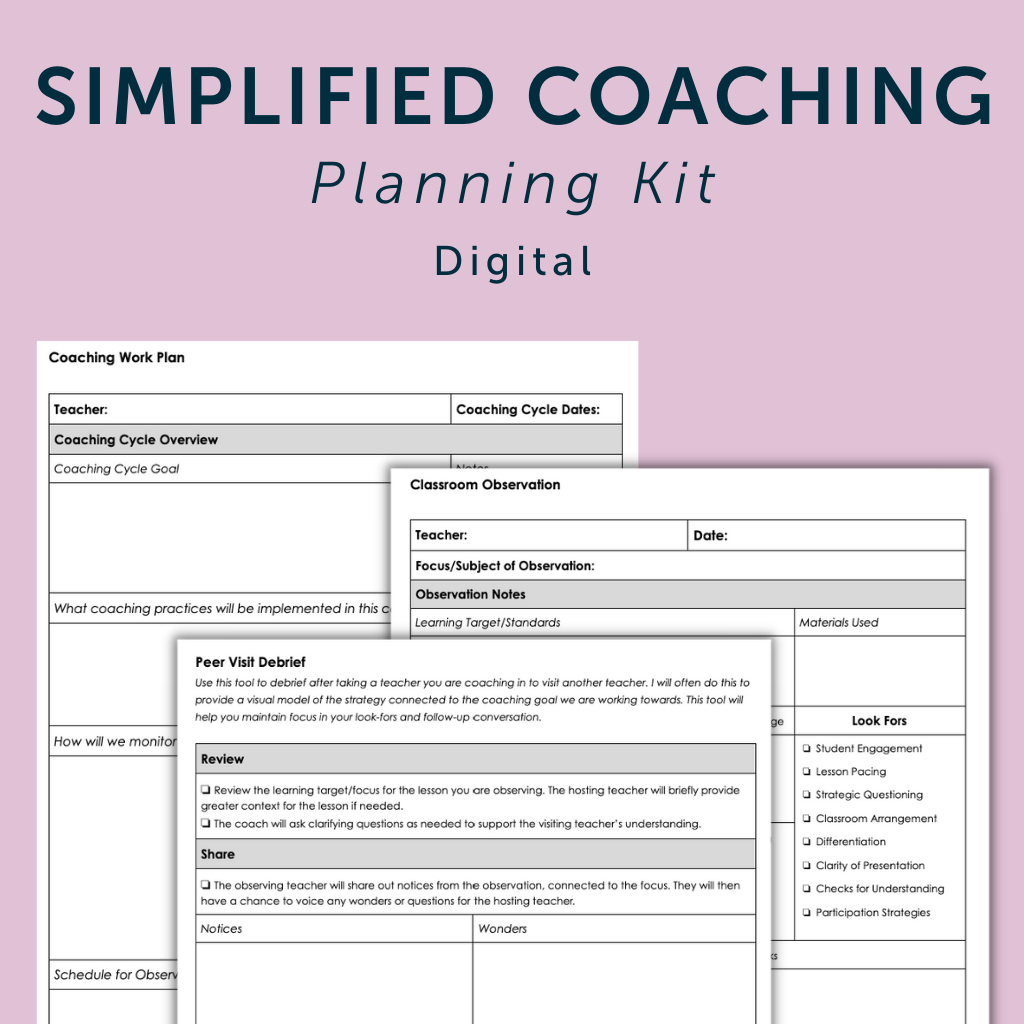
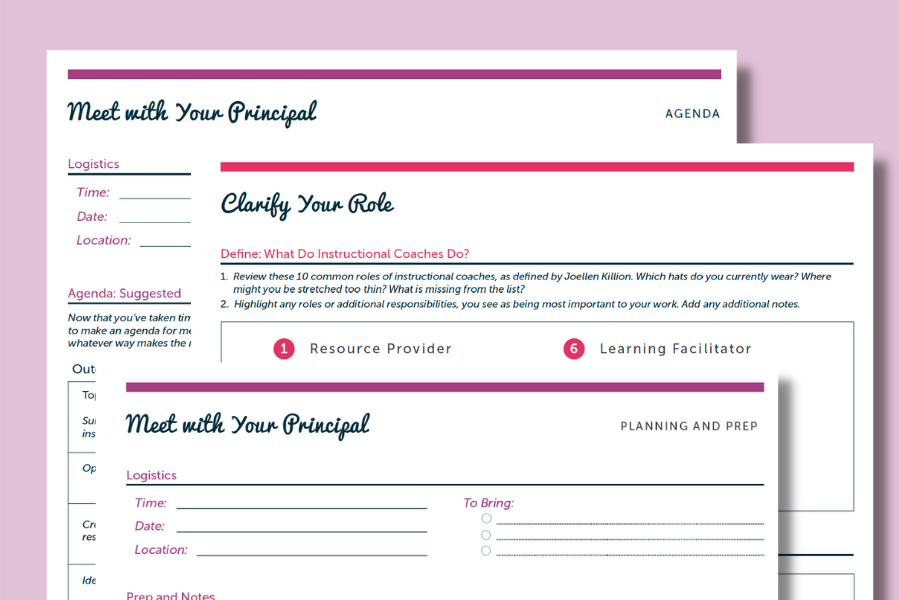
The Coaching Kick-Off tool I share in The Simplified Coaching Planning Kit, will help you plan for successful kick-off meetings of your own.

And on to the video!


I hope this video helped you get a better idea of how to engage in a successful coaching kick-off meeting.

Good luck, and talk to you soon!


How to Set-Up Your Coaching Cycle Calendar for the Year

Do you have a plan for how you’ll work with teachers in coaching cycles throughout the year? Let’s talk through how to get these mapped out for the year.

In the last few years, I’ve started to map out my coaching cycles for the year, and I’ll tell you…I would never want to go back!

Only having to “launch and market” your coaching support once at the beginning of the year, sure takes a load off your shoulders, and also gives you so much clarity in your weekly and monthly planning.

I’m currently working with my co-coach and principal in preparing to map out coaching cycles for the year, and thought it would be helpful to walk you through our process.

How to Map Out Your Coaching Cycles for the Year

1. Determine How Long Your Coaching Cycles Will Be

The length of a coaching cycle often varies depending on your coaching model or approach.

You may also want to add in “intensives” or short cycles in between longer cycles to meet certain building needs.

For us, we structure our coaching cycles in four, 6-week rounds with the goal of engaging every teacher in at least one full coaching cycle during the year.

2. Create a Professional Development Calendar

As coaching cycles are a form of professional development, it’s helpful to have a calendar set-up that shows all of the professional development structures for your school. On this calendar, also add in holidays and any other “no-school” days.

You can then use this to map out where your coaching cycles would best be placed.

3. Add Your Coaching Cycle Rounds to the Professional Development Calendar

Now just ‘color in’ your coaching cycle dates for the year! You can see above how we used the color purple to indicate these days.

And as I mentioned earlier, this will depend on about how long you typically run your cycles.

4. Launch an Invitation for All Teachers to Enroll in One of the Coaching Cycle Rounds

Once you’ve done the pre-work of mapping out your coaching cycles or ’rounds’ for the year, you’re ready to launch to the staff!

We plan on doing this in a whole staff meeting this year, though I have also “launched” via email and a snazzy Google Form.

In our upcoming launch meeting, our principal will be leading the messaging, and my co-coach and I will be sharing our goals in working with teachers and how we believe teachers will benefit from participating in a coaching cycle.

5. Iron Out Logistics with your Leadership Team

Who will be coaching? Focus of cycle? Dates?

As a leadership team, you’ll want to figure out and agree on certain logistics of your coaching cycles for the year. This could include:

  • How many teachers each coach will work with during each round?
  • Who is coaching who and when? This helps ensure teachers won’t be “double dipped” and their time is respected.
  • When will you meet to debrief coaching cycles and plan for the next round?

I’ve include two helpful tools in the Simplified Coaching Kit digital to support you in structuring this work. As well as many other helpful forms!

6. Share Finalized Coaching Calendar with Teachers

The last step is to share your team’s finalized coaching calendar for the year with teachers so they know when they are slotted to participate in a coaching cycle.

This calendar is also supportive to use with your leadership team, as a home-base for adding notes throughout the year and tracking progress as you go.

In the next post, we’ll chat more about how to kick-off or launch your coaching cycles with individual teachers.

Other Posts You May Like

Talk Soon!

How to Organize Your Simplified Coaching Planning Kit (Digital!) in Google Drive

Do you have a good system in place for organizing your DIGITAL instructional coaching tools and resources? Let’s talk through how to get your digital coaching life organized.

One of my most used coaching resources is my Simplified Coaching Planning Kit. I have used this paper based coaching kit for years now, and will continue to do so.

However, there is also a digital component to our work and planning as coaches, that needs to be attended to. Also, some of us just have a preference for digital based tools rather than paper. I get it!

This year I set up a digital extension of my Simplified Coaching Planning Kit in GoogleDrive, that I’m excited to share. Let’s take a look at my set up process.

How to Organize Your Simplified Coaching Planning Kit (Digital!) in Google Drive

1. Delete and Purge

First. The big delete and purge.

Go through all your digital files from the previous school year, and delete anything you didn’t end up using or know you won’t need going forward. We can think of this as digital clutter. Out it goes!

Everything else can be archived.

At the end of the school year, I create an archive folder for that year. Within the archive folder, I set up sub-folders so if I do end up needing to reference anything from previous years, I can quickly find it.

2. Create and Name Your Main Category Folders

Next up, I created my main category folders. I was intentional in “matching” these category folders to the sections I have in my paper-based coaching kit. This allows me to work flexibly with both components of my system.

A few notes:

  • I have enough folders to organize the different areas of my work, yet not too many.
  • Color coding support with visually distinguishing between categories, and it just looks pretty :)
  • I added numbers to the front of each folder title, to order my work, based on priority and importance for my coaching role.

3. Create and Name Your Sub-Category Folders 

I use sub-categories to keep my main category folders organized.

For example, I break my main coaching category folder into different folders for each round of coaching I expect to do throughout the year. Then within each of these folders, I will create a folder for each teacher I will be working with.

I also like to match my sub-category folder color to the main category color.

4. Create a Tools Folder

OK, this is important. Make sure each of your main category folders also includes a “Tools” folder.

This is where you will house all of your coaching forms and planning tools as templates.

The Simplified Coaching Planning Kit Digital has a collection of 25 Coaching Tools you can add directly into your Drive to get you started!

With this system in place, you’ll be ready to go for whatever your coaching work may bring you!

Other Posts You May Like:

Talk to you Soon!

4 Steps to Get Organized at the Beginning of the School Year as an Instructional Coach

Have you made a plan for getting organized for the beginning of the school year? Let’s talk through four key steps to get yourself organized for the beginning of the year.

instructional coaching get organized

My favorite thing ever…getting organized! It may definitely NOT be your favorite thing, but let’s not overlook the importance of organization to your instructional coaching success.

In my work, as a coach, I understand how important it is to get yourself organized at the beginning of the year. If you don’t, you may find yourself overwhelmed and not working as efficiently as you could be. No fun!

A structured and reliable organizational system will do wonders for your stress level, confidence, and productivity all year long. Ahhh… :)

4 Steps to Get Organized at the Beginning of the Year for Instructional Coaches

1. Decide on Your Organizational System

instructional coaching get organized

First things first.

You need a system.

A trusted system to capture your to-dos, organize your time, and keep it all together.

I created the Time & ToDo Planner when I first started as an instructional coach and needed an organizational system myself. The discbound Time & ToDo Planner is where I keep my schedule, to-dos, notes, project sheets, and coaching cycle notes. I love it!

2. Set-Up Your Calendar

instructional coach how to get organized

Once you’ve identified the primary organization system you will use, the next step is to get your calendar set up.

When getting your calendar set-up, make sure to include:

  • all appointments or meetings
  • hard deadlines
  • PD sessions
  • no school days or breaks

I like to set-up my calendar for the entire school year so I have a very clear vision of what is coming, and I won’t be caught off guard.

You can see in the image above how I used sticky notes in my planner to pre-plan for our beginning of the year PD days.

instructional coach how to get organized

3. Clarify Your Role and Responsibilities

instructional coach how to get organized

When you’re thinking about clarifying your role and responsibilities for the beginning of the year, focus on the first 30 days.

This will help you identify what to organize your time and coaching schedule around, without feeling too overwhelmed.

For example, one of my big roles and responsibilities for the first 30 days includes facilitating beginning of the year Professional Development. So I am planning for this as I think through how I am going to organize my first few weeks.

4. Create an Initial Schedule


instructional coach how to get organized

At the beginning of the year, it may not feel like you can yet create a schedule for yourself since the year is just getting going.

However, a big piece of getting yourself organized as a coach, is making sure you have a schedule. You likely won’t be given one by your principal and will need to make one for yourself.

Three responsibilities you can begin to organize your time around include:

  • meetings/PD
  • planning time
  • coaching and teacher check-ins

Other Posts You May Like:

Happy Coaching!


How to Introduce Yourself and Instructional Coaching to Staff

Has your principal asked you to kick-off the year by introducing yourself and sharing what instructional coaching will look like for the year? Let’s talk through how you can create an agenda to confidently respond to this request.

instructional coaching

If you’re new to a building or new in your role, introducing yourself and your instructional coaching program to staff can feel SCARY. Gah! However it’s a really important beginning of the year step, as it will provide the foundation for a successful “culture of coaching” within the school.

But have no fear, I’ve created a super helpful planning structure you can follow to create your own all staff introductory PD session. This is the same structure I used myself when introducing coaching at my school.

A clear agenda and supporting slides for your presentation will help you feel confident and in control of your opening presentation.

Agenda for New Instructional Coach Introduction

1. Plan for Logistics

Before getting into the meat of your introductory PD, it’s helpful to iron out all the logistical details ahead of time.

This could include:

  • How much time will you have?
    • In my experience, I have found that an hour time slot is about right.
  • Will your principal be supporting you with facilitation?
    • If not supporting you with facilitation, the presence of your principal at this PD will be essential. If any questions are asked, you can both answer with unified messaging.
  • Who will be asked to attend this PD?
    • It is important for ALL teachers in the building to be present for this PD to ensure everyone has a chance to ask clarifying questions, and everyone leaves with the same understanding as to how instructional coaching will be used as a professional development support structure within the building.
  • What materials will you use to anchor the work?
    • Texts? Key school documents?

2. Identify Outcomes

how to introduce yourself as a new instructional coach
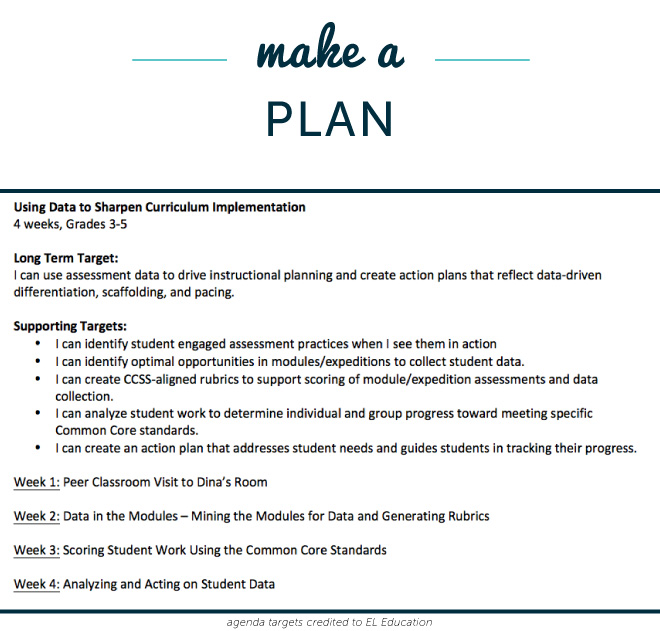
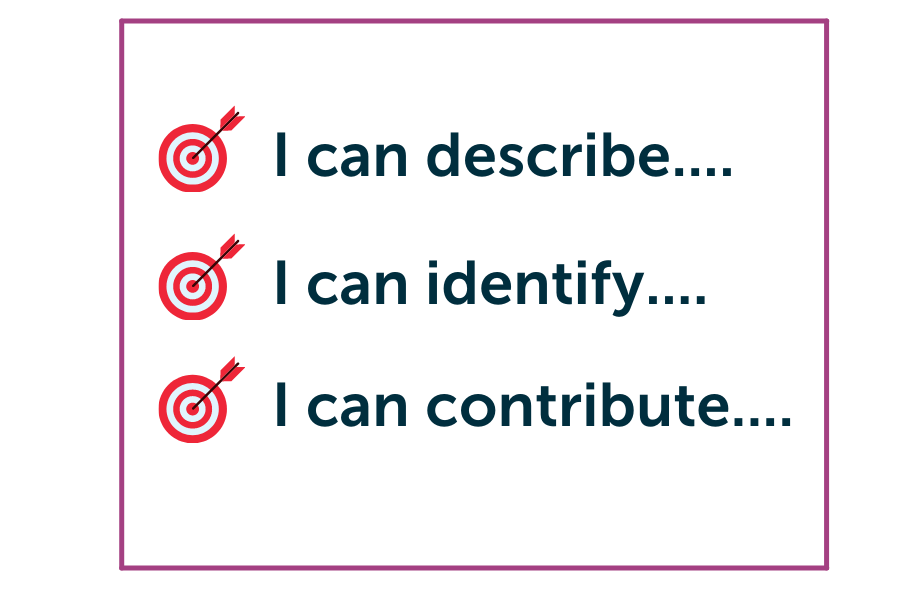
Before going any further, you’ll want to identify the key outcomes or learning targets for your introductory PD.

In the sample agenda I created, I identified three guiding learning targets to anchor what I really wanted teachers to walk away with.

In the image above I created a few learning target starters to get you thinking. One or two would be good, but no more than three!

how to introduce yourself as a new instructional coach

3. Create a Support System Document

how to introduce yourself as a new instructional coach

This doesn’t need to be fancy.

Just a one-pager explaining how coaching and your work fits into the bigger picture of professional development within your school.

You might additionally explain what your coaching model will be. Will you primarily use a student-centered coaching approach? Are you working with the New Teacher Center Model? Or perhaps you are more closely aligned to Jim Knight’s coaching model.

4. Put Together Your Agenda

how to introduce yourself as a new instructional coach

OK, time to put this all together into an agenda you’ll use to structure your time and work with teachers.

If you’d like to see a complete model of the agenda I used, you can find this in the How to Introduce Yourself Planning Kit. 

After you’ve created your agenda, share with your principal so you can continue to be on the same page with the messaging on instructional coaching that you will deliver to staff.

5. Create Your Slides

how to introduce yourself as a new coach

To go along with the agenda you have just created, you will want to create a slide deck to support you in visually communicating your message and learning.

If you’d like to use the slide template I created for this, you can find it in the How to Introduce Yourself Planning Kit. 

Use your slides to help you do a bit of rehearsing ahead of your PD session, so you are feeling confident and ready to go!

how to introduce yourself as a new instructional coach

Other Posts You May Like:

Happy Coaching!

3 Steps to Clarify Your Instructional Coaching Role and Responsibilities

Are you wanting to head into the school year with a clear vision of your instructional coaching role and responsibilities? Let’s walkthrough three steps to help you do just that.

instructional coaching roles and responsibilities

Clarifying your role and responsibilities as an instructional coach can feel exciting and overwhelming all at the same time. As a coach myself, I understand how important this is as a first step in setting yourself up for a successful school year.

As coaches, we are capable of doing a lot of things, but not everything! Lack of clarity and focus will leave you stretched too thin in your work and frustrated in your efforts.

Now that I’ve worked through clarifying my own  coaching role and responsibilities several times in my career, I can share three steps to help you do the same!

3 Steps to Clarify Your Instructional Coaching Role and Responsibilities

1. Define What Instructional Coaches Do

Instructional coaches can play many roles and assume multiple responsibilities in a school building. It is helpful to begin with brainstorming what these roles currently are in your building or could be. For myself, I have found it to be most helpful to pair up with a coaching buddy or colleague and do some brainstorming.

Questions to ask during this time could include:

  • What is the work we do on a daily, weekly, or even monthly basis to support the school?
  • Where are we feeling stretched too thin?
  • What is needed most by teachers and students this year?

If you are new to a school, you might talk with the previous instructional coach. You could also use the Clarify Your Instructional Coaching Role and Responsibilities Planning Kit to support you with this.


2. Meet With Your Principal

Now that you have a better idea of what you believe your coaching role and responsibilities should be, the next step will be to meet with your principal.

During this time, you will want to present what you’re thinking, ask clarifying questions, and get on the same page.

If you need support for creating a “Meet With Your Principal” agenda, I’ve created one for you in the Clarify Your Instructional Coaching Role and Responsibilities Planning Kit

Record your communication and any needed next steps, so you have a record of the conversation and are prepared to move forward.

3. Share With Staff

Now that you’ve done some personal reflection on your coaching role and responsibilities, and you’ve gotten on the same page with your principal, it’s time to share with staff.

I would suggest holding an all staff meeting to share your clarified role as an instructional coach for the building and how your work connects to the school’s overall support structure. This way you and your principal are able to share the same unified message, and answer any clarifying questions as a team.

Working through these three steps will help you build a “culture of coaching” at your school.

Here are a few other related posts you may like:

Happy Coaching!


Creating a Coaching Invitation

Wouldn’t it be super awesome if you had teachers constantly knocking on your door throughout the year, excitedly asking to work with you in a coaching cycle?

“Hey Kristin! I’d love to get started in a student centered coaching cycle with you connected to the 3rd grade informative writing standard. This is an area I’d really love for my students to make growth in next quarter. I can get started on creating a pre-assessment for us to work from if that works for you??”

OR

“Kristin! What do you think about co-teaching together next quarter? I’m working to get a handle on this new curriculum and I’d love you as a thought partner in helping plan through some of the lessons. It’d be extra cool if you could micro-model a portion of the close read aloud and then we could conference with a few students together and learn from each other’s formative assessment data!!”

Ahhh, dreamy.

I’d love to say this is my reality throughout the year, but it’s not.

And that’s ok.

Teachers get busy, and stressed, and overwhelmed, and sometimes getting excited about working in a coaching cycle is the last thing on their minds.

So, what to do? Well you don’t just sit around and wait for the excited knocks to come, feeling defeated when they don’t.

You stay positive, get out there, and continue to nurture the culture of coaching you’ve worked hard to create.

One way I worked to put this move into practice earlier this week, was by sending out an invite. Yep, a coaching invite.

There were a few things I worked to keep in mind in creating this. Let me walk you through my invitation creation process.


Push yourself to work your creative muscles a bit, and think outside the standard text in an email message. Sure, it gets the job done, but you’re working to get teachers excited about coaching remember? So could you try:

  • Make a short animated video as an invite.
  • Create an colorful brochure using Canva, export it as a PDF, and embed it in your email.
  • Design a color print-out with some fun graphics, maybe throw in some candy, and drop it off in teachers boxes.
  • Build an illustrated newsletter using Smore.

The sky’s the limit!


You like being given some choices with your learning, and so do teachers. They may be up for working with you, just not right now.

When creating your invite, pull out your Time & ToDo Planner. Consider what chunks of time you have for the remainder of this year to work with teachers, and which periods of time work best, given breaks and testing schedules. Based on this, provide options for teachers around the time period when they might work with you.


Do teachers in your building even have a solid understanding of what coaching with you will look like? The time commitment included? How it will benefit them?

Hmmm…

Even if you have worked with teachers before, you may have changed some things, or maybe it’s just been awhile. Not to mention the new teachers who may be in your building this year.

Either way, this could be a good opportunity for you to revisit what a coaching cycle actually is. The overview is brief!

Think about how to distill the work you do down down to 3-5 major bullet points, and share this in your invite.


Teachers will naturally have wonders, worries, or concerns about working in a coaching cycle that may be preventing them from signing up. Take a minute to think through what these might be. Great. Now consider how you might tactfully address 2-3 of these, very briefly, in your invite.

Here are a few that came up for me:

  • I have a lot going on, is this going to feel like something extra added to my plate?
  • Can you tell me a bit more about what “coaching in the classroom” will look like?
  • I’d love to work in a coaching cycle with my team. Is this a possibility?


Consider how you’d like to structure your coaching cycles throughout the year. How many rounds will you do? How many teachers can you work with in each round?

Also consider teacher needs. Send your invitation out well before you’d like your next cycle to start. Give them some time to process your invite, and respond.

I decided to send my invite out two weeks before fall break, as I’d like to start my next round right when we get back.

Oh, and don’t forget to give yourself plenty of time to actually create the invite. It took me a good few hours to draft, edit, and finalize mine.


OK, so here’s a look at what your invite might look/sound like when it’s all put together.


You sent it! Great job!

But…you’re not done there. Just because you sent the initial invite doesn’t mean every teacher will be banging down your door with a “YES!” RSVP. You will likely have to follow-up with teachers.


Plan to follow-up personally with the teacher who you would like to work with but hasn’t responded yet. I like to think of my coaching invite as a conversation starter. So, no pressure here, just follow-up with them to chat about what might be on their minds for coaching.

I hope this post gave you some ideas for how you might think about how you work to invite teachers into coaching cycles with you.

Let me know if you have questions in the comments, otherwise get those fun and fresh invites going!

Facilitating a Peer Classroom Visit

One of the best ways to really “get” good teaching, is to see it in action.

You can listen, learn, or read about what it’s supposed to look like all you want, but it doesn’t really click until you actually experience it — teaching that has a bang and makes a difference.

As I’ve shared in the Coaching Workshop, that’s one of the reasons why I think model lessons and classroom visits can be so impactful in building foundational understandings of teaching strategies, that you can then work with teachers on implementing themselves.

Now, when you can make this happen for a group of teachers, support it with a visual of the lesson plan beforehand, link your look-fors to specific teacher moves, follow-it up with a descriptive review protocol, and add in teacher commitments to next steps…well, then you’re really talkin’!

Peer Classroom Visit

This week I wrapped up a 4 week “deep dive” PD with our 3-5 teachers during which we learned about “Using Data to Sharpen Curriculum Implementation.”

It’s been pretty awesome, and I credit much of its success to our Peer Classroom Visit Kick-Off.

Let’s walk through the plan of action, shall we?

First things first. Start with your final outcome in mind, and plan backwards from there.

Here are some questions to consider:

  • What is your main goal/purpose for arranging this visit?
    • Will this lead into a sequence of follow-up PD sessions?
    • Will this visit support individualized coaching goals?
    • Will this visit kick-off a grade level coaching cycle?

Next up – recruit. Here’s who you’ll need:


OK, sweet. Now that I had the WHO all set-up, I needed to get my materials organized.

Knowing that the purpose of this classroom visit was to “kick-off” a series of future PD sessions, I wanted to help teachers stay organized with all the materials I would be giving them over the course of the next 4 weeks. Plus I wanted to spruce things up a bit, and help it feel more like an “experience” for teachers.

So I made a folder for each teacher, which greeted them on the morning of the visit. (logistics note: our Assistant Principal got coverage for all 12 teachers on this morning, so we were all able to go in together!)


After a pre-brief with teachers (overview of the Learning Target, self-assessment on target tracker, review of materials and observation norms), we were ready to head in!


Since teachers had to head back to their classrooms straight after the visit, I arranged for a follow-up debrief later that week.

There’s a lot of different forms/protocols you can use to structure a classroom visit debrief, but here’s one that can be found in my Coaching Kit.


Now coming back to the original purpose of this particular classroom visit…as I mentioned earlier, the learning that took place in observing Dina’s lesson was intended to kick-off a series of 4 follow-up PD sessions. The host of the visit, Dina, supported in facilitating these sessions and helped teachers apply the different pieces we had put into place around assessment to arrive at the tightly planned lesson they observed (logistics note: Dina is a teacher who I’ve coached actively this year. She was well prepared for the visit and the instructional practice we modeled for teachers.)

I’ve actually never set-up PD in this way, but I found that teachers were really engaged in the work and learning as a result of seeing it in “action.”


And there ya have it! Hope this post provided some inspiration for you as you think about organizing classroom visits within your own school to support teacher learning.

Thanks for reading!


P.S. Bonus tip: Listen to fun music when you plan. Sometimes I’ll even turn some tunes on for teachers at the start of PD! This one will get you feeling “Good as He**!”

P.P.S Excited about this year’s TTP?! (Time & ToDo Planner) – get signed up here for updates. Cool new cover design, binding, and….a folder this year! You won’t want to miss it.

Keep me posted about the Time & ToDo Planner

PD Pad Pick-Me-Up

Have you ever had one of those years at school that’s just been a bit…tough? This has been one of those years for us.

We’ve been working through some changes and challenges in leadership, that have left us all without a solid foundation to stand strong on, and just not our peppy selves.

As a coach, when you notice a dip in staff culture and morale, what can you do?

When I asked myself this question, I thought…well…hmm…what is something I’m pretty good at, I enjoy doing, and I know will help add some pep to our teacher’s step?? Think, think…I got it!

Creating beautiful spaces.

Working and learning in an inspiring space is something that makes us all feel good.

And where do we learn each week? The PD Pad!

So the designer in me stepped in and said, “Let’s do this.”

These past few weeks, using spare chunks of time, I’ve been chipping away at project: “PD Pad Pick-Me-Up”.

Alright, let’s take a tour, shall we? Come on in!

I made a Welcome Sign to greet teachers as they come in. I printed “Welcome” using a fun font on a turquoise background, cut out the letters, and matted them on different size sheets of black construction paper.

As you come in the room, to your right, you’ll see the three categories of our Work Plan Goals posted. Below those, are the Learning Targets guiding our work in PD. Some foliage always helps to liven up a space, so I got the plant in the corner at Hobby Lobby (not real, but still leafy :) and wrapped it in string lights. The star hanging above it is from Ikea. Lighting is one of those design pieces that can help take a room from drab to fab.

“Explore, Question, Create” are the three words that make up our school’s vision. So I knew I wanted these posted front and center. I asked a kindergartner to help me write the letters for the words, then backed them on a painted construction paper background that our art teacher had the first graders help her with.

OK, let’s take a look at the far side of the room. I love this corner of the space! Photos of students, and our character habits posted on the wall help anchor the room in the importance of the work we do everyday.

Oh, and you’ll see each table has a plastic basket to hold sticky notes, highlighters, and pens. I didn’t like the original colors the baskets came in, so I spray painted them a fun turquoise and gold to go with the color scheme of the room.

Here’s a closer look at the student photos. I wanted them to stand off the wall a bit, so I had canvas prints made at Walgreens.

On the wall, I added a smidge of color with gold strips of washi-tape. This also helped me cover up some ugly holes in the wall :)

Here’s our Habits wall. I made some DIY frames, then used white chalkboard marker on a black tag-board background to hand letter our staff norms connected to each of our Habits.

Above each of the three windows in the room, I strung the words “We Are Crew.” As an EL Education School, this phrase is really important to the work we do. To highlight it a bit more, I strung some bistro light strands right above.

As a teacher, I would always hang photos of students in the room to help illustrate that this was our space. And as a coach, I like to do the same thing. Black and white photos of each of the teachers, matted on a black background, with gold washi-tape, felt just right.

On the other side of the room is our snack station. It’s hard to add some pep to your step in an after school PD without snacks and caffeine :)

I designed this typography poster for a bit of motivation as teachers grab their snacks.

And there you have it! Hopefully this post gave you some ideas for how you might work to create beautiful spaces in your own building(s).

For more ideas and inspiration, here are two past PD Pads you can check out:

Creating a Professional Development Space

PD Pad Set-Up

And lastly, if you’re going through challenges of your own at school, don’t worry. They happen to all of us. Just remember, teachers need you as their coach to stay strong and positive. You got this!

Talk to you soon,

4 Steps for Creating a Coaching Cycle Schedule

Earlier this week, I broke out the cool new pens I got for Christmas and got to work on putting together my coaching cycle schedule for this next quarter.

Creating new schedules throughout the year is a cool opportunity for us coaches. It’s kind of like having a mini beginning-of-school-year kick off more than just once :)

You get to reset and regroup for a new journey ahead with new “students” to motivate and move forward.

I know that sometimes creating a coaching cycle schedule can feel overwhelming, so I wanted to share the steps I use to simplify the process a bit and make it fun.

OK, now that we’ve got those steps and tips down, grab yourself a nice bright sheet of white paper and head over to the printer. I just designed a new Scheduling Tool I want to share with you.

It’s simple, fun, and includes space at the top to jot down a few goals for your upcoming coaching cycles. And because I think quotes are cool and inspiring, I included one of those too :)

Once you have it printed out, you can pop it in your Coaching Kit. I like to put mine front and center, along with a color coded index of the teachers I’ll be working with. You know me and color coding :) The colors help me quickly find the different “sections” for teachers. So when I head into a classroom, I can just whip my Kit right open to that color.

Want to learn more about how I work through coaching cycles? Check out the Walk Through a Coaching Cycle Workshop, where we walk through a full coaching cycle together.

I’ll also help answer some of those logistic questions that come up:

  • How many teachers do you work with during your coaching cycles?
  • How many observations and feedback meetings do you schedule x week?
  • Do you always set-up face-face feedback meetings, or do you use email at all?

Here’s what Nancy C. had to say about her Coaching Workshop experience:

“First of all, I want to tell you that I absolutely LOVE your documentation and your videos! What a fantastic package you’ve put together. This is only my second year as a Literacy Coach so I’m really just learning as I go along and your clear and concise way of explaining the coaching cycle is EXACTLY what I needed. I cannot thank you enough.

Here we go Coaching Cycles, here we go!! Whoop whoop.

Alright friend, I’m feeling really good about this second half of the school year. If there are any other topics or resources you’d like me to share heading into this year, be sure to let me know!