Why You Should Start a Blog – And How to Do It

Alright. I know our summer days are coming to a close and you’re likely getting in as much maxin’ and relaxin’ as you can before school starts up in a few short weeks {agh!}. But I’ve been wanting to tell you something for kind of a long while now, and I figured I should probably tell you now while you still have a little downtime.

You should start a blog.

blog-image3

Yes you! And Austin Kleon, the author of one of my favorite books Show Your Work!, just happens to agree:

“Eventually, I figured out how to install a blog, and that changed everything. A blog is the ideal machine for turning flow into stock: One little blog post is nothing on its own, but publish a thousand blog posts over a decade, and it turns into your life’s work. My blog has been my sketchbook, my studio, my gallery, my storefront, and my salon. Absolutely everything good that has happened in my career can be traced back to my blog. My books, my art shows, my speaking gigs, some of my best friendships—they all exist because I have my own little piece of turf on the Internet.” –Austin Kleon, Show Your Work!

The cool thing about blogging is that it can lead anywhere.

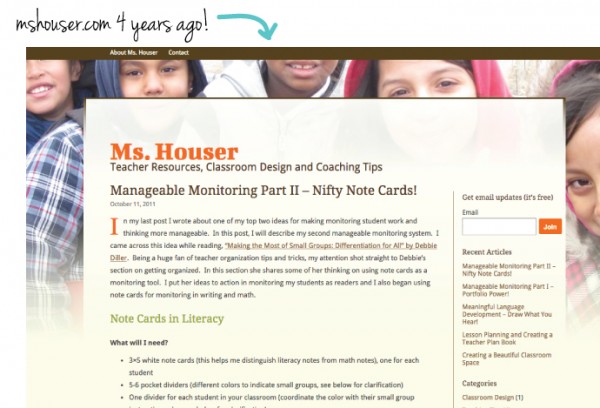
I started my blog 5 years ago and it’s an action I took that I continuously thank myself for. If you put in the work, you’ll get more than you can imagine out of it.

My blog has helped me accomplish so much. To name a few…I’ve become a way better writer, I’ve networked with other coaches I never would have known had it not been for the blog, I’ve created a visual resume of my work, and I’ve created a strong foundation for amazing adventures I hadn’t even planned for like starting my Etsy shop and launching my first online business with the Time & ToDoPlanner.

Your blog will become your online home. A place to share your work and inspire others, connect with people all over the world, and just put something out there that is uniquely you. It will be all yours and you can take it in whatever direction you choose.

Are you with me?!

I sure hope so, because we seriously need some more coaches out there showing off their work.

Alright, let’s get to the “how-to” part. Don’t worry, it’s really easy and your future self will say thank you. Just follow the three steps below and you’ll be up and running with your very own blog in no time.

1. REGISTER A DOMAIN NAME

name-tag

This just means choose a name for your website. Take some time to think about this one, but don’t obsess about it and let it hold you up from taking action. It can be as simple as your name, or relate to where you want your blog to go. Brainstorm and write down as many ideas as you can. When you think you’ve got a few names to run with, head over to DreamHost and see if your name is available by entering it in the box that looks like this:

domain1

You’ll also need to host your domain name. Hosting is like renting space on the web to display your blog. DreamHost has great rates and gives you your domain name for free if you decide to host with them.

2. INSTALL WORDPRESS

wordpress
WordPress is a blogging software and the one I’ve always used, know how to use, and really like. There are others such as Blogger and SquareSpace, but WordPress is definitely the platform most commonly used. DreamHost will walk you through all the steps to get it installed and set-up.

Step two, done. Now you officially have a blog and all you really need to do at this point is add good content that people want to read. Then, when you’re ready, you can move on to Step 3…

3. SPICE IT UP!

When I first started my blog, it was super simple and that was cool, because you don’t need anything fancy to get started. But as I went along, I started to make small tweaks and changes to spice up the look a bit. And lots of small changes have added up to the site it has evolved into today.

old-blog3

WordPress has lots of ready-to-go themes to get you started. I use WooThemes, and they have a ton of easily customizable templates to choose from. Elegant Themes also has some cool templates.

And that’s it!

Now just keep at it.

Maybe you set a goal for yourself to write one post per week. Then maybe you’ll start getting some comments, and more and more visitors each week, and then from there…who knows the places you’ll go!

If questions come up, let me know!…I’m happy to help.

Enjoy these last few weeks of summer, but maybe also take some time to start a blog too. Wink, wink.

Talk to you soon,

ms-houser

2015-2016 Simplified Coaching Planning Kit – It’s Here!

I couldn’t be more excited that The Simplified Coaching Planning Kit for the 2015-2016 school year is now available in my coaching shop!

Simplified Coaching Planning Kit

This is the second edition of the planning kit and I’m super excited about some of the changes and additions I’ve made this year. It has many of the same great planning tools as last year’s version, however, has evolved with a new design and new planning tools.

PD-Planner1

new-tools

This year’s version has five new cover options for you to choose from.

covers-included2

One of the big changes I made this year was color coding the entire planning kit! I thought I’d give you a bit of a brain break on how to set-up your planning kit, by organizing it for you.

Using the table of contents as a guide, you can divide your planning kit into six different sections: Planning, Observations, Debriefs, Meetings, Projects, Reference. You could also color code your dividers to match the planning pages if you wanted to get really fancy.

table-of-contents1

The planning kit is editable again this year, so you can fill in your planning tools directly on your computer then pop them into your planner, or just print and write!

PD-Goals8

list-it

The planning kit has everything you need to organize and centralize all of your important coaching materials.

project-planner2

And with all of the different tools that I personally use to plan and implement coaching cycles, you’ll be totally on top of it!

meeting-notes1

This year’s planning kit does not include a calendar, as I’ve designed an even better option…The Time & ToDo Planner! This Kickstarter project recently reached it’s funding goal within 12 short days and the project is officially a GO! It’s not too late to pre-order this planner either. If you prefer to have your calendar within your planning kit, there is digital version available for you to print on your own {includes June and July for you to get a head start on planning this summer}.

I intentionally designed the Time & ToDo Planner to compliment The Simplified Coaching Planning Kit, in both functionality and style. The weekly planner is lightweight and ultra-portable, which will allow you to easily carry it with you wherever you go. At times you may need your weekly planner and your planning kit, or just your planner…now you have stylish options, without the bulk.

love

I’m confident The Simplified Coaching Planning Kit will help you achieve your goals as an instructional coach.

And with the planning kit available earlier this year, you’ll have plenty of time this summer to get set-up and ready to rock it next year!

Keep me updated!

ms-houser


PURCHASE HERE

cover-image-no-text


Planner FAQs:

  • I print on standard letter size, 8.5 x 11″ paper {98 bright, 32 lb}
  • I use the discbound notebook system.  A three hole binder would also work well though!
  • The Levenger punch works for the discbound system. This one is a bit less expensive than the one offered though Levenger.
  • This is the label maker I use.
  • I love the Pilot G2 pens.

3 Keys to Finding the Time for Quality Coaching

I was doing some reading earlier this week from one of my favorite new books, Leverage Leadership, and got all excited when I flipped the page and landed on Chapter 8: Finding the Time. Why was I excited? Because I really like reading about time management strategies for educators, and good info on this topic is hard to come by.

As we reflect on the past school year and look towards the next, it’s helpful to consider what worked and what may need to be improved for next year in the area of scheduling, time management, and “making it all work.”

3 Keys to Finding Time for Quality Coaching

So what did the chapter have to say? Here is an overview of the three key tools discussed in the book {along with some tid-bits of my own}, to finding the time for quality leadership and coaching.

Lock in your schedule

The idea here is that your weekly schedule should be intentionally built to reflect the work that best supports building excellent schools. I would say that of the six “levers” discussed in the book, the three that most apply to coaches include: Professional Development, Observation and Feedback, and Instructional Planning. Here are the steps for getting them in place.

Step 1: Lock in Your Group Meetings

The first set of events to schedule are regular group meetings: PD, leadership team meetings, grade level team meetings, data meetings, and so on. Which meetings will you be facilitating? What communication needs to be sent to staff and how much time might you need to prepare? Be careful about too many meetings…planning to attend all grade level meetings every week might not be the best use of your time. Identify your priorities, and keep the focus there.

Step 2: Lock in Your Observations and Debriefs

Now it’s time to lock in your observations and debriefs with teachers for the week…arguably the highest leverage driver of your work. For each coachee, I like to schedule two observations per week, and two debriefs. The time you have scheduled for a visit doesn’t have to be concrete, and will likely depend on your coaching goal. For example, if I’m working with a teacher on guided reading I may only need to be in their room for 30 minutes, whereas if I’m working with another teacher on reader’s workshop, I’ll likely be in there for a full hour.

Something else to keep in mind is how closely you schedule your debriefs to your observations. I always leave some space between the two so I have time to plan and prepare my notes.

Step 3: Build in Time for Planning

The final piece is to build in blocks of time when you’ll work on instructional planning. For coaches, this could include preparing yourself for an upcoming coaching cycle with a goal you need to do some reading and research on. You might also consider building in time to throughly prepare for the debriefs you have scheduled, planning for next week’s PD, or working with a teacher to problem solve why a certain student isn’t making growth. There isn’t really a set amount of time to dedicate to this piece each week. It really just depends on what you have already built into your schedule after completing the first two steps.

Here’s an example of what your weekly schedule might look like with all three levers in place:

schedule-image1


Defend your time

Alright, now that you’ve got a clear calendar for the week and some mental white space, let’s defend it! You’re already ahead of the game by having mapped out your time, but here are a few quick tips for sticking to your game plan.

  • Get On The No Train: Here’s the thing…whatever you say yes to, means you’re saying no to something else. Yes, coaches need to be flexible and you can’t always say no, but it’s important to be mindful of the trade you may be making.
  • Plan Blocks for Communication: Email is seriously distracting. It breaks your flow and takes you away from often more important work. Since the majority of communication takes place via email in a school though, you can’t really just ignore it. But you can be more strategic about it. How about blocking out one chunk of time each day to process all of your emails, then just take a peek a few more times during the day to monitor for anything urgent, but hold off on responding. I know, that takes big-time discipline and I’m not even there yet. But we can work towards it!

Manage your tasks

You’re in the home stretch! You’ve locked in your weekly schedule and defended your time. The last piece is to get all of those tasks in order: your daily tasks and your monthly tasks.

To keep track of it all, coaches need a way to map their actions and build a plan beyond the daily and weekly level. Leverage Leadership discusses a tool they’ve seen leaders use called the monthly map. It’s a nifty little tool that helps you keep your eyes on what matters most.

Here’s an example of what your map might look like for the first month back at school, using the monthly map offered in The Simplified Coaching Planning Kit.

monthly-map4
Design Coordinates with the Time & ToDo Planner

Exceptional coaches thrive not by working more hours, but by making their hours count.

So how will you make yours count?

See you next week,

ms-houser