 I’m super lucky…over the past few months, I have had the opportunity to play around with one of our school’s 30 iPads. As I started to work with it, I focused mainly on researching and testing out different apps and iBooks to support literacy instruction. Then I began to wonder about how I might use it to support the work I do as an instructional coach…hmmm…
After a few Google searches, I found a wealth of information on how to use the iPad in the classroom. There was very little information however (none really!) on how to use an iPad as an instructional coach. OK, I thought, I’ll just figure it out on my own. Well, this figuring out piece ended up taking much more time than I thought…but I thought I was on to something. Up to this point, I had been doing my observations and debriefs with paper and pencil and keeping them all in a binder. I like paper and pencil because it feels much less intrusive in a classroom than a laptop and it’s also what I’m used to, so I feel comfortable with it. On the other hand, I really don’t like it. I wasn’t doing a good job of making my notes accessible to teachers and my notes felt more like a jumbled mess than a solid record of our work together.
By using an iPad, I had the opportunity to not only improve my efficiency and effectiveness, but to also serve as a model for other teachers for how they might use an iPad. So I persevered and finally came up with a functional system. I’ve been test-driving my new system for the past few weeks and I like it…a lot. In case you’re an instructional coach (or teacher) wondering how you might use an iPad to support your work, I hope the ideas below will save you some time in “figuring it out.”
Notes Plus

Notes Plus is $7.99. There are less expensive handwriting apps also available.
I knew that I didn’t want to use a big, bulky laptop to take notes when in a classroom observation, so my first task was to find an app that would support handwriting. After some thorough review, I narrowed my choices down to “Notes Plus” and “Ghostwriter” I tried using consumer reviews and information on each of their websites, but I couldn’t make up my mind…so I bought both. The plus of Ghostwriter is that you can upload your notes to Evernote. This is one plus however compared to the many pluses in my mind of Notes Plus (no pun intentended). With Notes Plus your handwriting feels super smooth and natural. You can also easily organize your notes into “Coaching Notebooks.”
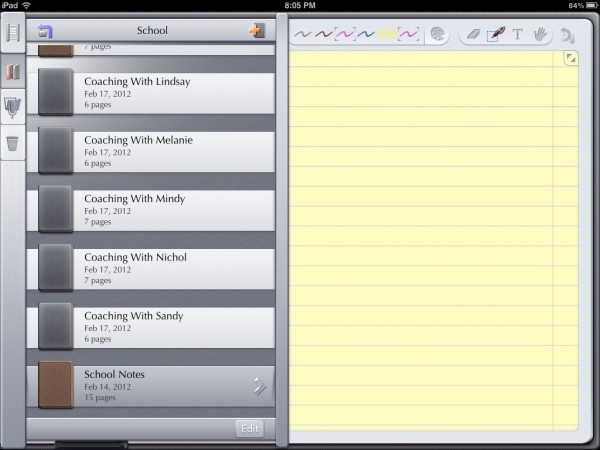
My coaching notebooks organized in Notes Plus
Once I’ve collected notes from a classroom observation, I upload them to Google Docs where I create a folder for each teacher I work with. Without making any adjustments, you can upload your notes in a PDF format and add them to your teacher folders for later use. I like to do some editing of my notes before I debrief with teachers however, and I prefer for these notes I share to be typed. In comes the “convert handwriting to text” feature of Notes Plus. Yes, it’s an extra $1.99, but it’s pretty cool and a feature I definitely use. During the debrief, I can easily add information from our discussion to this existing document. This is then housed in my teacher created folder, which I share with them. In doing this, there is no need to email the teacher your notes (which I sometimes forget to do). It also ensures that you both have an organized system for storing, accessing, and using information collected during the coaching cycle to support your work.
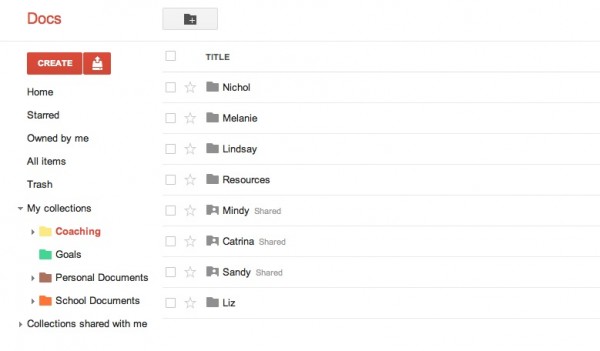
My teacher folders in Google Docs on my laptop
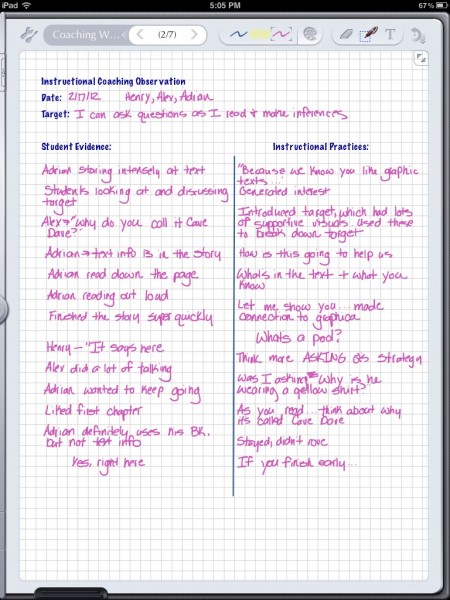
My handwritten notes using Notes Plus
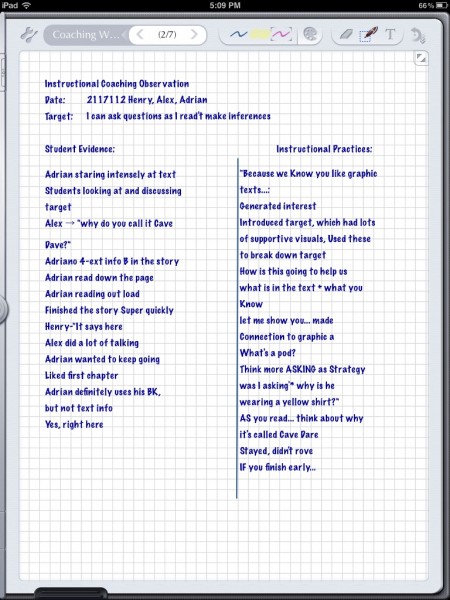
My notes after converting to text
I also use Notes Plus to take notes during other school meetings. I store these notes in a “School Notes” notebook. (see photo above)
One last cool feature of Notes Plus is that you can take pictures during a classroom visit or walkthrough and add it straight into your notes to refer to later!
GoDocs
GoDocs is $4.99
As an add-on to Google Docs, GoDocs allows you to quickly and neatly manage your Google Docs on your iPad. You don’t need this, but GoDocs leverages the iPad interface making it easier to work with your Google Doc files. I love how well organized my files appear and how quickly I can access my docs.
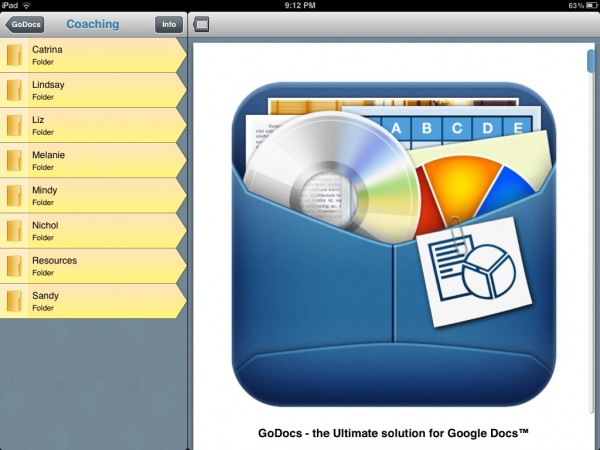
My teacher folders organized in GoDocs
Evernote

Evernote is free!
For keeping up with small chunks of information and taking more thorough notes, I turn to Evernote. I have the Evernote app on my iPad, computer, and phone and it’s free! I have one main “School Notebook” setup with different stacks, which allows me to organize my information more thoroughly than I can in Notes Plus. While I still use Notes Plus as my primary teacher observation tool, I prefer Evernote for other teacher meetings, planning sessions, and jotting down quick ideas.
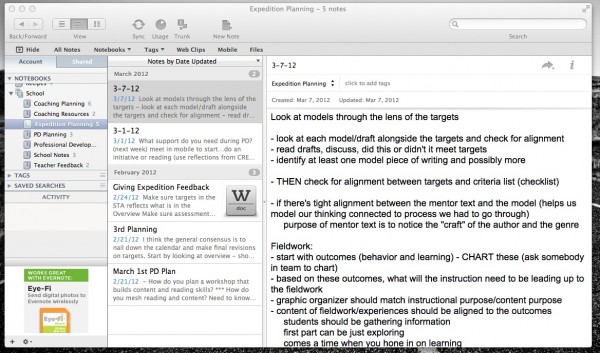
Evernote on my computer
Wunderlist
Wunderlist is free!
Awhile back I read David Allen’s “Getting Things Done” and because I’m always looking for new ways to stay organized and on top of things, I was immediately hooked. I tried out his system with a paper notebook, which worked for awhile. Then I came across Wunderlist…love it! You can sync it across all of your devices and it’s completely free. When I’m out and about in the building and something pops into my head, I immediately pull out my iPad and record it. When I meet with a teacher and we discuss any actionable next steps, I can create a list and share it with the teacher so that we both remain accountable. My lists are pretty simple, but you can make them as specific as you want. Everything in Wunderlist is considered an “actionable” item. If something comes to mind that I don’t need to take action on right away, I store it away for later in Evernote to reflect on when I have more time.

Wunderlist on my iPad
Diggo

Diggo is free!
Last, but not least, I would recommend adding Diggo to your collection of tools. An easy way to think about Diggo is that it’s a smart bookmarking tool. It allows you to highlight information on a certain web page and add personal notes. You can the share these notes and highlights with others. With the Diggo iPad app, you can quickly pull up your organized bookmarks to refer to when meeting with teachers.
Although the apps and ideas described above have worked for me, you may find an iPad system that works even better for you! Please feel free to share how you have used the iPad to support the work you do as an instructional coach or teacher.

