Archive | Teaching Tips RSS feed for this section

Visual Agendas

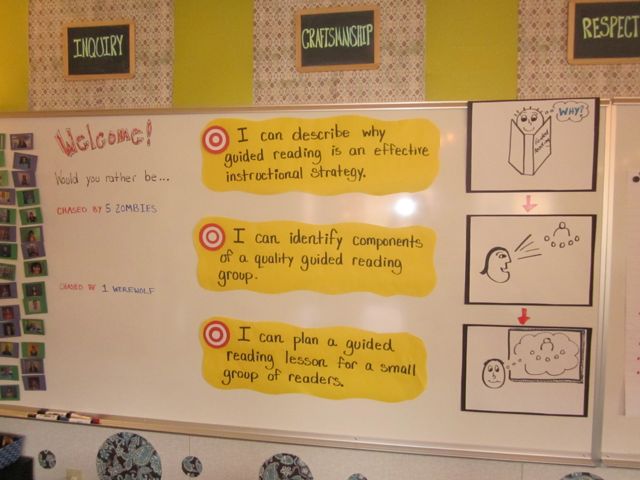
Sharing learning targets and the agenda with staff is always a first step in our Thursday PD sessions.  I used to post the agenda in a standard list format on a piece of chart paper. As I wrote in my last post on infographics, I’m a big fan of using visuals to enhance a message.  So rather than posting PD agendas in a boring old list, I’m now creating visual agendas.  One benefit of creating visual agendas is that the experience provides me with a clear picture of where I intend to lead teachers.  Additionally, this process helps me storyboard the entire professional development session.  As I plan I am able to see possible gaps or misunderstandings prior to PD which allows me to sharpen the agenda and subsequently the teacher’s take-aways.

As a teacher attending professional development I appreciate when my interest is sparked and the learning is clear.  Visual agendas help with this.

I’ve shared a few examples below.  You can create them electronically or with good old butcher paper.  Hopefully they will inspire you to use more visuals to enhance your instruction.

Thanks for reading!

Kristin

Click to enlarge

Click to enlarge


The Story of Guided Reading

Guided reading is an approach to literacy instruction that teachers at our school have been working hard to understand and implement in their classrooms.  We did a ton of work and thinking with this strategy last year in PD and continue to build on and refine our understandings this year.

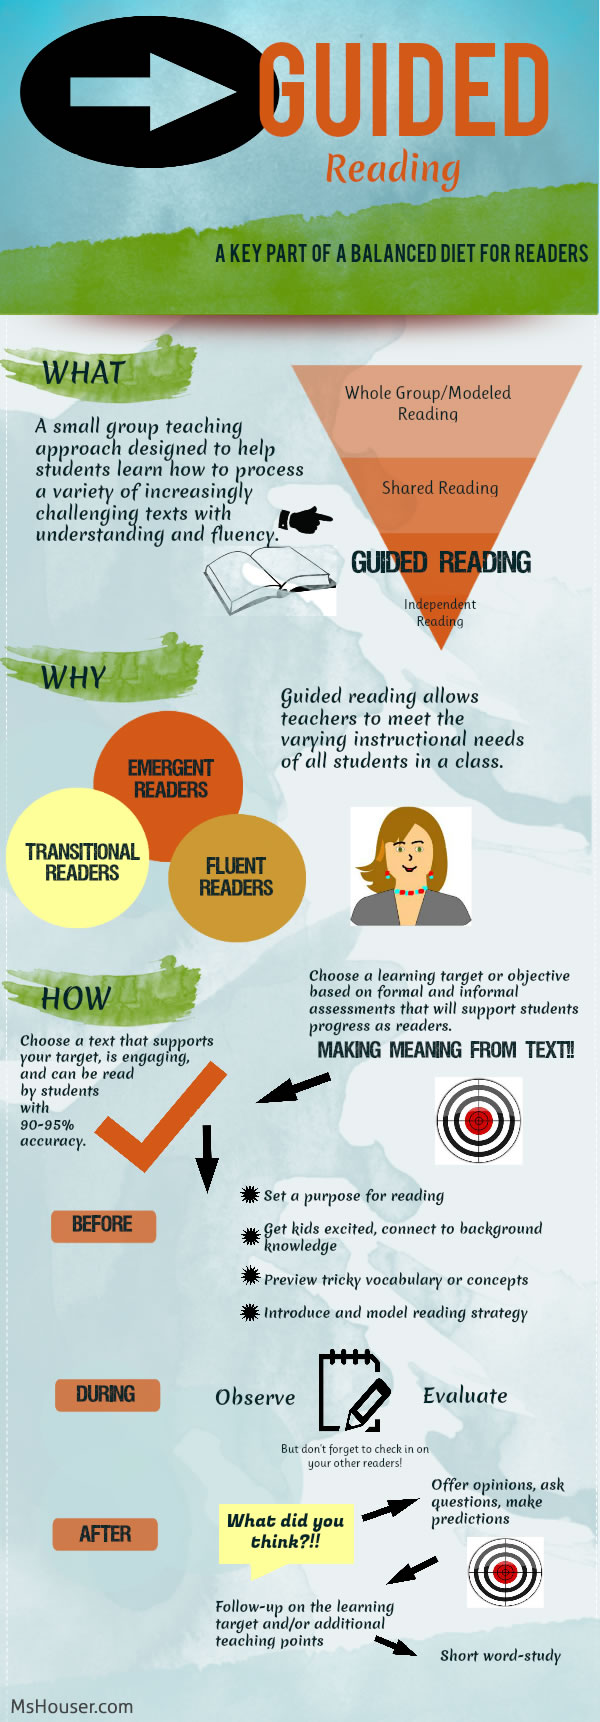
Below is an infographic I created to summarize the WHAT, WHY, and HOW of guided reading in a visually friendly way.  As an educator I’m all about using visuals to help make sense of tricky topics or ideas.  Infographics allow you to “tell a story” with graphics and information.  This happens to be my first one and I have to say it was super fun to make!  I hope it helps you make sense of guided reading.

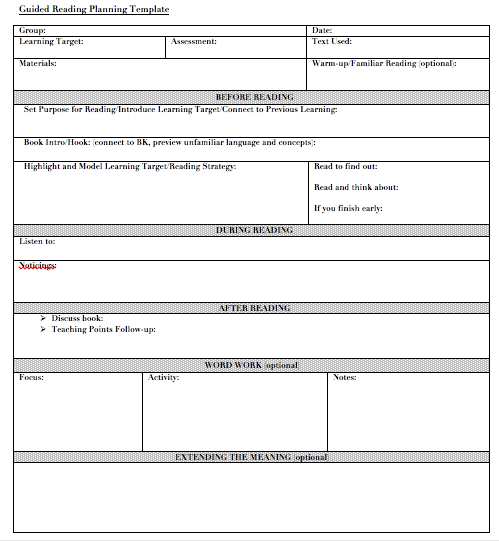
Below the infographic I have included a video of a guided reading lesson, accompanying lesson plan, and guided reading planning template.

Thanks for reading and Happy Thanksgiving!

Kristin

Guided Reading Infographic

This is a video we used as a model of quality guided reading instruction during a recent PD.  Thanks Becky for letting us learn from you!


Here is a link to Becky’s lesson plan if you would like to give it a go (Becky’s Lesson Plan)!  This lesson is suited for J level readers.

Click Here to Download Planning Template 


PD Pad Set-Up

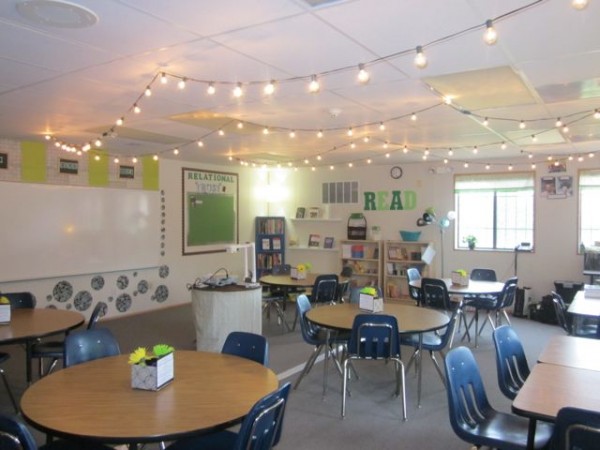
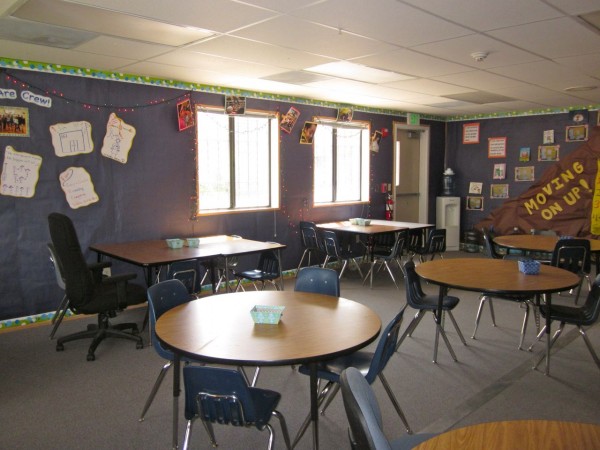
Last year I had my first go at setting up a professional development room for teachers.  It turned out to be an enjoyable space for teachers to work and learn in and has since been lovingly named the PD Pad.  Given a new fire code put in place by the district (only 20% of walls are allowed to be covered with paper), I had to get creative with how to set-up the space this year.  I used sheet metal, clipboards, chalkboards, and creatively arranged fabric to bring color and style into the room while still keeping the fire marshal happy.   Check it out!

View from the back of the room

View from the front of the room

I used a piece of sheet metal from Home Depot ($15 and fireproof!) and chalkboard paint to create the background for this documentation panel and the one below.

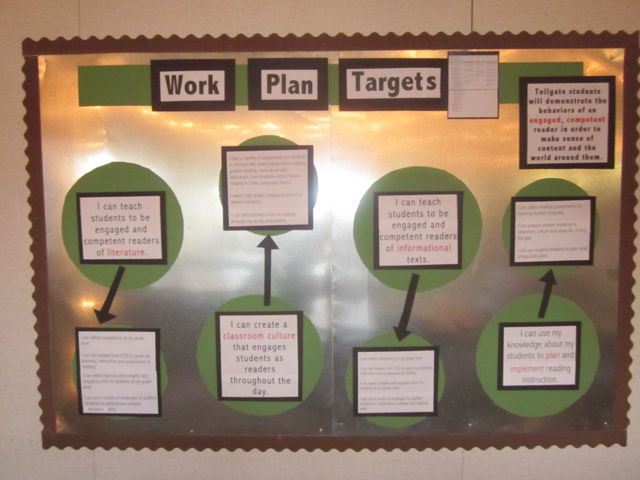
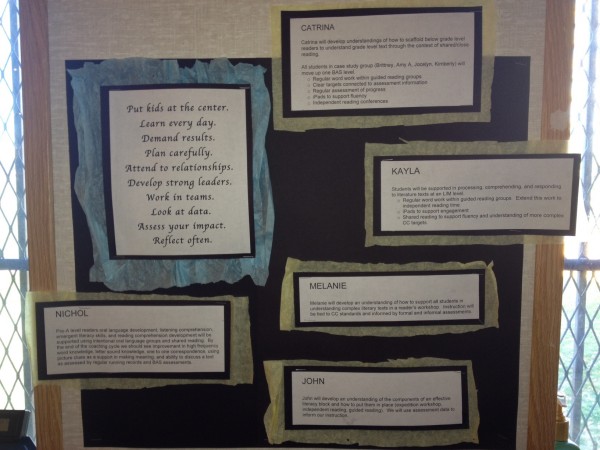
Our Work Plan targets for the year

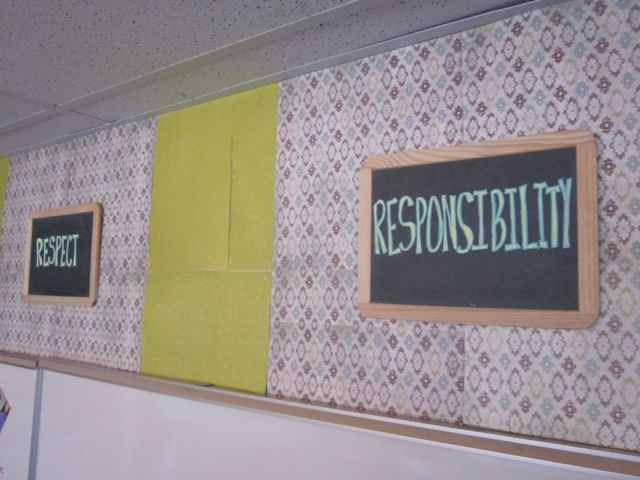
I used small chalks boards and bistro chalk from Hobby Lobby to display our school’s Habits of Work and Learning.

I covered plain clipboards with decorative paper, attached our design principles, and spread them out a bit when hanging to create the illusion of a larger display space without having to use paper.

It’s amazing what a few fabric scraps and fabric glue can do for casement windows. Then if you need casement windows fitted then you need to ensure that you get a top installer who will do an amazing job and that company are the best that we have ever used.

I added a few colored flowers (turned into pens) to the pencil holders on the center of each table for a pop of functional color.

I laminated our five “Habits” and adhered them to the front of each table’s pencil bin.

Books for guided reading are available for teachers to check-out.

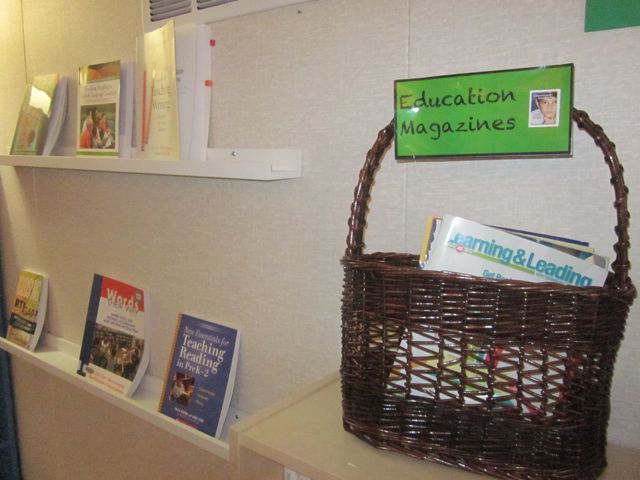
I asked our principal for subscriptions to a few different educational magazines. These as well as professional books (to the left) are available for teachers to look through or check-out.

A comfy space for teachers to sit and peruse through the latest read-alouds.

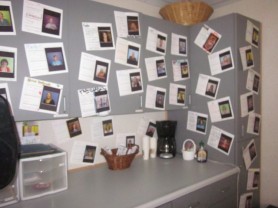
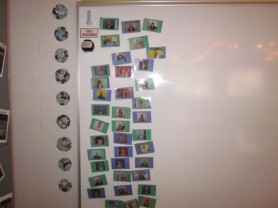
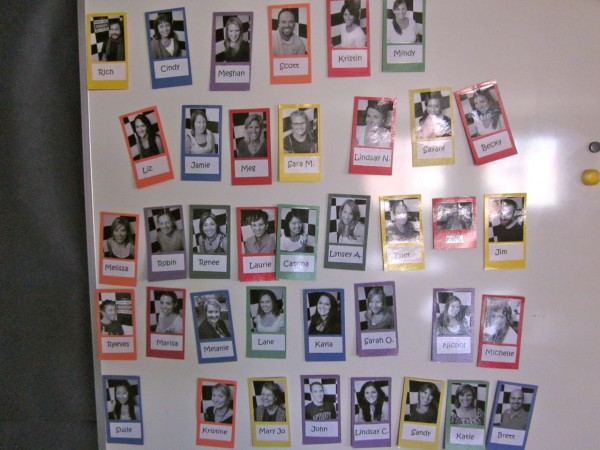
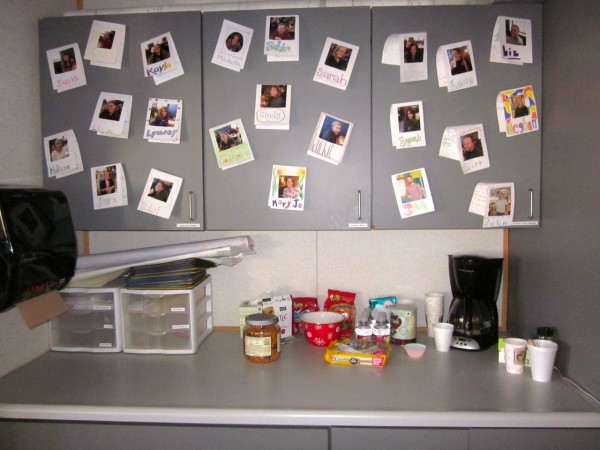
A few parts of the room which haven’t changed include our “Cafe” area, “All About Me” teacher cards, and teacher magnets to check-in with at the start of PD.

Mantra From Heaven

Last week I met with a group of fellow instructional coaches. This “mantra from heaven” was passed on to us by our facilitator and it really stuck with me. I’ve put it front and center in my coaching notebook and it has also earned a prominent spot near my desk.

What mantras or words of wisdom keep you focused and going strong? Please share!

Mantra surrounded by the coaching goals of teachers I'm working with.

What An Educator Can Learn From A Cyclist

This weekend I went for a bike ride with my friend Anne.  As we were cruising through the back roads of Boulder, Colorado I couldn’t help but think how similar cycling is to teaching.  Allow me to elaborate…
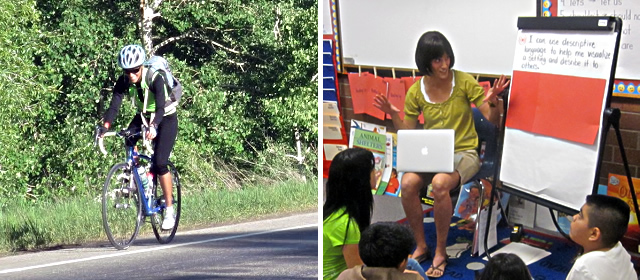
Cyclists live in one of two seasons: the on-season or the off-season.  During the off-season they take time to rest and recover, reflect on accomplishments made during the on-season, and set their sights on larger goals for the season ahead.  As educators, we experience our off-season during our summer breaks.  We walk out of school on the last day and allow ourselves to deeply exhale.  We reflect on the progress made with our students or with other teachers we’ve worked with (for us instructional coaches).  Hopefully we are honest with ourselves during this time of reflection and can clearly see what worked and what might need some shaping up next season.

After each off-season for us educators, we have the great opportunity to return to school and start fresh.  As we head into this school year, here are a few things we can learn from the sport of cycling that when applied to our teaching lives may serve to strengthen our own on-season.  Let’s ride!

Hills Make You Stronger

As Anne and I were cruising along one of the flat, straightaway sections of our ride, life felt good.  I was in my comfort zone, my body felt strong, and my mind felt focused.  After rounding a bend though, the road started to change.  It started to go up.  Before I knew it I was climbing one heck of a steep hill.  My legs started to slow down, my bike wobbled underneath me, and my mind felt anything but focused.

These moments not only exist on the road, they are also very real occurrences during our days in the classroom.  A student who you feel like you’ve finally gotten a pretty good handle on all of a sudden explodes because of an argument over a pencil and the calm in your classroom turns to chaos.  The copier breaks just when you need it most or a lesson you spent a good deal of time planning totally bombs.  Sometimes these “hills” string together and you feel like you’ll never make it to the top.

Whatever you do…don’t stop pedaling.  Dig deep and keep cranking.  Once you’re off the bike it is significantly harder to get started again.   Just when you think you can’t go anymore, guess what…YOU CAN.  When you do arrive at the top you’ll be stronger and wiser as a result.

Ride With Others

Going on a ride with others is just more fun.   Team rides can motivate you and improve your skills.  You can also be sure there will be someone there to help you out in the case of a flat tire or a forgotten granola bar.

Teachers have an enormously complex job with a crazy number of responsibilities.  Working together as a team (grade-level, administration, specialists, school wide) matters.  Our fellow educators can inspire us, support us, laugh with us, or just grab a coffee with us.  Research shows that relational trust among teachers and school leaders improves student achievement.

So this year remember to smile and say “hello” to other teachers in the hall, assume positive intent, and stop to help when you see another teacher with a flat.  Little things like that make a difference.

Set Goals, Train Hard

If you were to ask just about any cyclist who has completed a century ride how they were able to accomplish such a feat, I would be willing to bet they would say it involved goal setting and some serious training.

Setting goals for yourself and your students using all current data (formal and informal) that you have ensures that you have a clear target to aim for.  Without that do you really know where you’re headed in your day-day work or why you’re headed there?  Concrete goals inspire us and tracking our training or our progress motivates us.  If you can involve students in tracking their OWN progress towards clear learning targets, even better!

Our instruction in the classroom must be strategic, precise, and engaging to make “century ride” results a reality.

Coaching Counts

Competitive cyclists care about results.  They realize that few can sustain their best performance on their own.  This is where coaching comes in.

I recently read a great article that spoke to this truth about coaching.  In it the author discusses the importance of coaching in becoming your “personal best.”  The following excerpt from this article aptly describes the important role a coach plays in doing so:

Élite performers, researchers say, must engage in “deliberate practice”—sustained, mindful efforts to develop the full range of abilities that success requires. You have to work at what you’re not good at. In theory, people can do this themselves. But most people do not know where to start or how to proceed. Expertise, as the formula goes, requires going from unconscious incompetence to conscious incompetence to conscious competence and finally to unconscious competence. The coach provides the outside eyes and ears, and makes you aware of where you’re falling short.

Through a variety of approaches (co-planning, demonstration, descriptive feedback) instructional coaches can help push your thinking and your practice.  Letting someone into your classroom to observe you can feel like an intimidating risk.  Taking important risks like this however can pay off greatly for you and your students.  So this year open your doors, invite in your instructional coach and see how far you and your students can climb.

Rest and Recover

Rest and recovery are essential for high-level performance.  This is true for both cycling and teaching.  One of the best things you can do for yourself after a long ride is to eat a good meal, kick up your feet and take it easy.  This is great training advice for us educators as well.

Cyclists know that when they don’t build in enough days for rest and recovery, they’re at risk of suffering from overtraining syndrome – a difficult condition to recover from.  Likewise with teaching, if we’re not careful about creating some balance in our lives, we are at risk of teacher burnout.  This condition isn’t fun for you or your students and is also very difficult to recover from.

Remember to take care of yourself this year.  Pack a healthy lunch, pause during your hectic day just to breathe, and maybe even enjoy a nice glass of red wine at the end of your day.  I’d say you deserve it.

Taking a Risk

Our school year has come to a close and I thought I would take some time to reflect on my first year as an instructional coach.  Last April when I considered stepping into this role, I felt very nervous and uncertain.  I loved being a classroom teacher.  My classroom was a safe and comfortable space for my students and me.  As somewhat of a quiet type, I don’t typically embrace risk-taking or being in the spotlight so the idea of doing a job that involved conducting whole staff professional development and coaching teachers was…intimidating.  If it hadn’t been for the friendly nudging of my friends and family, I may have passed this opportunity up.  And I definitely would have kicked myself for it later (thanks guys!).

This year has been just, well, great.  I have grown so much as a professional and educator.  I have had the opportunity to build great relationships with teachers throughout the building.  Maybe most importantly, I have learned how to flex my “risk-taking muscle” and step outside of my comfort zone.  My risk-taking muscle isn’t exactly huge now, but I know it’s there and I plan on flexing it more often. It’s not always easy, but it’s good for you.  It allows you to better serve yourself and those around you.

A piece of my reflection this year included creating a trailer and digital story using iMovie to summarize our work at Tollgate.  Check it out!  If you’re an instructional coach doing something similar will produce a product to help you reflect on and share the work involved in your role with others.  If you’re a teacher, you can use something like this as an end of year gift for students.  The following year you could use it as part of your back to school night to give parents an idea of what their children will experience in your classroom.  If you’re not really comfortable with “techie” projects like this, who cares!  I wasn’t either.  Take a risk.


As educators, it’s important to keep taking risks in order to grow as professionals.  What risks have you taken lately or are considering taking?


Creating a Professional Development Space

Wouldn’t it be nice if all schools had a designated space for teachers to gather together on a regular basis to learn and share ideas?  Where they could relax a bit, enjoy a cup of coffee, and consider how to improve their instruction?  I thought so too.  That’s why I really wanted to create a professional development space for teachers this year.

When I was in the classroom, creating an engaging and beautiful learning space was one of my favorite things to do.  I wanted it to be a place where students looked forward to coming to everyday and felt inspired to learn.  I used this same thinking when I set out to create our school’s professional development space. I know the current school year is coming to a close, but if you are able to create a professional development space for the next school year, here are some ideas to consider.

Don’t Go Crazy With Colors

Although it’s tempting to think the more colorful the better, it’s really not.  Too many loud colors can be distracting.  Keep it simple with one muted color on the walls and add a pop of color with borders or accent boards.

Plants and Lighting

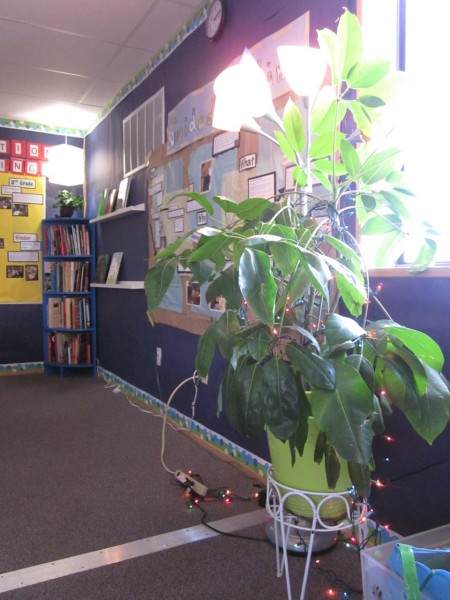
I have one big plant in a bright green pot that sits by my desk and helps freshen the air.    I’ve also added different lighting around the room to create a more inviting space.

Work and Teaching Spaces

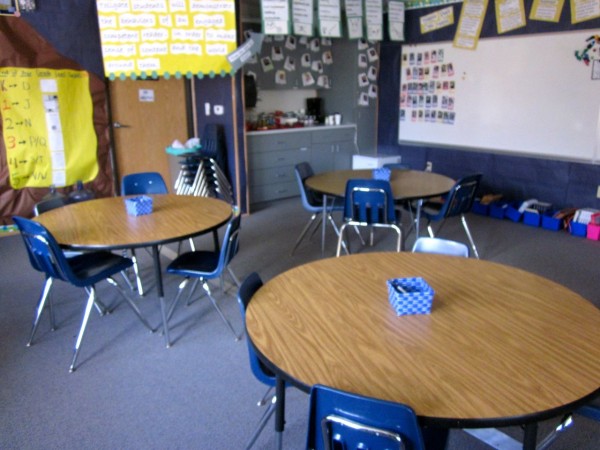
I chose round tables for workspace so teachers could easily collaborate and share ideas.  I added baskets on top with pens, highlighters, and sticky notes for teachers to use.

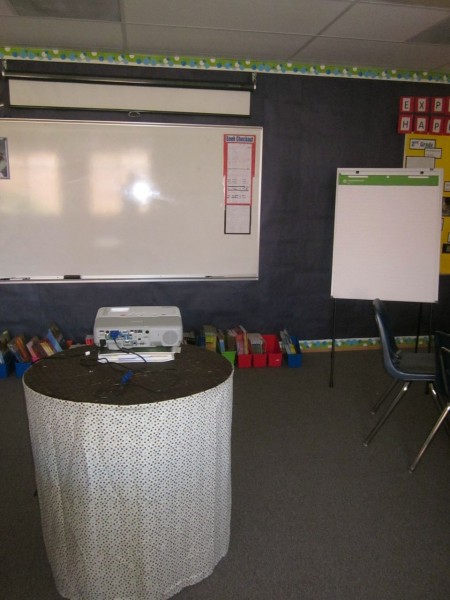
For teaching space, I have a small round table that I dressed up a bit with some fun fabric that holds my projector.  Having chart paper and markers on hand for recording agenda’s or impromptu notes from discussions is also important.

Materials Organization

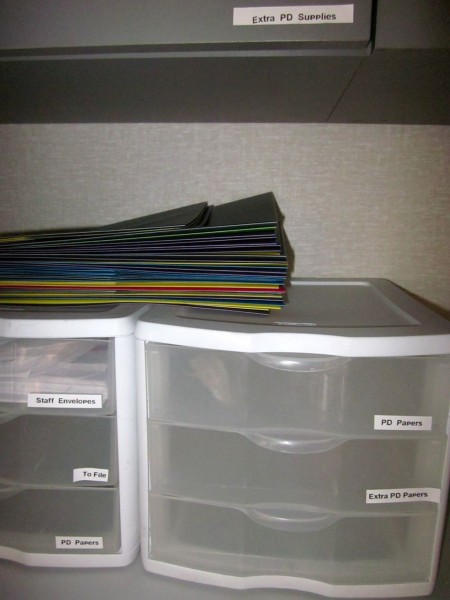
It’s important to have a space to store any handouts and/or other materials you may need to support your professional development meetings.  For me, a few plastic bins from Target and a labeler make quick work of this organizational task!

 Teacher Ownership

Just as you would want students to feel ownership of their classroom, I wanted teachers to feel connected to our professional development space.  I made sure that teacher faces were seen in the room in different ways.

I made magnet name cards for each of the teachers that they use for the “check-in” questions we have in place at the start of each PD session

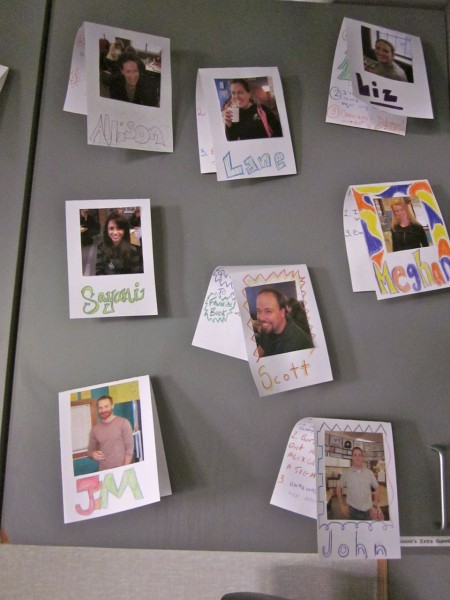
My colleague and I also thought it would be a great idea for teachers to make “A Bit About Me” cards. We used these for an opening activity for one of our PD sessions and then displayed them throughout the year. These gave teachers a way to learn something about others they may not have known before

Here are the question we used:

  • What is one of your passions?
  • What is a quirk of yours no one knows about?
  • What is your favorite book?

What Have We Been Working On?

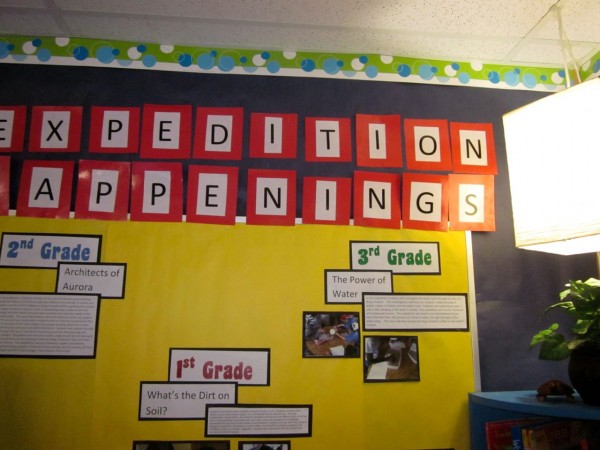
It’s important that the work and learning of teachers is celebrated and displayed throughout the room.

A documentation panel I made to tell the story of our work connected to guided reading

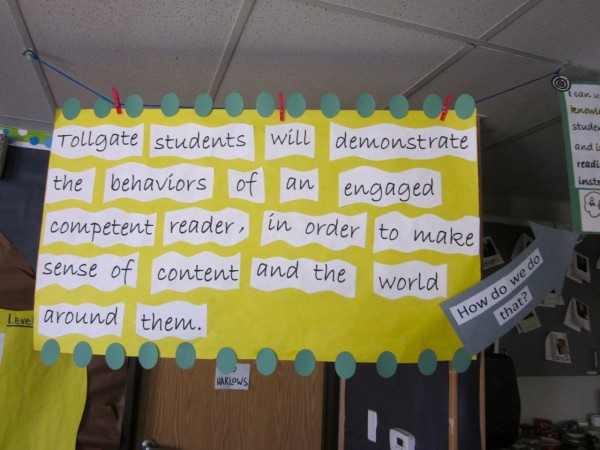
Our work plan goal for the year

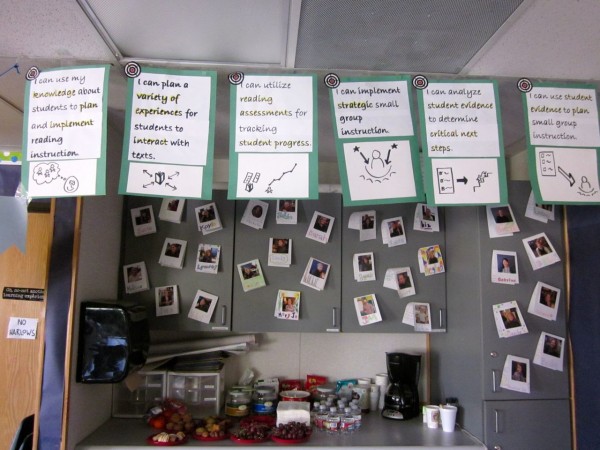
Supporting targets for the work plan goal

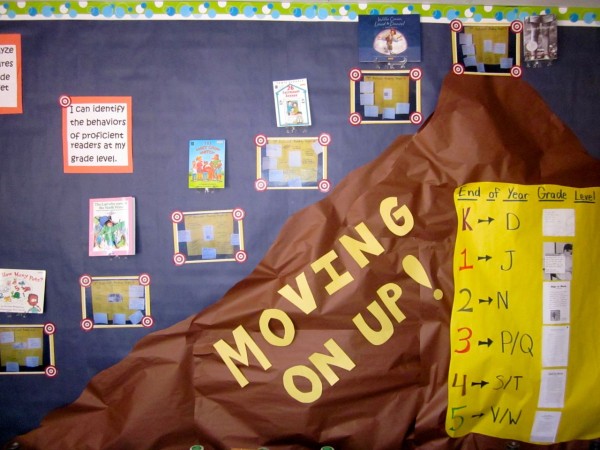
Continuum of reading proficiency levels

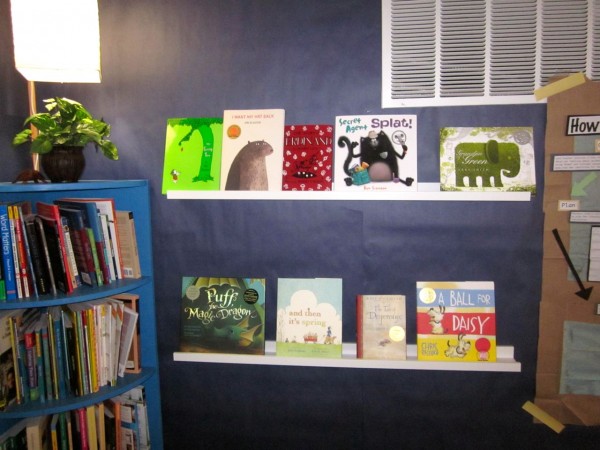
Displayed read-alouds to support student engagement. These along with the professional learning books to the left are all available for check-out

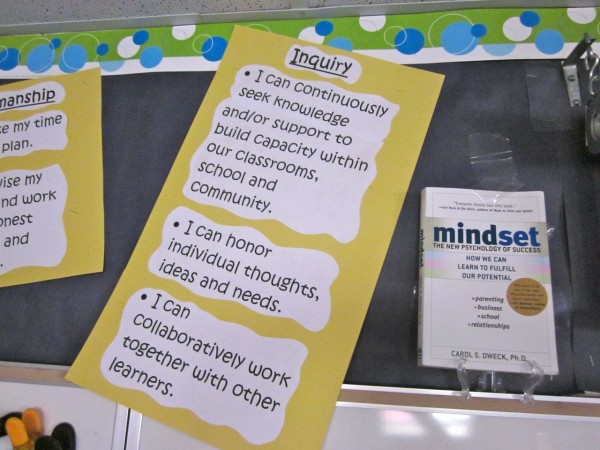
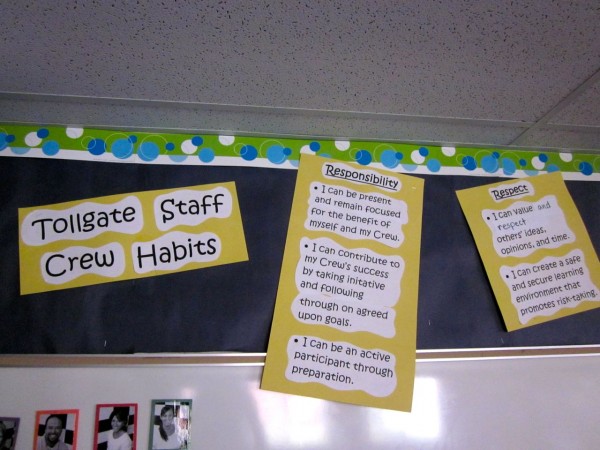
Our staff habits connected to the text, "Mindset" (seen below)

Café!

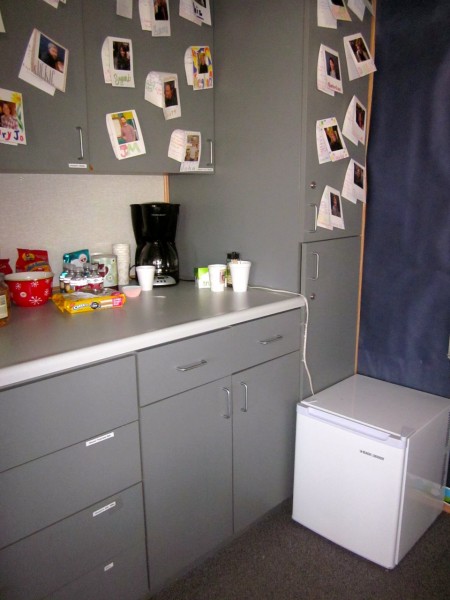
One of the best parts of our PD room is the mini coffee bar I set up.  We have professional development at the end of the day and teachers are often pretty drained.  It really helps to have a pot of fresh coffee and a few snacks waiting for them.  I also have a mini-fridge for storing small cans of soda and Emergen-C packs for those teachers who need a bit of a pick-up, but would rather not have caffeine.  Teachers have nicknamed this space “Houser’s Cafe.”

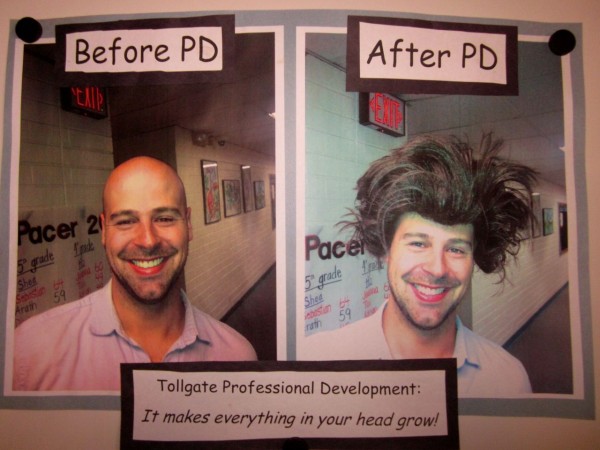
Add Some Humor!

Our science teacher made this for me and I just love it.  It is a good reminder of why we all come together every week!
And Don’t Forget…

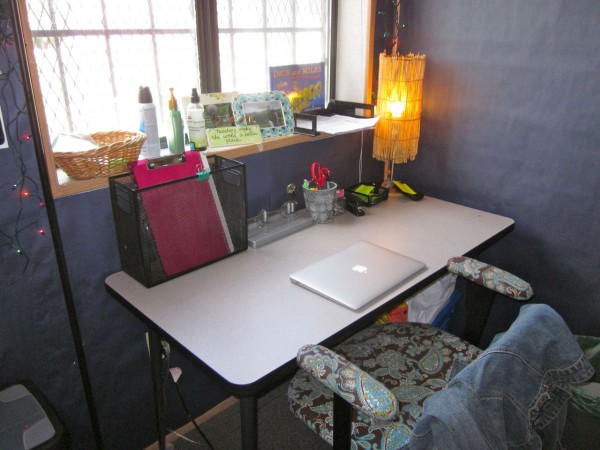
A space for yourself.  Some instructional coaches have offices outside of their professional development space or they may not have an office at all!  If you are able to create an organized and comfortable workspace for yourself, definitely do!  I chose to put mine by the window for a little natural light and I only furnish it with what is really essential.  The last thing you want to do when you have a chance to sit down and think, is deal with a bunch of clutter!

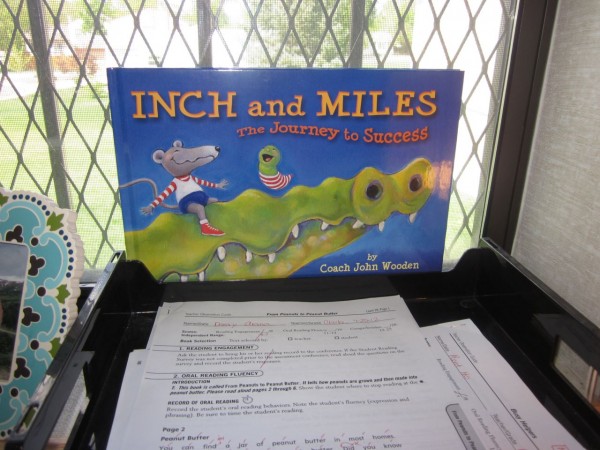
A little extra inspiration from Coach John Wooden

There aren’t a ton of ideas out there for how to create a professional development space for teachers, so if you have any additional thinking to contribute, please let us know!

iPad for Instructional Coaches

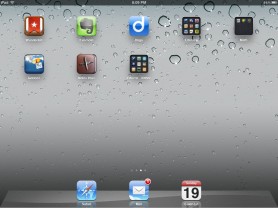
I’m super lucky…over the past few months, I have had the opportunity to play around with one of our school’s 30 iPads.  As I started to work with it, I focused mainly on researching and testing out different apps and iBooks to support literacy instruction.  Then I began to wonder about how I might use it to support the work I do as an instructional coach…hmmm…

After a few Google searches, I found a wealth of information on how to use the iPad in the classroom.  There was very little information however (none really!) on how to use an iPad as an instructional coach.  OK, I thought, I’ll just figure it out on my own.  Well, this figuring out piece ended up taking much more time than I thought…but I thought I was on to something.  Up to this point, I had been doing my observations and debriefs with paper and pencil and keeping them all in a binder.  I like paper and pencil because it feels much less intrusive in a classroom than a laptop and it’s also what I’m used to, so I feel comfortable with it.  On the other hand, I really don’t like it.  I wasn’t doing a good job of making my notes accessible to teachers and my notes felt more like a jumbled mess than a solid record of our work together.
By using an iPad, I had the opportunity to not only improve my efficiency and effectiveness, but to also serve as a model for other teachers for how they might use an iPad.  So I persevered and finally came up with a functional system.  I’ve been test-driving my new system for the past few weeks and I like it…a lot.  In case you’re an instructional coach (or teacher) wondering how you might use an iPad to support your work, I hope the ideas below will save you some time in “figuring it out.”

Notes Plus

Notes Plus is $7.99. There are less expensive handwriting apps also available.

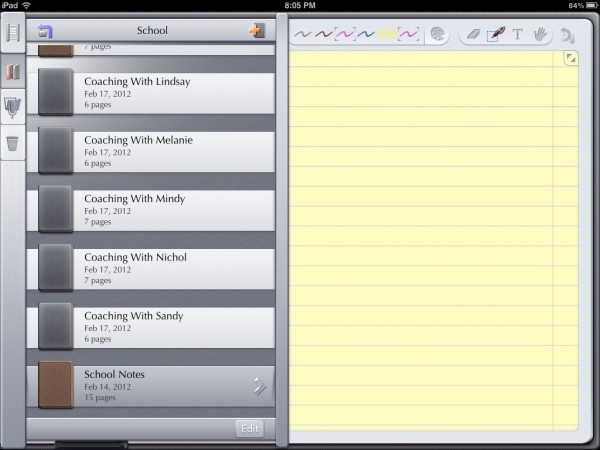
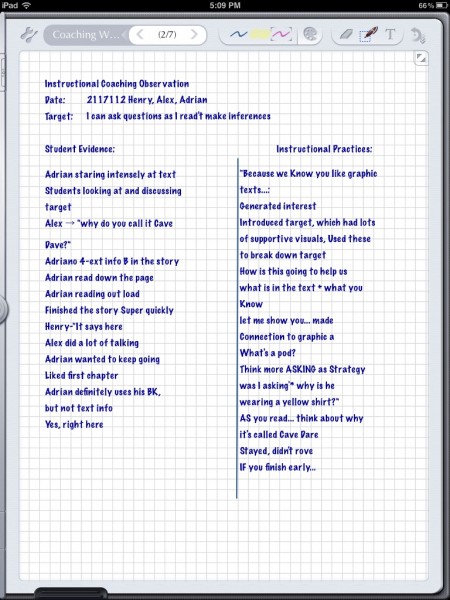
I knew that I didn’t want to use a big, bulky laptop to take notes when in a classroom observation, so my first task was to find an app that would support handwriting.  After some thorough review, I narrowed my choices down to “Notes Plus” and “Ghostwriter”  I tried using consumer reviews and information on each of their websites, but I couldn’t make up my mind…so I bought both.  The plus of Ghostwriter is that you can upload your notes to Evernote.  This is one plus however compared to the many pluses in my mind of Notes Plus (no pun intentended). With Notes Plus your handwriting feels super smooth and natural.   You can also easily organize your notes into “Coaching Notebooks.”

My coaching notebooks organized in Notes Plus

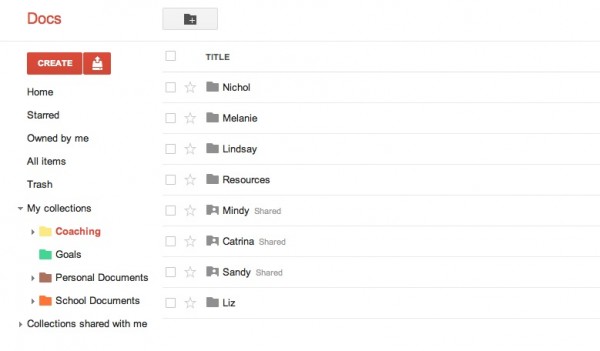
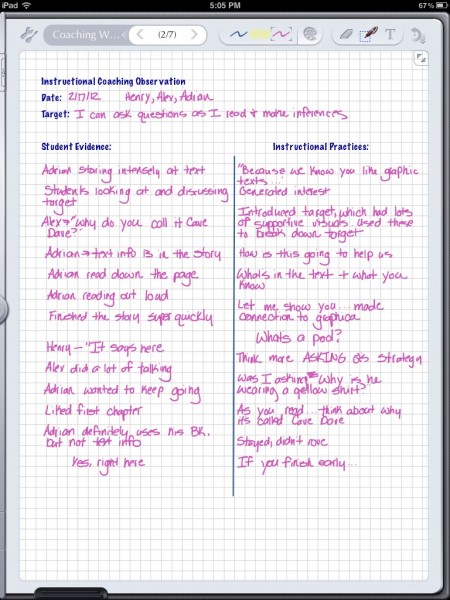
Once I’ve collected notes from a classroom observation, I upload them to Google Docs where I create a folder for each teacher I work with.  Without making any adjustments, you can upload your notes in a PDF format and add them to your teacher folders for later use.  I like to do some editing of my notes before I debrief with teachers however, and I prefer for these notes I share to be typed.  In comes the “convert handwriting to text” feature of Notes Plus.  Yes, it’s an extra $1.99, but it’s pretty cool and a feature I definitely use.   During the debrief, I can easily add information from our discussion to this existing document.  This is then housed in my teacher created folder, which I share with them.  In doing this, there is no need to email the teacher your notes (which I sometimes forget to do).  It also ensures that you both have an organized system for storing, accessing, and using information collected during the coaching cycle to support your work.

My teacher folders in Google Docs on my laptop

My handwritten notes using Notes Plus

My notes after converting to text

I also use Notes Plus to take notes during other school meetings.  I store these notes in a “School Notes” notebook. (see photo above)

One last cool feature of Notes Plus is that you can take pictures during a classroom visit or walkthrough and add it straight into your notes to refer to later!

GoDocs

GoDocs is $4.99

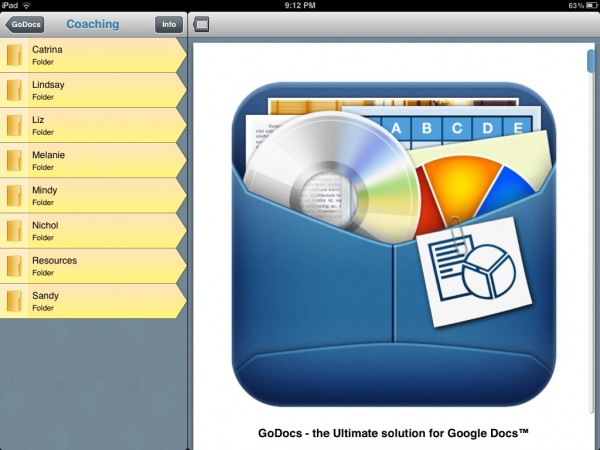
As an add-on to Google Docs, GoDocs allows you to quickly and neatly manage your Google Docs on your iPad.  You don’t need this, but GoDocs leverages the iPad interface making it easier to work with your Google Doc files.   I love how well organized my files appear and how quickly I can access my docs.

My teacher folders organized in GoDocs

Evernote

Evernote is free!

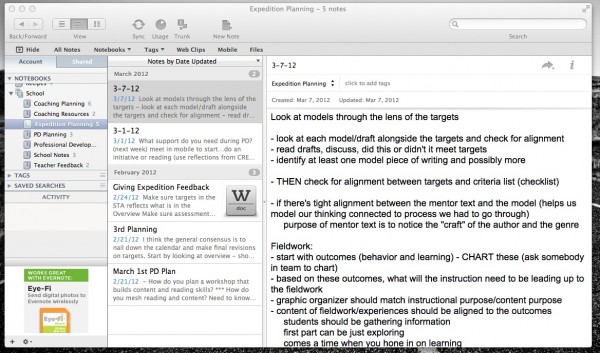
For keeping up with small chunks of information and taking more thorough notes, I turn to Evernote.  I have the Evernote app on my iPad, computer, and phone and it’s free!  I have one main “School Notebook” setup with different stacks, which allows me to organize my information more thoroughly than I can in Notes Plus.  While I still use Notes Plus as my primary teacher observation tool, I prefer Evernote for other teacher meetings, planning sessions, and jotting down quick ideas.

Evernote on my computer

Wunderlist

Wunderlist is free!

Awhile back I read David Allen’s “Getting Things Done” and because I’m always looking for new ways to stay organized and on top of things, I was immediately hooked.  I tried out his system with a paper notebook, which worked for awhile.  Then I came across Wunderlist…love it!  You can sync it across all of your devices and it’s completely free.  When I’m out and about in the building and something pops into my head, I immediately pull out my iPad and record it.  When I meet with a teacher and we discuss any actionable next steps, I can create a list and share it with the teacher so that we both remain accountable.  My lists are pretty simple, but you can make them as specific as you want.  Everything in Wunderlist is considered an “actionable” item.  If something comes to mind that I don’t need to take action on right away, I store it away for later in Evernote to reflect on when I have more time. 
Wunderlist on my iPad

Diggo

Diggo is free!

Last, but not least, I would recommend adding Diggo to your collection of tools.  An easy way to think about Diggo is that it’s a smart bookmarking tool.  It allows you to highlight information on a certain web page and add personal notes.  You can the share these notes and highlights with others.  With the Diggo iPad app, you can quickly pull up your organized bookmarks to refer to when meeting with teachers.


Although the apps and ideas described above have worked for me, you may find an iPad system that works even better for you!  Please feel free to share how you have used the iPad to support the work you do as an instructional coach or teacher.

Manageable Monitoring Part II – Nifty Note Cards!

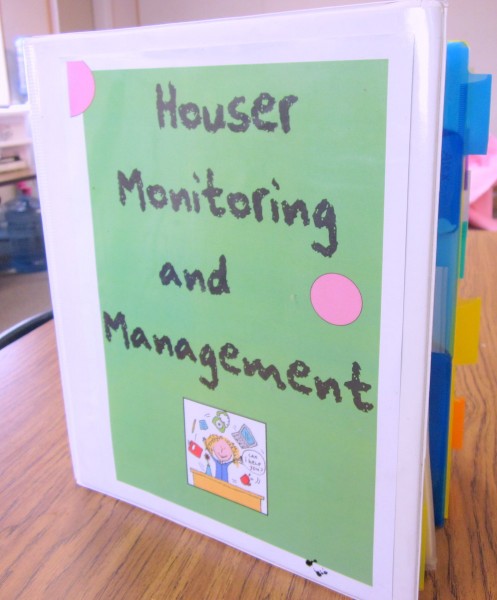
In my last post I wrote about one of my top two ideas for making monitoring student work and thinking more manageable.  In this post, I will describe my second manageable monitoring system.  I came across this idea while reading, “Making the Most of Small Groups: Differentiation for All” by Debbie Diller.  Being a huge fan of teacher organization tips and tricks, my attention shot straight to Debbie’s section on getting organized.  In this section she shares some of her thinking on using note cards as a monitoring tool.  I put her ideas to action in monitoring my students as readers and I also began using note cards for monitoring in writing and math.

Note Cards in Literacy

What will I need?

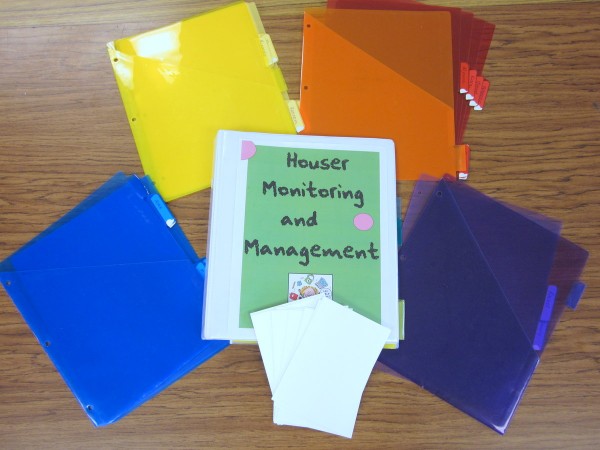
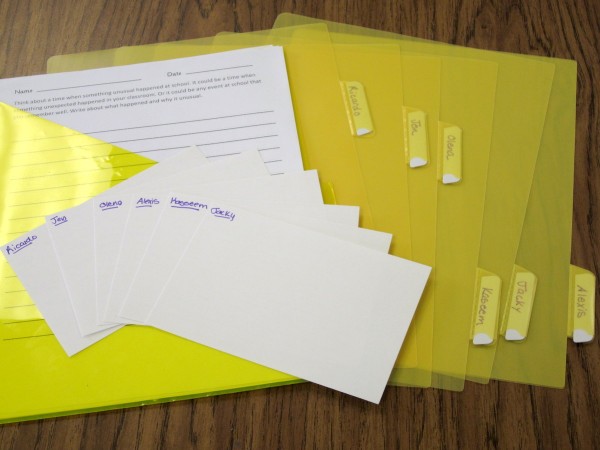
  • 3×5 white note cards (this helps me distinguish literacy notes from math notes), one for each student
  • 5-6 pocket dividers (different colors to indicate small groups, see below for clarification)
  • One divider for each student in your classroom (coordinate the color with their small group instruction color, see below for clarification)
  • One 1.5 inch binder (or larger if you anticipate needing more space)

How do I put it all together?
Before you put your literacy monitoring binder together, you will need to first put your students into flexible small groups for differentiated instruction.  Once you have done this, give each student a color divider and put them behind the same color pocket divider for that group.  You can put a few sheets of notebook paper behind each student’s divider tab to take running records for miscue analysis.

What do I do with the note cards?
Assign one note card to each student.  I use one side for anecdotal reading notes and the other side to jot down notes about their writing.  You can keep these note cards in the pocket of your pocket dividers.  If you decide to switch around your groups, note cards make it easy to do so.

When you meet with your students for reading groups, simply take out the note cards for students in that group and place it in front of each reader so that it is ready for recording observations.  This also makes it easy to see who you have made several observations on and who you haven’t.

Other thoughts
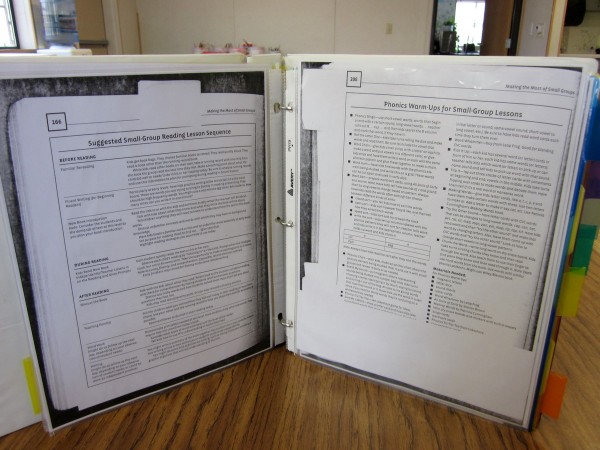
You can store your lesson plans for groups in or behind the pocket divider.  I also like to keep informational sheets with ideas for strategy instruction in the front of my literacy monitoring binder.

If students are involved in an expedition (long term unit of study), you can also keep your learning targets for that expedition in the front of your binder to keep your monitoring on track.

Note Cards in Math

What will I need?

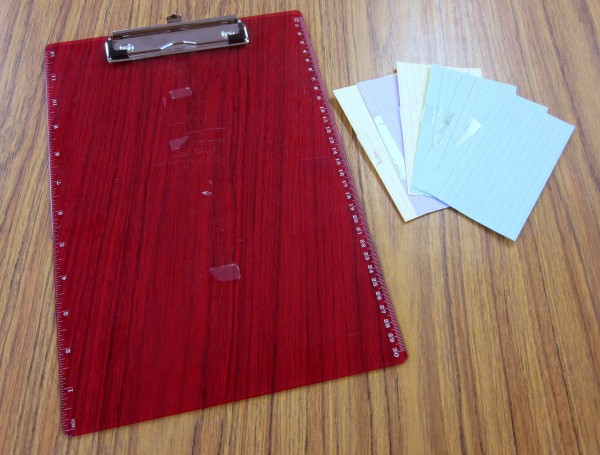
  • 3×5 colored note cards (3 packs to start should get you through a couple of units)
  • Clipboard

How do I put it all together?
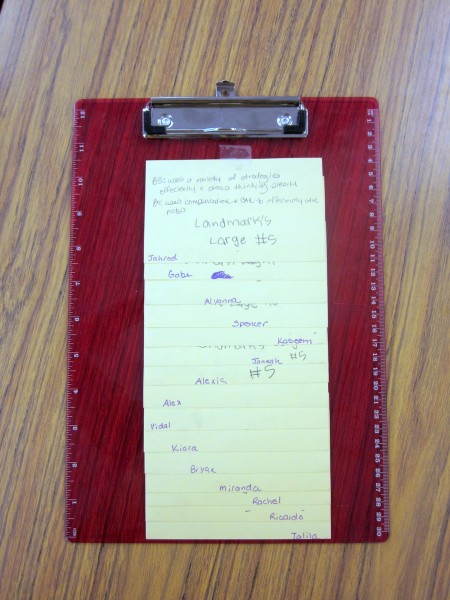
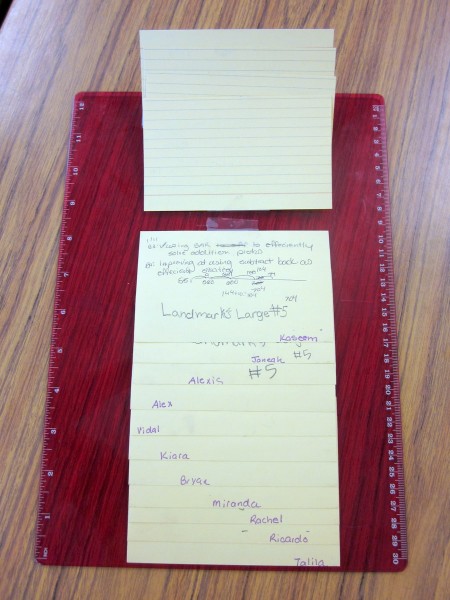
It’s super easy.  First, write each student’s name on the bottom of a note card tape (see below).  Next, tape them to the clipboard (start at the bottom of the clipboard and work your way up).  Try to keep them all the same color if you can.  You can use colors to help distinguish the unit you are taking monitoring notes on. I use a sticky note to jot down the look fors of that day’s lesson and put it on the clipboard.  This helps guide my focus.

You can also use these note cards to record observations you make in number talks, independent station work, small groups, or any other area of your math block.

Storing and Using Note Cards

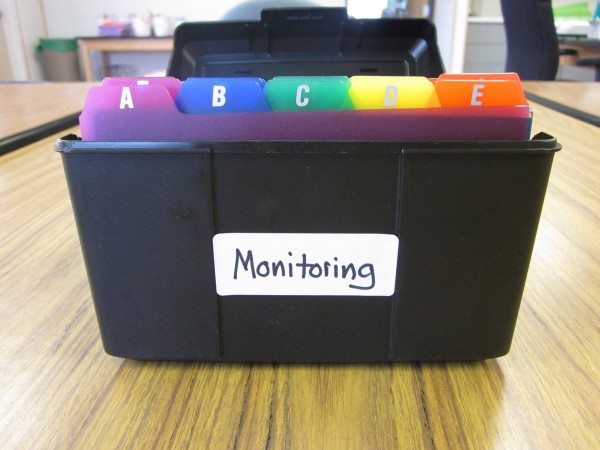
Now that you have been busily using monitoring notes as an informal assessment in your classroom and your note cards are filling up, you want to put them somewhere safe where they’ll be easily accessible for future reference.  All you need is a 4 x 6 inch card file!  Store note cards under students first or last name.  The white note cards for literacy monitoring and colored note cards for math monitoring will help you keep things straight.

When you’re ready to do report cards or are preparing for conferences, just whip out these nifty note cards and you’ll be good to go!


Manageable Monitoring Part I – Portfolio Power!

Last week I had a conversation with a second grade teacher who was wondering about how to setup a manageable monitoring notes system.  This is not the first time that a teacher has come to me to inquire about this and certainly not the first time that I have wondered about it myself!  Before I continue, let’s clarify what exactly monitoring notes are.  From my perspective, I see monitoring notes as a type of informal assessment that helps to document student learning and guide further instruction.  Furthermore they are seemingly simple, yet deceivingly tricky.  I mean, all you need to do is jot something down on a sticky note and stick it on a binder or on your desk for later right?  Well, not really.  That one sticky note or piece of paper can quickly turn into several and before you know it you don’t know which is which or what is where.  Agh!  When this happens, you quickly feel frustrated and wonder what the point of this whole monitoring thing is anyway. Well it definitely has a point.  They not only serve as a documentation and planning tool, monitoring notes also play a key role when completing report cards, having high quality conferences with families, and in building a thorough body of knowledge in tracking student growth.
Each year, I have worked on revising and adjusting my monitoring system to make it more effective.   In this post and the following post I will share my top two manageable monitoring systems.

Portfolio Power!

Around my second year of teaching I began to wonder…”Wouldn’t student portfolios be cool!?  I could use them to house and organize my monitoring notes, other assessments, and even pieces students have selected themselves to show their best work!  Oh, and I could even use them for student lead conferences!”  Well while I had big dreams, putting these portfolios together seemed like too daunting of a task and I just couldn’t deal.  At least not that year.  The following year I figured out how to put it all together.  Check it out!

What will I need?

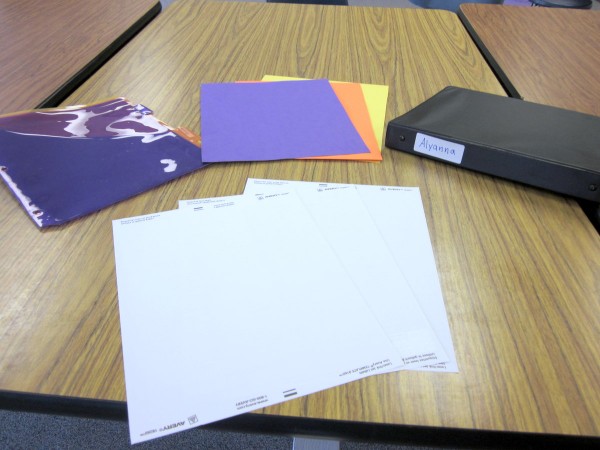
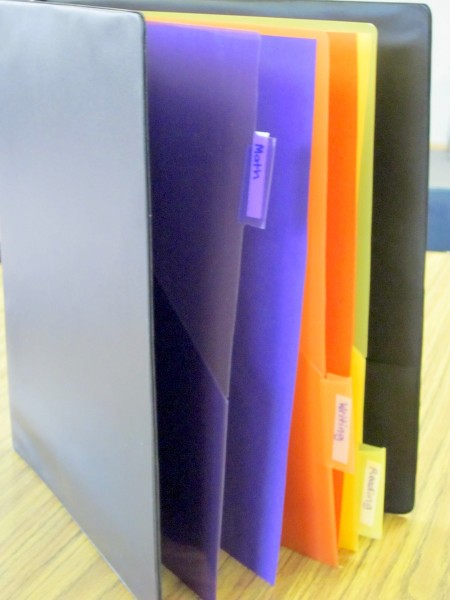
  • one 1-inch binder for each student (if students didn’t bring them in with their other back-to-school supplies, I found them for $.79 each at WalMart)
  • three dividers, one for each of the main subjects you teach (reading, writing, math) — I especially like the pocket dividers as you can use them to store other assessments
  • three pieces of construction paper, cut to size (matching the colors with the dividers keeps it even more manageable!)
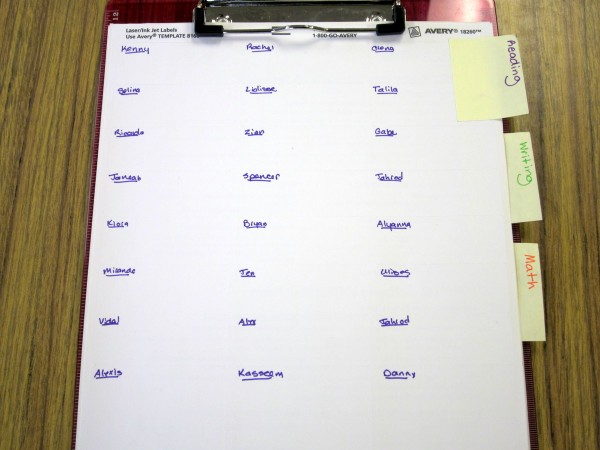
  • mailing labels (I prefer the sheets that have three columns of labels)

How do I put it all together?
Label the dividers and put the corresponding construction paper folder behind them…done!

What do you do with the mailing labels?
The labels are where you will take your monitoring notes.  You will need one sheet of labels for each subject you are monitoring.  Write each student’s name on the labels for each subject (you can even use pen colors that match the construction paper color you’ve designated for each subject).  I then put these label sheets on a clipboard, dividing them with stick on tabs so that they are ready for monitoring.
What are you monitoring for? 
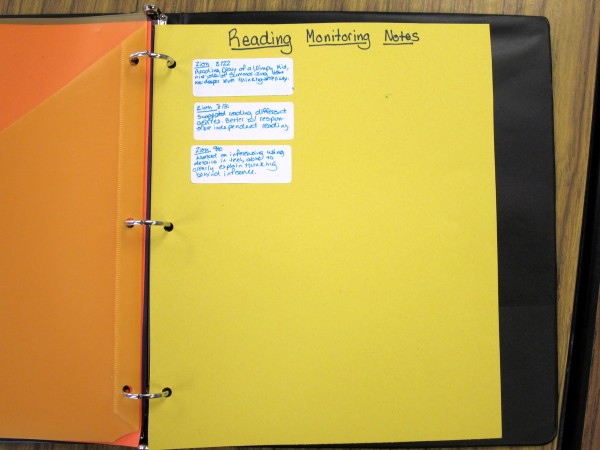
The majority of your monitoring notes should be based on specific look fors tied to learning targets you’ve set for the lesson.  Monitoring in this way helps to focus your attention and guides next steps. Of course, other note worthy observations not connected to the learning target you make while working with students can be recorded too.  As you continue to take notes on students, you can quickly see by looking at your monitoring sheet who you have met with and who you may need to check in with.
As your monitoring notes fill up, place them on the construction paper inside of student binders.  What will result is a growing bank of knowledge about students in each academic area that you can use to track and report progress.

At the end of the day or the week, try to set aside a time to review your monitoring notes and use them to make adjustments to your lessons.   Informed instruction = better instruction!  Take the time to make monitoring student work more manageable for yourself and I’m confident you’ll be happy that you did.

As always, let me know if you have other good ideas!

Kristin