Archive | Teaching Tips RSS feed for this section

Cleaned Up Computer Files

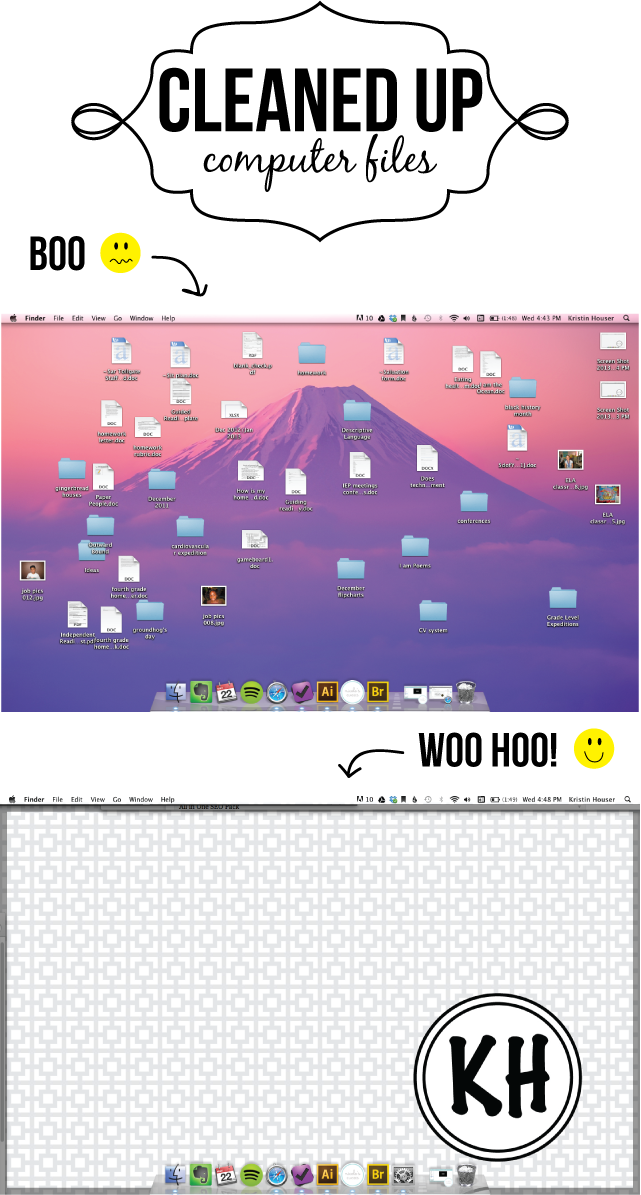
Throughout the school year we accumulate lots and lots of electronic files of all kinds. All of these files are stored somewhere on your computer, but where? When you go to look for an important document does it take you 5 seconds or 5 annoying minutes to find it? Or worse, maybe you can’t find it at all and are forced with having to recreate it or hunt it down elsewhere…argh! A cluttered desktop and unorganized computer files can really slow you down and we coaches/teachers do not have time to waste.

If your docs could also benefit from some tidying, a few hours dedicated to tackling this project might really pay off in the happy and effective coach/teacher factor. Take a look at how I went from “Boo” to “Woo Hoo!”

Cleaned_Up_Files_Before_After_130521

For Customized Desktop Wallpaper of your own, click here!


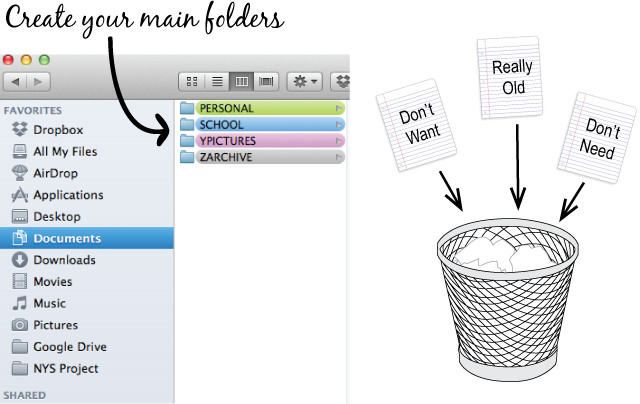
STEP_1

Sort_and_Purge_Visual

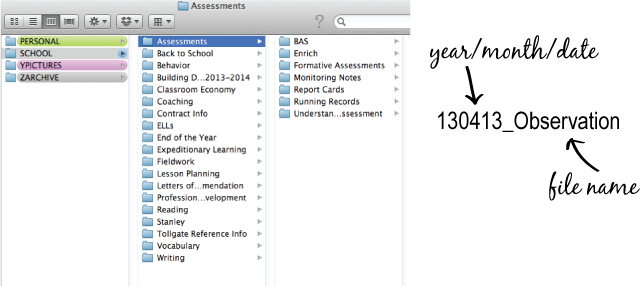
Subfolders_and_Naming_Sign

As you create your subfolders and continue to sort, notice how you’ve been naming your files. If you haven’t been using dates as part of your naming system, you might consider beginning to do so.  Here’s an article that helps explain why.

Subfolders-and-Naming-Visual


Step_3

Here’s the fun part! Now that you’ve done all that sorting and purging, choose an inspiring desktop wallpaper that will help prevent future clutter.

Screen Shot 2013-05-23 at 4.43.23 PM

There are lots of different ways to keep your computer files organized. Any tips or tricks to share?

Thanks for reading,

ms-houser

Tips for Facilitating a School Site Visit

Last week I facilitated my first school site visit.  Typically our school designer leads these visits, but she wasn’t available on this particular day which meant I would be in charge!  Here I share a few tips I learned in making the experience a successful one.

Seek Support

When my principal first asked me to facilitate this visit, I began to work through some planning on my own.  I quickly found out though that I had more questions than I had answers.  I am very lucky because I work with a terrific school designer whose experience extends beyond my own and is always willing to help.  She talked me through some of the pieces to be sure to have in place and provided a few resources to get me going.  If you have someone to go to for some initial support, definitely take advantage of this.

Plan Outcomes/Targets

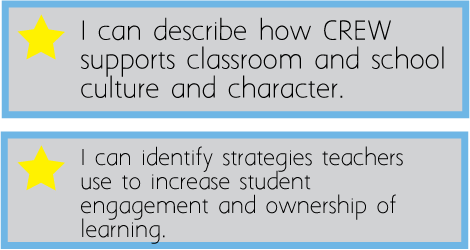
In order to put together a supportive and productive agenda, it’s important to be aware of the needs of visiting teachers and what understandings you hope they walk away with.  In my case, I began by gathering some background information from the principal of the visiting school.  I then crafted two learning targets that I thought would support teachers and provide a focus for the visit.  I shared these targets with the principal to ensure I was on the right track and moved on from there.

targets

Create an Agenda

Once you have clear targets to guide your work, you are ready to create an agenda consisting of work and learning experiences that will support these targets.  Before heading straight into presenting targets and logistics for the day, begin with an interesting introduction/greeting to help break the ice a bit.

Agenda

Share Observation Norms

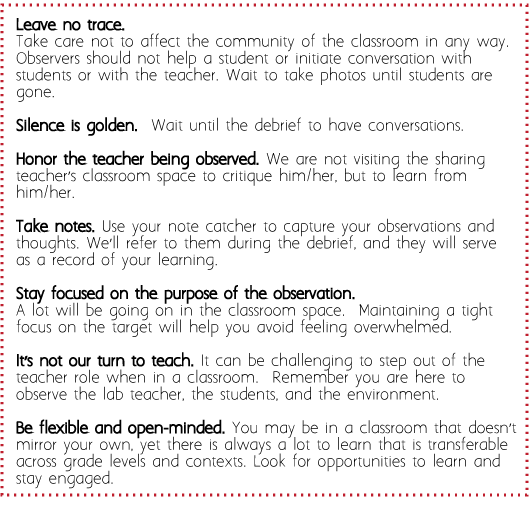
These were shared with teachers just to ensure that the classroom visits were as respectful and productive as possible.

agenda-4

Just Keep Swimming

I arrived at school bright and early the morning of the visit.  When I walked into the building I was greeted by…dark and cold.  That’s right. No power, no heat, and no one to problem solve with.  This definitely was not a part of the day that I had planned for.  After my initial panic (!!!!) I pulled myself together, put a smile on my face, and just kept swimming.  The day got even crazier from there with an early dismissal and a fire on the roof (no kidding!), but I stuck it through and managed to wrap-up a successful site visit.   I must say though that I wouldn’t have been able to do this without very understanding visiting teachers and super supportive hosting teachers…thanks everyone!

I learned a few things from this experience.  First, always be as planned and prepared as possible.  I made sure that I had our materials and space for the site visit arranged well in advance of the visit date.  If I had waited until that morning to do this, I really would have been up a creek.  Second, even when you are well planned and prepared, you can’t plan for everything.  When unplanned roadblocks do present themselves in an untimely fashion, just keep swimming.  Our first grade teacher reminded me of this as we were sitting and observing her lesson in the dark and cold.  She told her students to have a strong mind and ignore the roadblock because there was still work and learning to be done.  Her little guys proceeded to present themselves as excellent models of what perseverance looks like in action.

Nemo

Follow-Up

After visitors have left and you’ve had a chance to take a breath, don’t assume that your work is done.  First, I sent a follow-up email to the principal of the visiting school with our captured notes from the debrief of the visit attached.  Then I wrote each hosting teacher a handwritten note thanking them for their time.  Sometimes a personal note like this can feel more meaningful to receive than an email.  Lastly, I followed up on the commitments I made to visiting teachers.  They asked that I send a few example daily schedules along with information regarding documentation panels.  I made sure to do this as soon as I could.

If you have any other tips or “just keep swimming” stories from school site visits of your own, please share in the comments section below!

Thanks for reading,

ms-houser

Common Core Lesson: Asking Questions

Earlier this week I modeled a reader’s workshop lesson in a Kindergarten classroom tied to the Common Core State Standard RL.K.1:

Target-3

This is a lesson that my coaching colleague, Katie, kindly shared with me as an idea for how to teach this standard in a reader’s workshop. Although the lesson was planned for Kindergarteners, it could easily be adapted for other grade levels by increasing the complexity of the text.

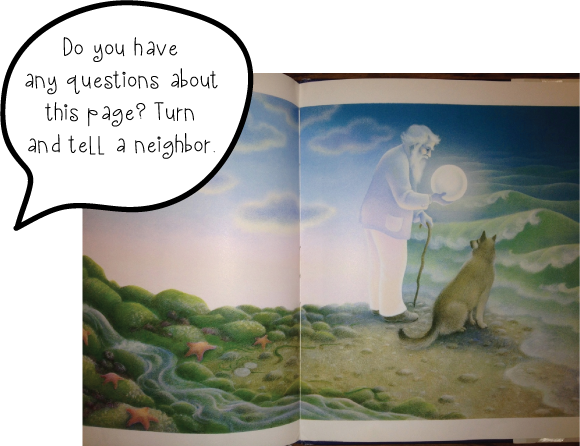
Rather than teaching, asking and answering questions in the same lesson, I planned to first teach students how readers ask questions about books.  The text I selected for this lesson was Grandfather Twilight.

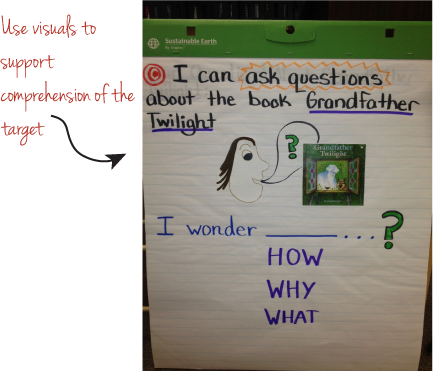
Anchor-Chart-3

Hook/Introduction

The hook or introduction during a reader’s workshop serves several instructional purposes.  It supports engagement, motivation, and a “need to know” for learning.  This is also the time when you can connect to prior learning and introduce the learning target for the lesson.

In the hook for this lesson, I shared with students how excited I was to share one of my favorite books with them.  I then introduced the learning target and the words we would use to help us ask questions.

Mini-Lesson/Think-Aloud

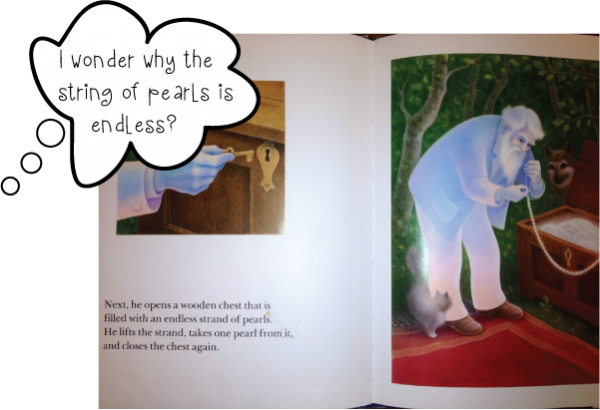
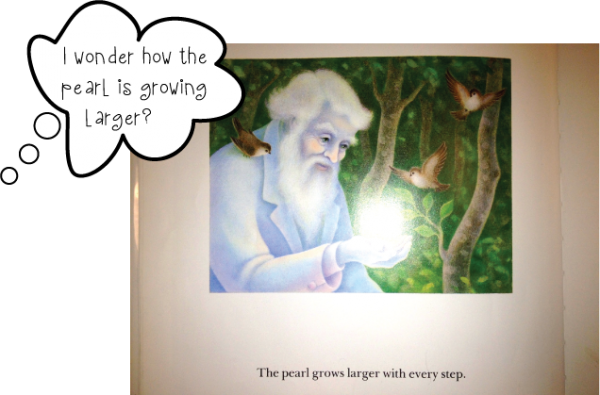
During the mini-lesson I modeled the thinking I wanted students to do as readers.  For this lesson, I read the first few pages aloud and paused twice to model asking questions.

GT-with-Words

pearl-larger

After modeling, I asked students what they saw me do as readers.  I wanted them to notice how I read the words carefully, looked closely at the pictures, and used our posted question words to help me ask questions.

Guided Practice

Guided practice is the component of reader’s workshop in which you create a safe place for students to practice the task before sending them off to work independently.  It is also an opportunity to assess student readiness for independent application and address misconceptions.

To begin guided practice, I shared with students that it was now their turn to practice asking questions.  I read the next few pages on the visualizer and asked students to follow along with their eyes.  Allowing students to better see the text helps support fluency.

GT-Question

Independent Practice

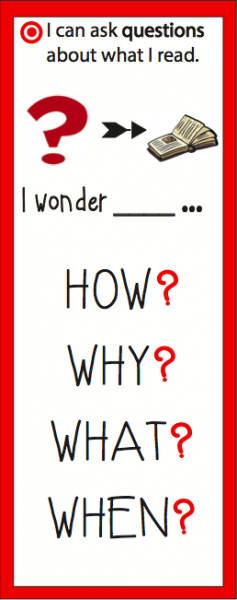
To support students with independently applying the target, I made them bookmarks.

Screen Shot 2013-04-03 at 4.52.38 PM

Click Here to Download

As students were reading, the classroom teacher and I conferred with students to see how they were applying the target to their own reading-level appropriate books.  I was able to make some observations during this time that I followed up on during the debrief.

Share/Debrief

After students have had time to work on applying the learning target independently, it’s important to honor their efforts with a brief share.  For this lesson, you might ask students to share one question they had about a book they read with a neighbor.  After students have had a chance to share, make a connection between the specific learning target for the lesson and the larger context.  You might ask students, “Why do you think it’s important we practice asking questions as readers?”

Continue to work on this standard using a variety of literature and make appropriate adjustments based on the needs of your kids.

A special thanks to Katie Shenk for providing the foundation for this lesson.

Thanks for reading!

ms-houser

Book Review: “How Children Succeed: Grit, Curiosity, and the Hidden Power of Character”

Screen Shot 2013-03-08 at 6.42.12 AM

Last week I went to Baltimore to learn from and alongside other educators in the Expeditionary Learning Network.  The keynote speaker for the conference was Paul Tough, the author of “How Children Succeed:  Grit, Curiosity, and the Hidden Power of Character.”  Tough’s book has become quite popular among those involved or interested in K-12 education.   I finished reading it on the plane ride back to Denver and thought I would provide a quick review.

Throughout the book Tough describes how character supports academic achievement and overall success in life.  Among these skills are persistence, self-control, grit, and self-confidence.

I enjoyed how Tough shares his ideas through a series of different stories involving teachers and students he got to know while writing the book, most notably Kewauna Lerma’s story, a Chicago teenager.  In Kewauna’s story, Tough explains how the development of important noncognitive or character skills (conscientiousness, volition, ability to delay immediate gratification) can help even the most struggling students turn things around for the better.

This book was an enjoyable read that got me thinking about how we can better teach and develop important character strengths such as those Tough outlines in his book.

If you have read this book, what did you think?  I’d love to hear your thoughts.

This is one of the great books for educators that I have read.  Take a look at some of my other favorite top teaching books.

Thanks for reading,

ms-houser

Organizing for Professional Learning

I have just arrived in Baltimore for the Expeditionary Learning National Conference.  I can’t wait!  During this three-day conference I’ll be participating in a mix of interactive master classes and a variety of structured discussion groups.

To ensure I maximized this professional learning experience, I did some essential pre-planning and organizing.

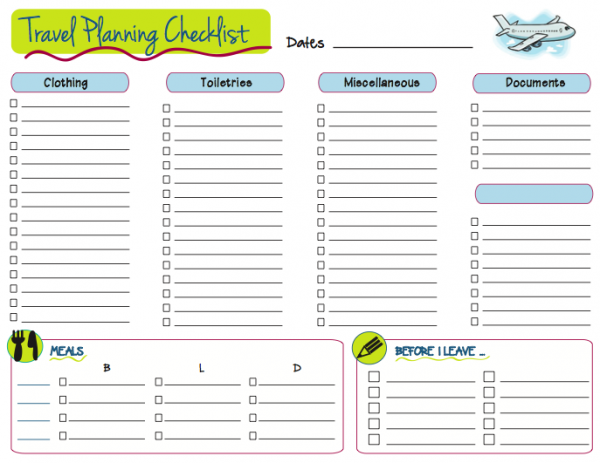
Before leaving I made sure my mind was free and clear of any mental clutter.  I whipped up a travel planning printable to help me with this.  Now I won’t have to worry about whether I forgot to pack anything or if any loose ends were left untied at school.  Ahhh…

Screen Shot 2013-02-27 at 11.27.09 AM

Click Here to Download

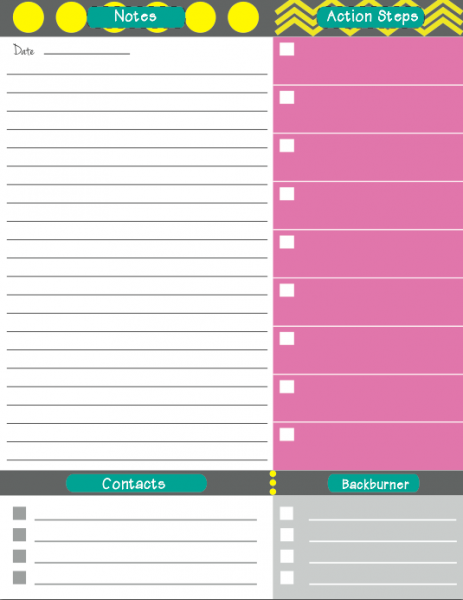
During the conference, there is going to be so much great information to record.  My notes won’t mean much though unless they are aligned to specific next actions…now that I know this, what does this mean for me?  What can I share with others?  To support me with this, I created a note catcher for the conference.

Screen Shot 2013-02-28 at 5.04.19 AM

Thanks to Behance Products for inspiring this note catcher.

Click Here to Download

You’ll see at the bottom I included a “Contacts” and “Backburner” session.  At the conference I may meet other educators with great ideas who I want to connect with in the future and I want to make sure I get their contact information.  Additionally, thoughts may come up that aren’t necessarily next actions, but may lead to important next steps in the future.  I’ll plan to record this thinking under “Backburner.”

I hope you can also use these printables to help you plan and prepare for professional learning experiences of your own now or in the future!

Thanks for reading,

ms-houser

8 Strategies for Scaffolding Instruction

With the advent of the common-core standards, our thinking about how to support second language learners has become super important. While opting for services like Translation Services London is an excellent way to get one’s work translated, one also has to know more than one language fluently. Our current focus for supportive instruction may be on grammar and vocabulary or we may be modifying the texts English Language Learners (ELLs) work with during a lesson so they’re at a more “appropriate level.”  Under the standards developed through the Common Core State Standards Initiative, however, instruction for ELLs will have to move beyond modifying lesson materials and teaching fundamental components of language.  Educators now have to ensure that we are teaching ALL kids, no matter their language background or where they are academically, how to grapple with complex, grade level information and texts.

So how do we do this?  Well, a piece of it is thinking more carefully about what supports or scaffolds we can add to our instruction.

Through my experience working as a classroom teacher in an urban school with a large number of second language learners, along with two years experience as our school’s English Language Acquisition Teacher Leader, I have identified eight “scaffolding strategies” that I believe should always be considered when planning instruction for second language learners:
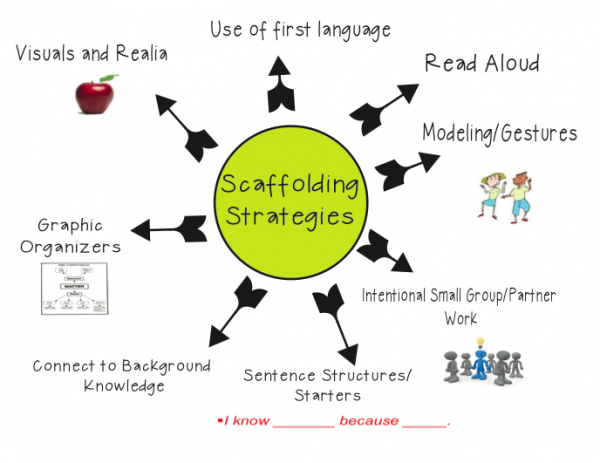
Screen Shot 2013-02-20 at 2.53.34 PM

Click Here for the 8 Scaffolding Strategies Printable

When I set out to plan a lesson, I always consider how to use any or all of these eight scaffolding strategies to support comprehension and language development.

1. Visuals and Realia

Whenever I can I include realia, or real life, tangible objects in my lessons.  I have found that realia is super supportive for vocabulary development and engagement.  For example, I recently selected a text about coral reefs for a close read lesson.  I wasn’t sure students would know what “coral” was, so I brought in an actual piece of coral to pass around.  If you don’t have realia available for a lesson, use visuals or images!  You can frequently find me on Google images, looking for that just right visual to support my lesson.

2. Modeling/Gestures

If you were to observe me teaching a lesson, you would likely see me making all kinds of funny looking gestures.  Funny looking maybe, but supportive definitely!  When all you do is talk/lecture to students who don’t speak English as their first language, most of what you say will probably fly right over their head.  Modeling and gestures help bring your words to life.  Couple this with the use of supportive visuals and say hello to comprehension!

3. Connect to Background Knowledge

When planning for the “hook” or introduction in a lesson, I consider what background knowledge students might have that I can connect to.  For example, I might show them a picture of something related to our lesson and ask them a question about it.  Connecting previous knowledge/learning to new learning is always a great support for ELLs.

4. Graphic Organizers

Graphic organizers may not be an appropriate scaffold for every lesson, but they are for many!  You can create your own or use one of the many free ones to be found on the www.  Graphic organizers can be used as a tool to help students organize their thinking when responding to a text.  They key is not to make them too complicated or they may end up being exactly the opposite of a useful thinking support.

5. Sentence Structures/Starters

Sentence structures can be a great support for English Language Learners.  I often use them during the close of a lesson in the debrief or share.  You can also slightly differentiate graphic organizers or recording sheets you provide students by adding sentence structures.

6. Read Aloud

Reading a grade level, complex text aloud to students at the start of the lesson can serve three important purposes:  support engagement, support fluency, and give ELLs some access to the text they’ll be working with.  When reading a text aloud to students, it’s important that it is displayed in a way that all students can easily see it.

7. Intentional Small Group/Partner Work

To support students during independent work time, you can consider small group or partner work.  I say “intentional” small group/partner work because it’s important to consider how and why you’re pairing certain students.  Pairing two students just because one is a “high” reader and the other is a less sophisticated reader can quickly backfire if you haven’t considered how their personalities/work styles might pair up.  Additionally, if you have chosen to provide a small group of students with additional support, just be aware of how much support you’re providing…hopefully not too much!  We don’t want to take away all the challenges that a text/lesson presents.

8. Use of First Language

If a student’s first language is available to you, then by all means make use of it as a scaffold.  I’m not implying that the whole lesson should be translated.  However if you can translate important vocabulary words, make connections between concepts presented, or translate specific instructions then go for it!

As a final note, even if you do not work with ELLs, try to keep in mind that good instruction for second language learners is great instruction for all kids!

Thanks for reading, and download your Scaffolding Strategies Printable for free.

ms-houser

Professional Learning Binder

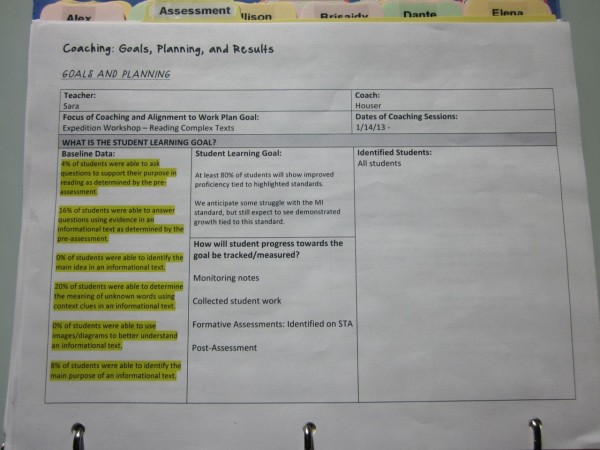
For the past few weeks I’ve been pondering how to support teachers in documenting, organizing, and reflecting on their work and learning done in coaching cycles, particularly the use of evidence and data in supporting student achievement.  I wanted teachers to have a lasting, tangible product to walk away with after the completion of coaching to support their future work.  After a conversation with my principal during which she suggested creating “Professional Learning Binders” with teachers, I thought this could be a great solution to my dilemma!

I envisioned teachers being able to use their Professional Learning Binders in a variety of ways.  First, as a model for how to organize other classroom assessments and data.  Well analyzed and organized data is so important in instruction, but many teachers struggle with the organization piece.  Using the Analyzing Assessments tool, the featured Monitoring Grid and a few labeled dividers can all help with this.  Additionally, teachers can use collected work in the Professional Learning Binders as part of a larger teacher portfolio.  Like other professionals, teachers need evidence of their growth and achievement over time.

Now with all that said, let’s have a look!

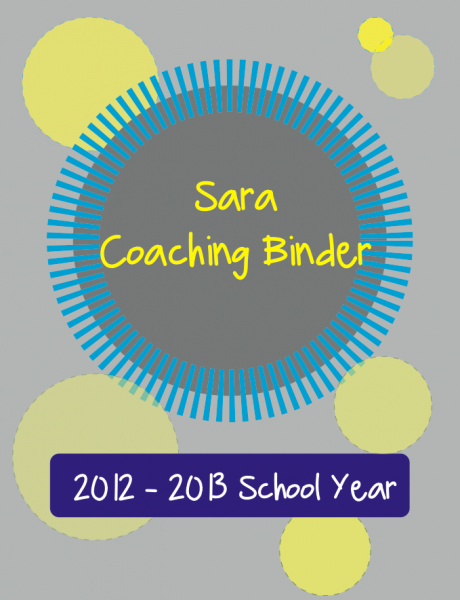
Binder Cover

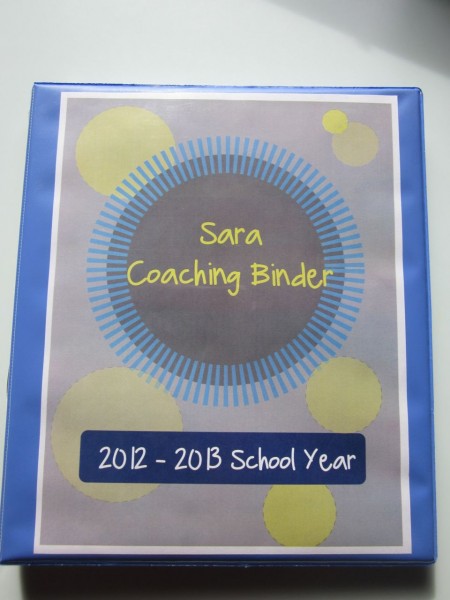
***If you would like a personalized binder cover in the design featured here, send me an email and I will make one for you free of charge!

Front of Binder

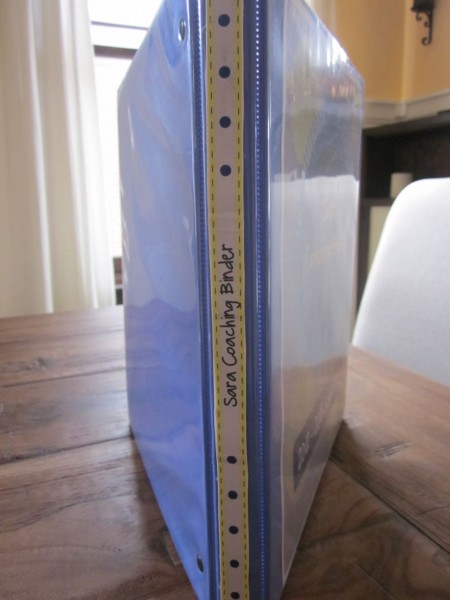
Binder Spine

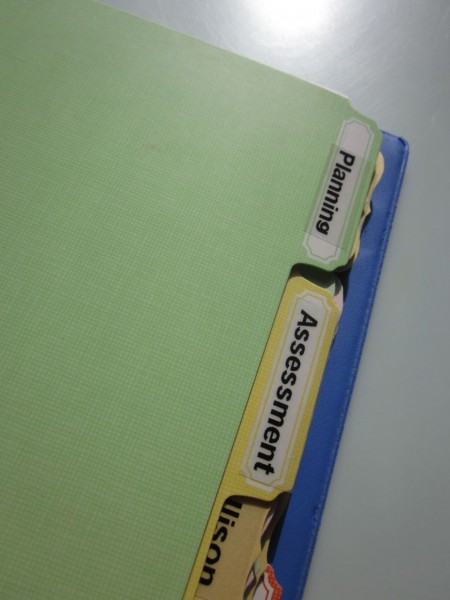
The first two tabs are labeled “Planning” and “Assessment.”  The Planning section includes documents that helped guide our identified coaching goal such as our school Work Plan and Expedition planning documents.   I also included a copy of our “Goals and Planning” page which outlines our student learning goal and if applicable, teacher learning goal.

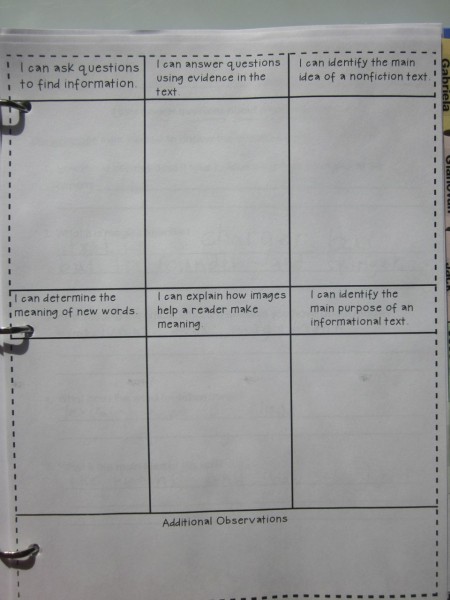
The Assessment section features collected assessments for each student divided by name labels.  There is also a Monitoring Grid included for each student.  You can use mailing labels to collect information on each student tied to identified learning targets.  Then at the end of the week, just peel and stick!

Click to Download a PDF of the Monitoring Grid

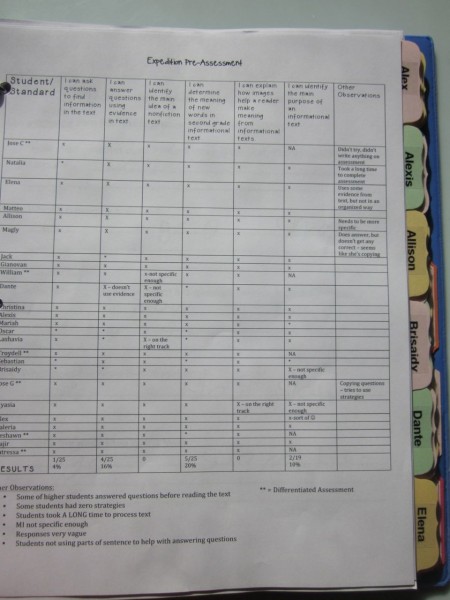
At the front of the assessment section is the Analyzing Assessments tool we used to organize assessment information into a data set to support us with planning.

Click to Download Analyzing Assessments Tool

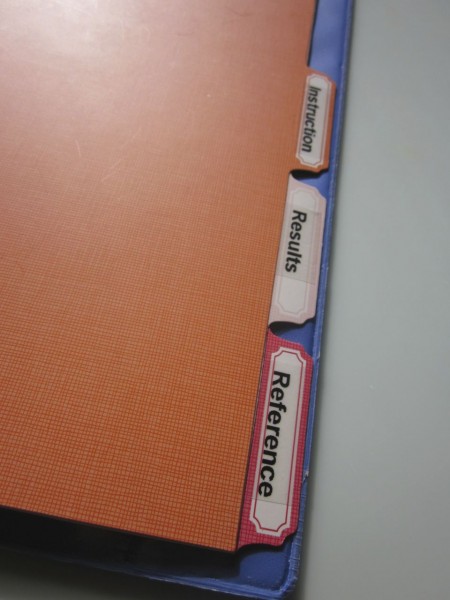
The last three tabs are labeled “Instruction,” “Results,” and “Reference.”  In the Instruction section I plan to collect a few example lessons that I observe and give feedback on during the coaching cycle.  After a post-assessment is given at the completion of the coaching cycle and we have data to show what progress was made, this will be included in the Results section.  Additionally, I plan to ask teachers to write a short reflection on their work done in coaching and their learning as a result which will also be included.  In the Reference section, I have included a few professional articles tied to our coaching goal as an additional resource.

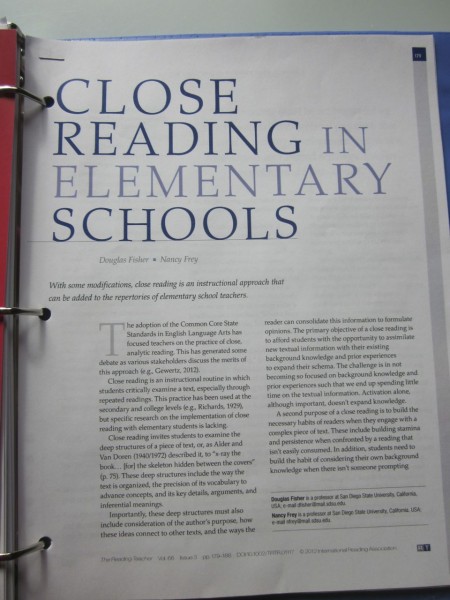
This is a GREAT article by the way if you’ve been learning about Close Reading!  You can download it here.

I hope this post sparked your thinking for how you can support teachers in organizing and reflecting on important information tied to your coaching work.  If you are a teacher, hopefully this post gave you some ideas for how to begin a professional learning binder/portfolio of your own!

Thanks for reading,

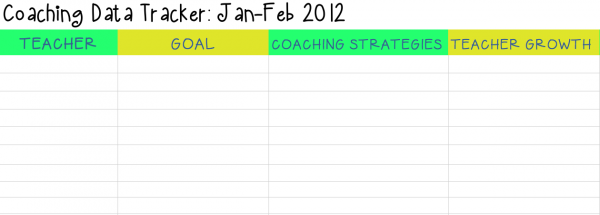
Coaching Data Tracker

One of my New Year’s resolutions as an instructional coach is to keep better track of the work I do with teachers.  I have a variety of “coaching tools” that I use with individual teachers throughout coaching cycles­ to document and organize our work, however nothing that provides a collective big picture.  In comes the “Coaching Data Tracker!”

Click to Download

I think this is an important document to create and maintain for a couple of reasons.  First, it can be passed on to your principal for the purpose of making sure that you’re both “on the same page.”  While I do have coaching check-ins with my principal, I knew she would just love to have a single go-to document that shows the complete coaching story at Tollgate.

Second, creating this Coaching Data Tracker is seriously great for your own reflection!  For example, in the process of creating mine it was rewarding to see the student and teacher growth I contributed to in my coaching cycles.  Additionally, it pushed me to think harder about how to achieve even better results in future coaching.

Reflecting on what we are doing well and how we can improve is an important part of our work as instructional coaches.  I hope this Coaching Data Tracker supports you in the process.

Student Engaged Assessment

Are you looking for a way to motivate your students, get them excited about learning, and support their progress?  Then student-engaged assessment is for you!  If you have never heard of this assessment strategy or don’t know how to make it happen in your classroom don’t worry, you’re not alone and I can help.

I first learned about student-engaged assessment when our school adopted the Expeditionary Learning model.  Expeditionary Learning embraces this assessment practice in building student ownership of learning and driving achievement.  Even after learning about what student-engaged assessment was, it took me awhile to really get it and begin to put it in place in my own classroom.   When I did, my understandings clicked into place and I never looked at assessment the same way again.

Student-engaged assessment teaches students to continually track, reflect on, and share their progress towards learning targets or goals they have set for themselves.  Using assessment in such a way is motivating and fun for students!  Who’d have thought?

A key piece in the success of student-engaged assessment is maintaining the belief that everyone is capable of high achievement and that learning comes as a result of effort.  This goes for both students and teachers!

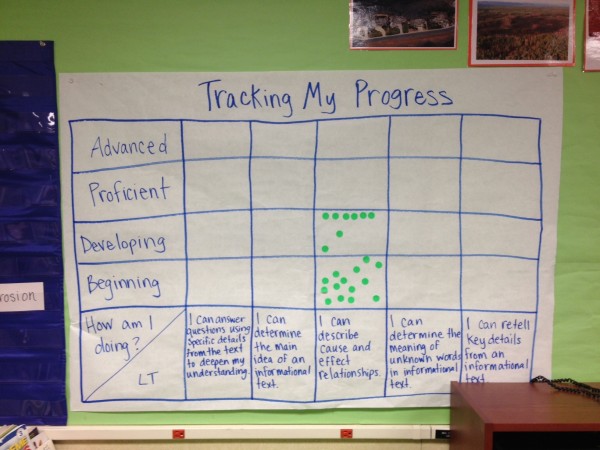
I encourage you to give it a try.  To get you started, I have included a few “Tracking Progress” printables below.

Click to Download

This first document can be used in any subject area.  I used it frequently during our “expeditions” or long-term units of study.  Fill in your long term learning targets or objectives at the bottom and provide a copy for each student.  Then introduce your students to the different proficiency descriptors and teach them what they mean.  One of the most important pieces in teaching students to track their progress is to stress the importance of honesty.  Students are often hesitant to assess themselves as “Beginning”, but let them know that this is totally okay!  When they’re clear about where they are, where they need to go, and how they’re going to get there they will build the confidence and motivation to work their way up to “Proficient” or “Advanced.”

You can ask students to track their progress against a target being worked on once or twice a week.  Students can mark a dot to show where they think they are and record the date alongside it so that they can see  their growth over time.

As you work through your unit, help students analyze their progress charts and why they are or are not making growth.

In addition to the individual tracking progress sheets, you can create a whole class tracking progress chart.  These are really fun and supportive because you can see where everyone is in relation to the targets.  Student’s competitive instinct tends to kick in and they enjoy putting forth a bit more effort to ensure they don’t fall behind their peers.

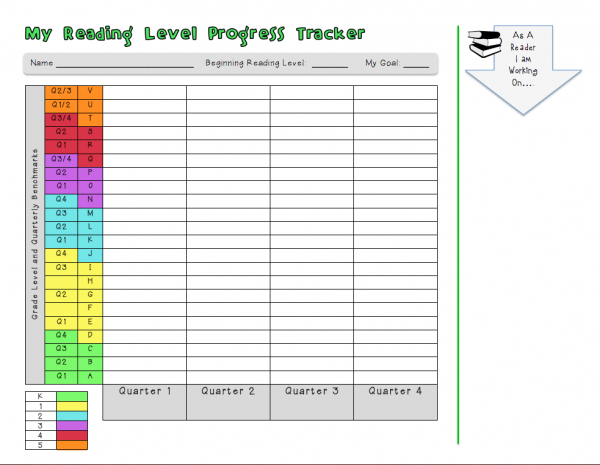
Click to Download

This second document was created specifically to help students track their progress as readers.  Both a fourth and fifth grade teacher I have been working with are using this form with their students and tell me that their kids really dig it.  They now clearly know where they stand, what level they’re working towards, and the specific goals to focus on to help them get there (you can record these goals with students in the section on the right of the document).  This progress tracker can be adjusted to better reflect the reading levels appropriate for your grade level.  Another idea is to leave it as is and include it in end of the year information to be passed up to the student’s next year teacher.  Students can then continue tracking their progress as readers in their new grade level.

Developing the skills of data collection, inquiry, and analysis in achieving goals is a great skill to teach students in the elementary grades.  It will surely set them up for success in the future.

Thanks for reading,

Running Records: Why We Should Be Doing Them

I’ve just started a new coaching cycle with a Kindergarten teacher who is interested in building his understandings of guided reading.  We’ve planned to work with a group of A/B level readers and will be using running records throughout the next six weeks to ensure that our work is supporting students progress as readers.

During my first few years in the classroom I rarely, if ever, gave running records outside of the required district reading assessments.  With everything else I was trying to keep up with, these just seemed like one more thing “to do.”  However, now after having done countless running records, I can confidently say that they provide reliable, relevant data.

Running records are an assessment given to guide teaching, assess text difficulty, and capture progress.  The procedure is simple and straightforward.  When analyzing what is recorded, you’re really challenged to think with greater clarity about the progress of your beginning or struggling readers.  As a result, you adjust your instruction as needed and then guess what…your readers get moving!  Running records make sense and are well worth your time.

To support my coachee with giving and analyzing these assessments, I created a running record form and progress tracker to use alongside of it.  The running record form is user friendly with a space on the bottom for recording notes on student’s comprehension of a text.  You can either type your notes directly into the document or record as you go on a blank form.  The progress tracker form will help you visually capture a student’s progress over a period of time.  The one featured below reflects the K-5 Fountas and Pinnell Levels.  You can easily delete any unnecessary rows for the particular grade level you are working with.  I have also included an example of what a completed progress tracker form might look like.

Download Running Record Form Here

Download Progress Tracker Here

If you’d like to know about running records in more detail, Marie Clay’s book “Running Records for Classroom Teachers” is a great resource.

I’m also happy to answer any questions.  Just send them my way!